Govern sensitive database data
Use NineData Sensitive Data Protection to discover sensitive columns, apply sensitivity levels, mask protected values, and route access through approval. This helps teams reduce data leakage risk when users query, export, or manage production data.
Applicable Scenarios
Sensitive data governance is useful when you want to:
- Identify columns that contain phone numbers, ID numbers, email addresses, or customer information.
- Mask sensitive values for users who do not have access.
- Assign approvers for different sensitivity levels.
- Audit access to sensitive data across data sources.
How NineData Sensitive Data Protection Works
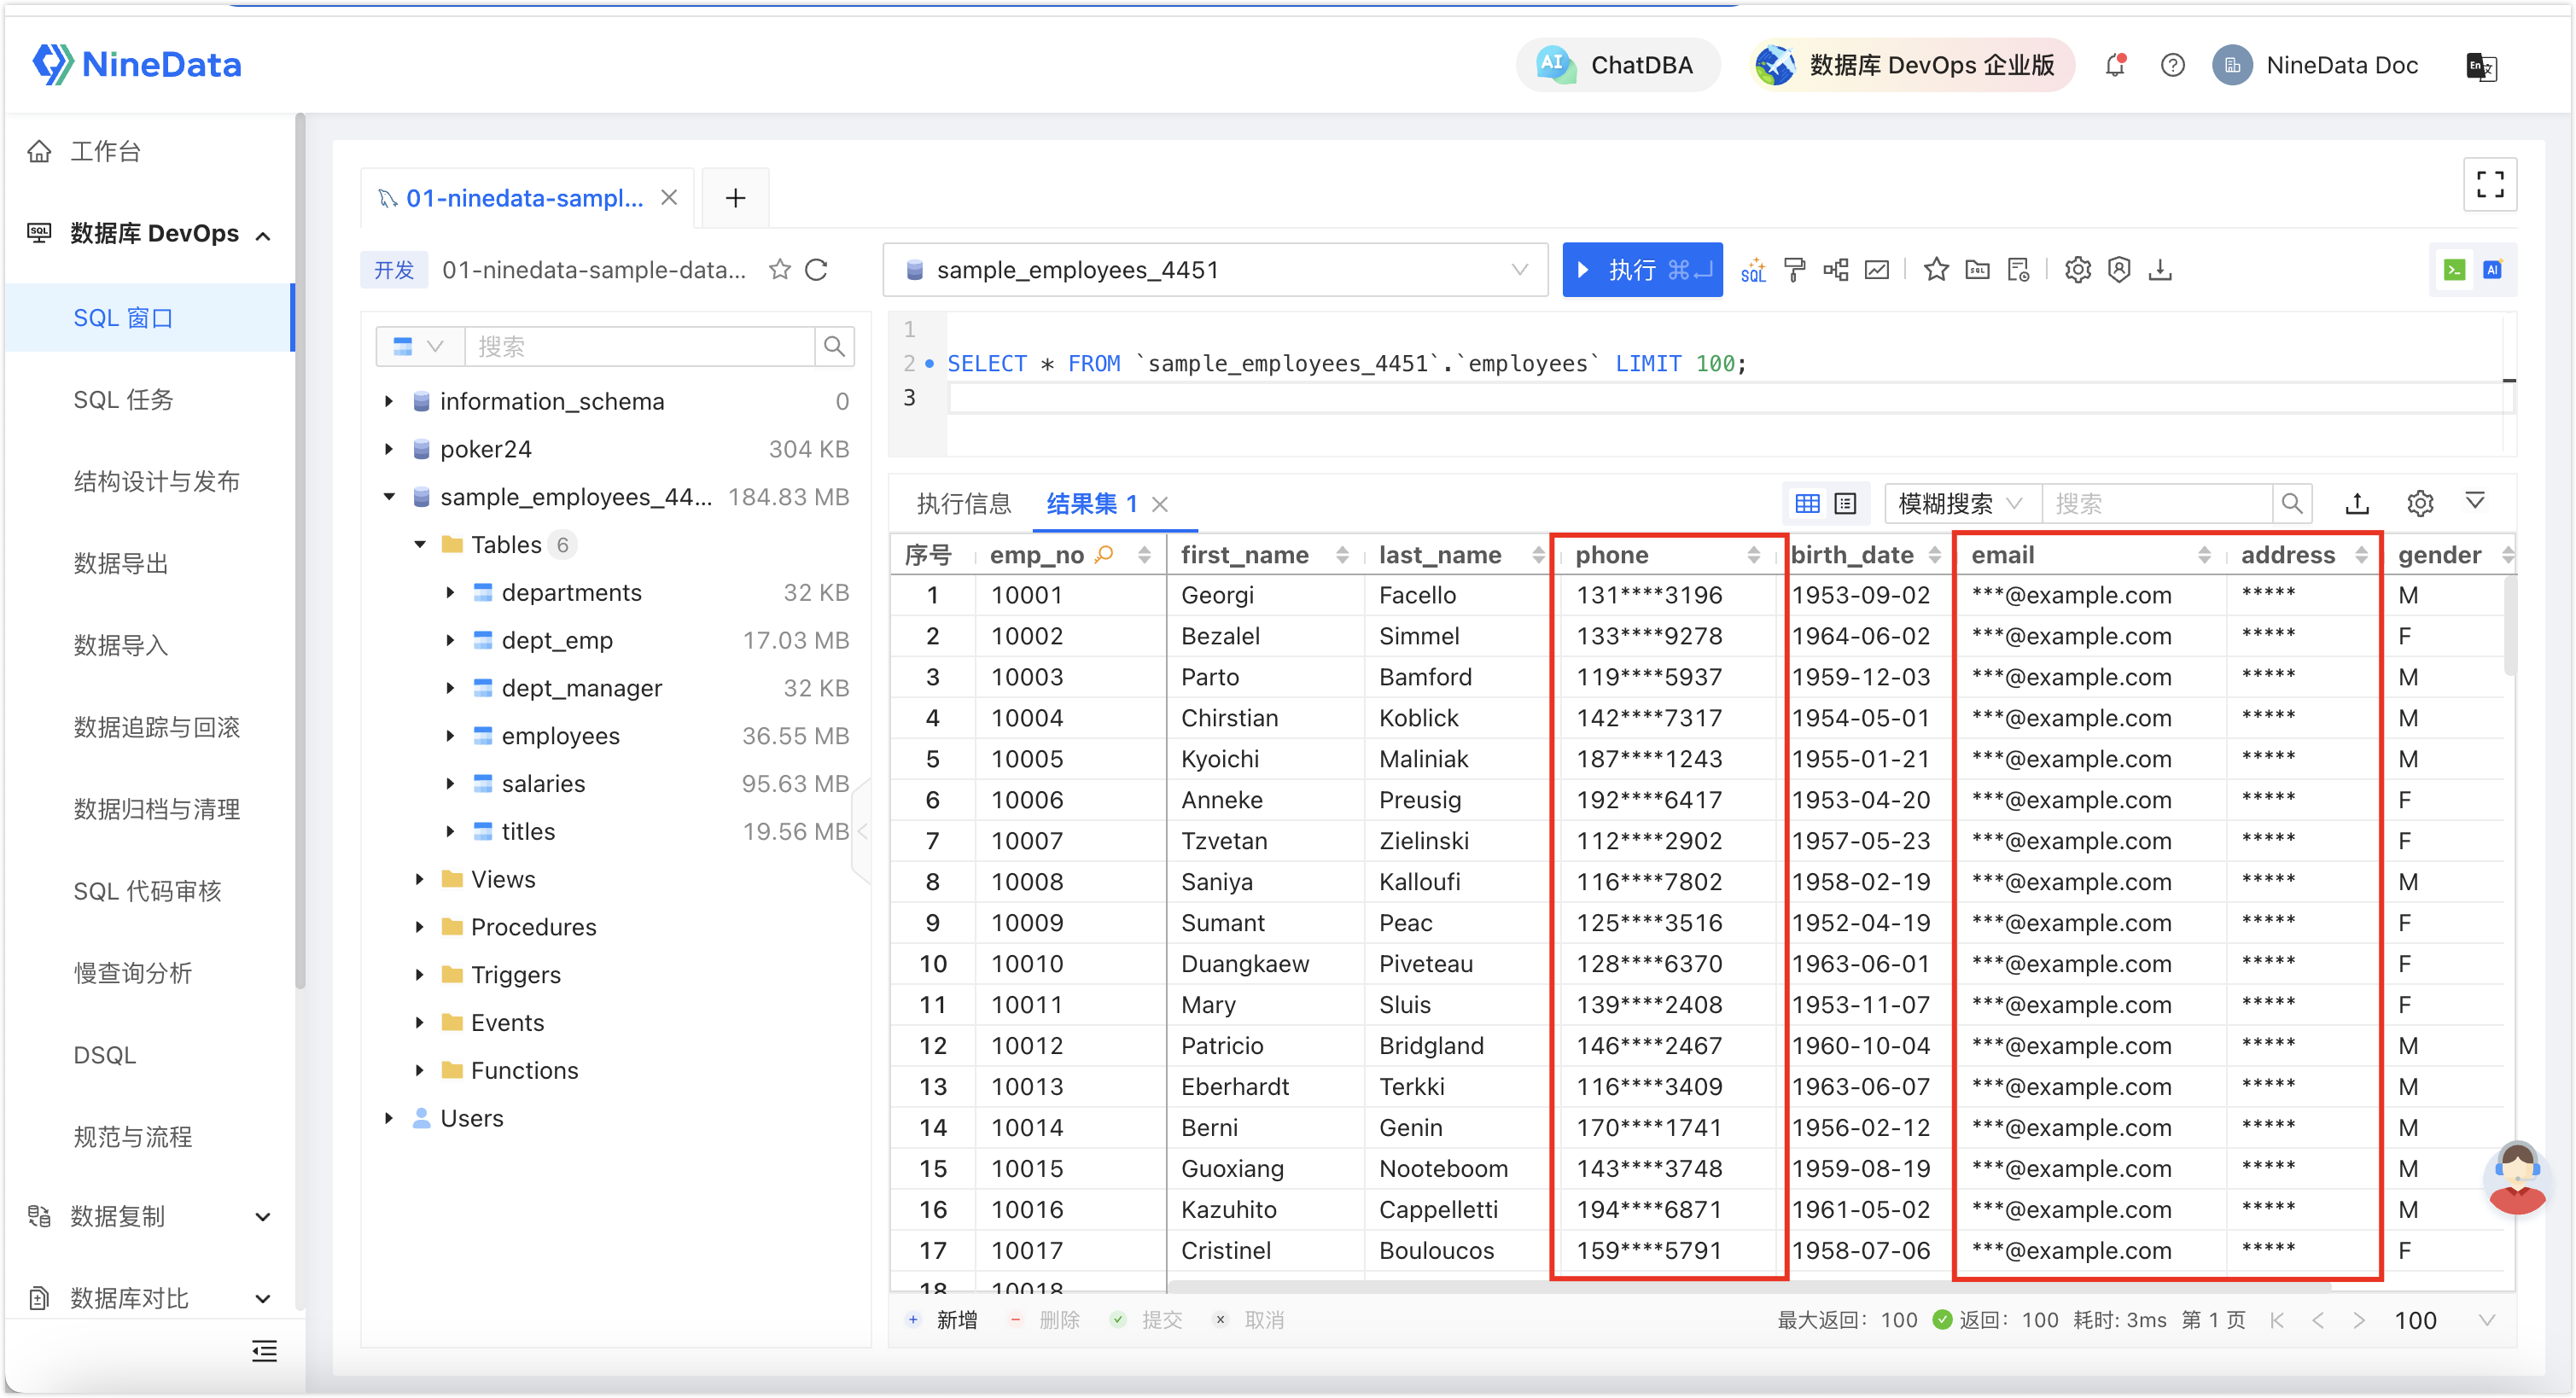
NineData provides six sensitivity levels, S0 through S5, with built-in recognition rules. After sensitive data protection is enabled, NineData can scan database tables, identify sensitive columns, and apply masking for unauthorized users.
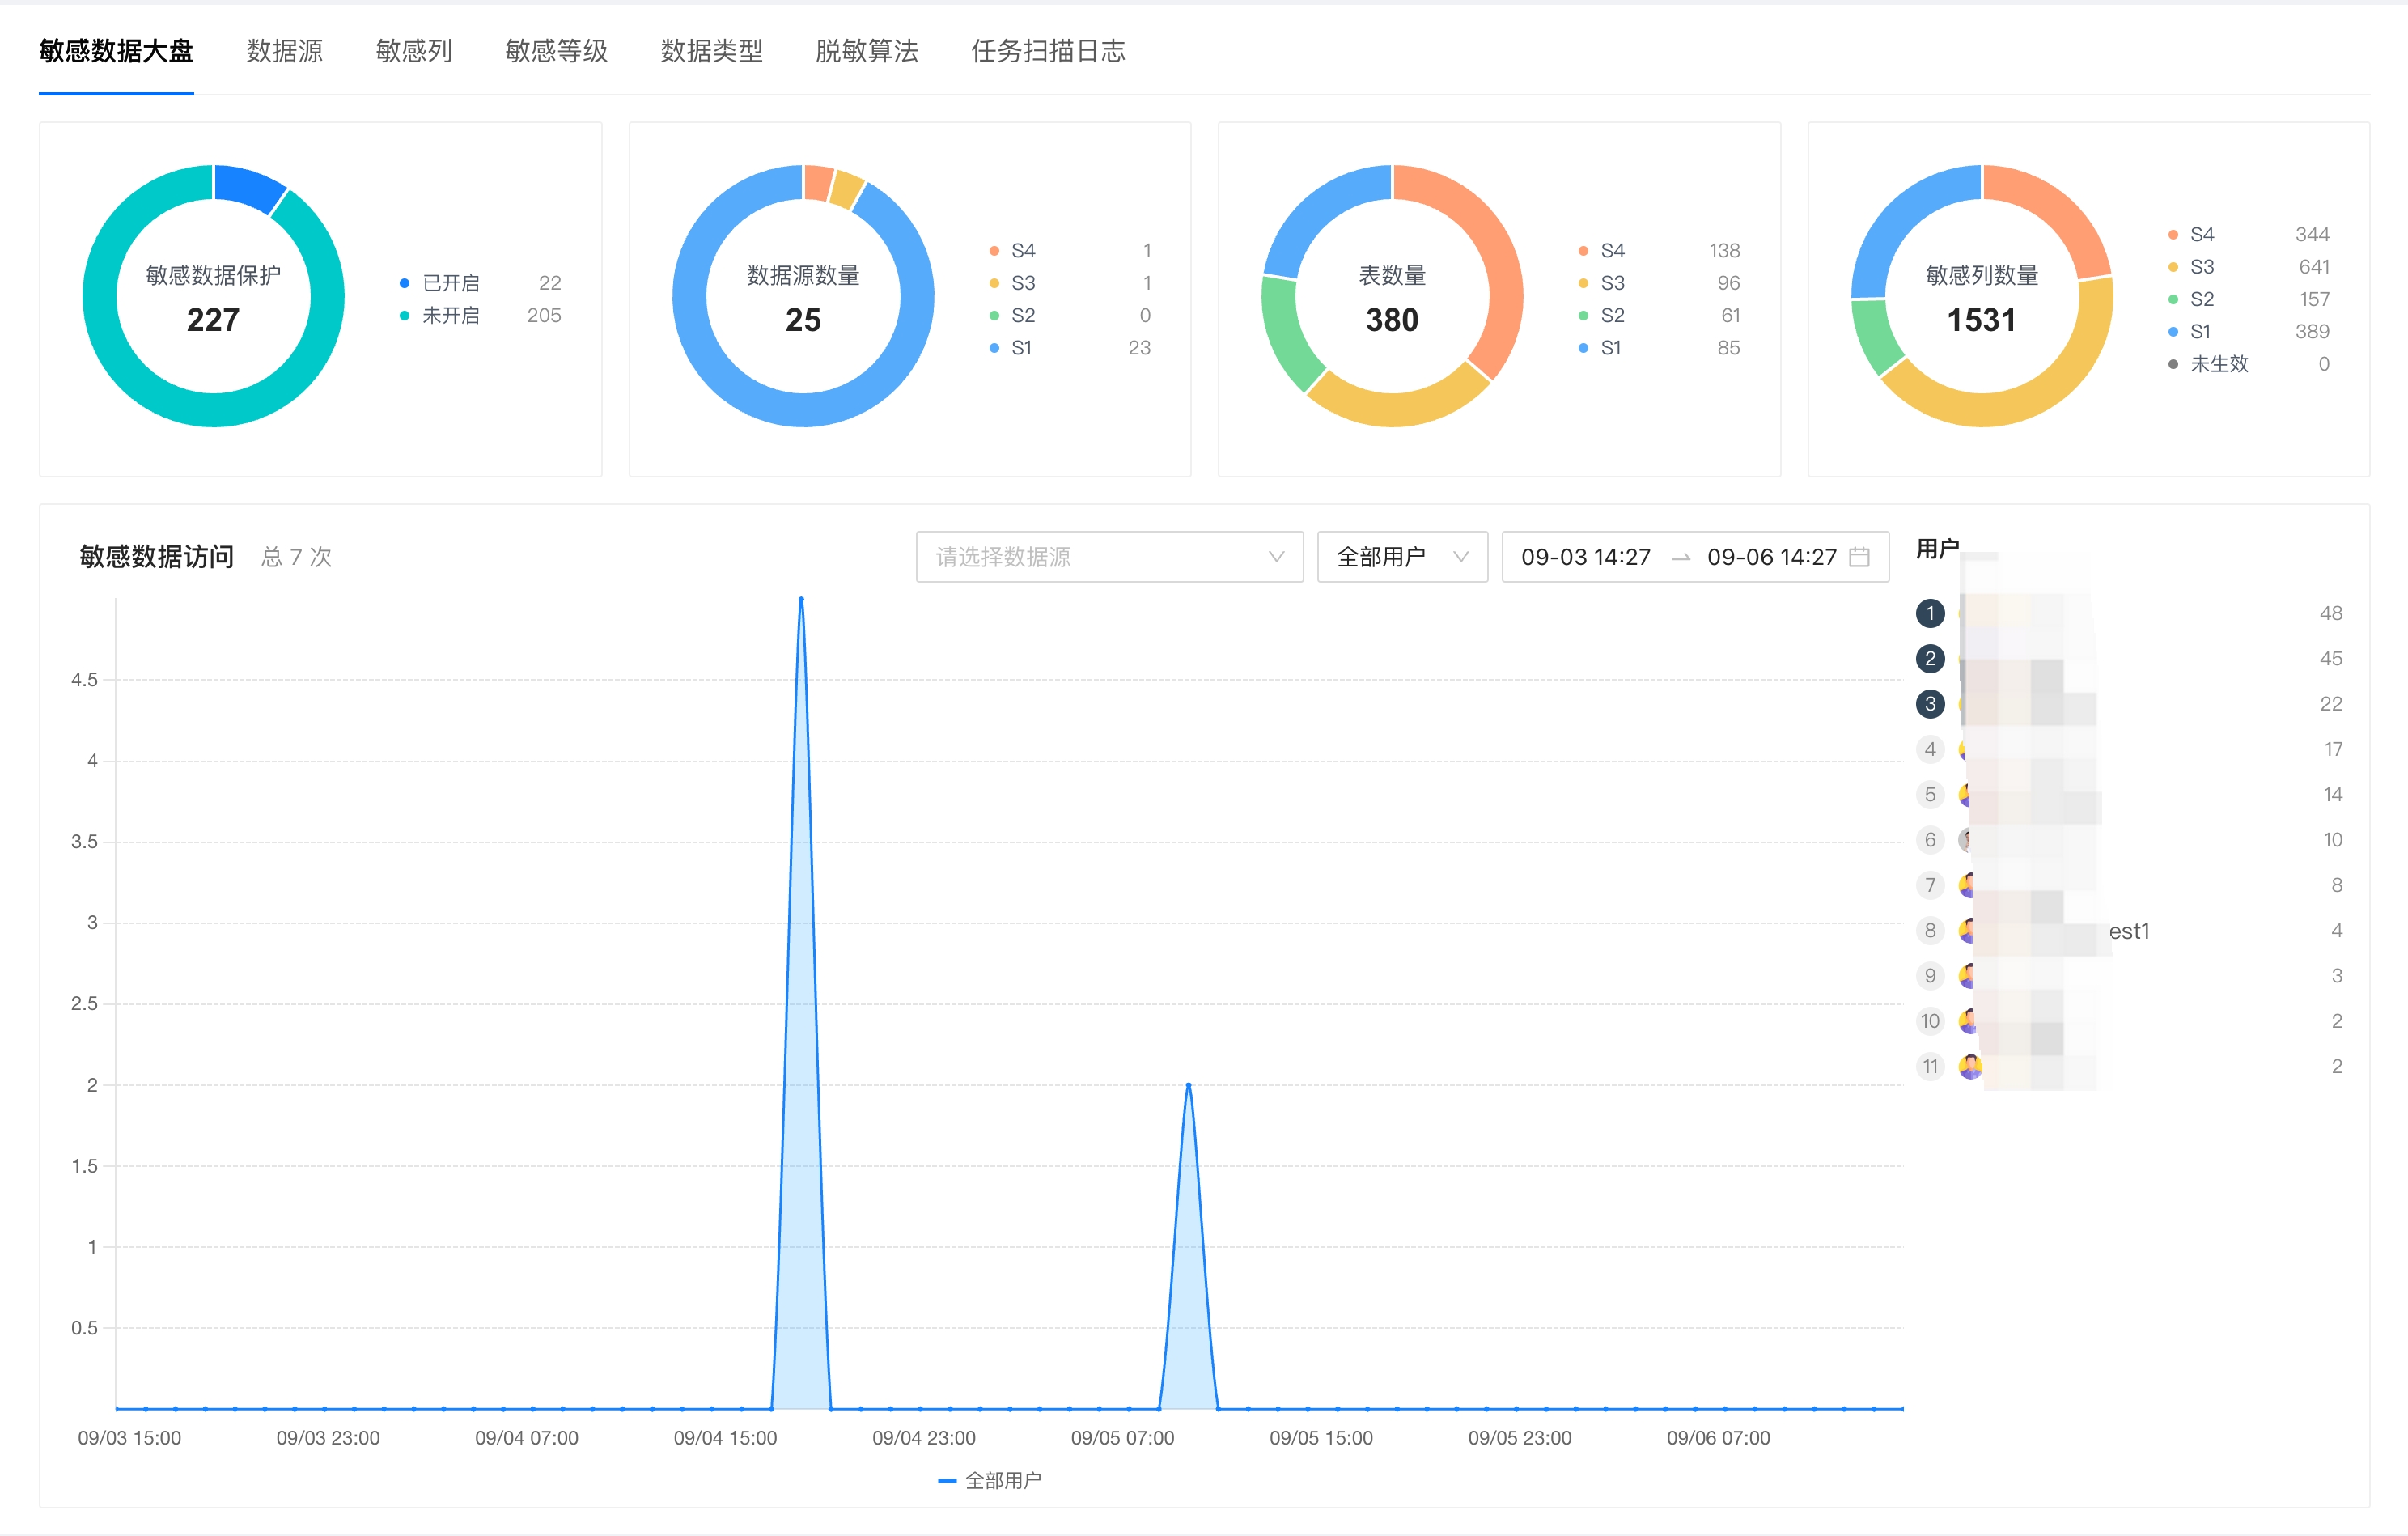
Administrators can also use the Sensitive Data Dashboard to review sensitive data coverage across the organization, including enabled data sources, sensitivity levels, protected tables, sensitive columns, and sensitive data access counts.
Before you begin
Before you configure sensitive data protection, make sure that:
- The target data source has been added to NineData.
- You have administrator permissions for the Sensitive Data module.
- The organization has defined who should approve access for each sensitivity level.
- Users access the database through NineData so masking and audit controls can take effect.
Configure Sensitive Data Protection
1. Scan Sensitive Columns

Open the Sensitive Data Protection switch for the target data source. In the Operation column, select Scan Settings, then select OK to start the scan.
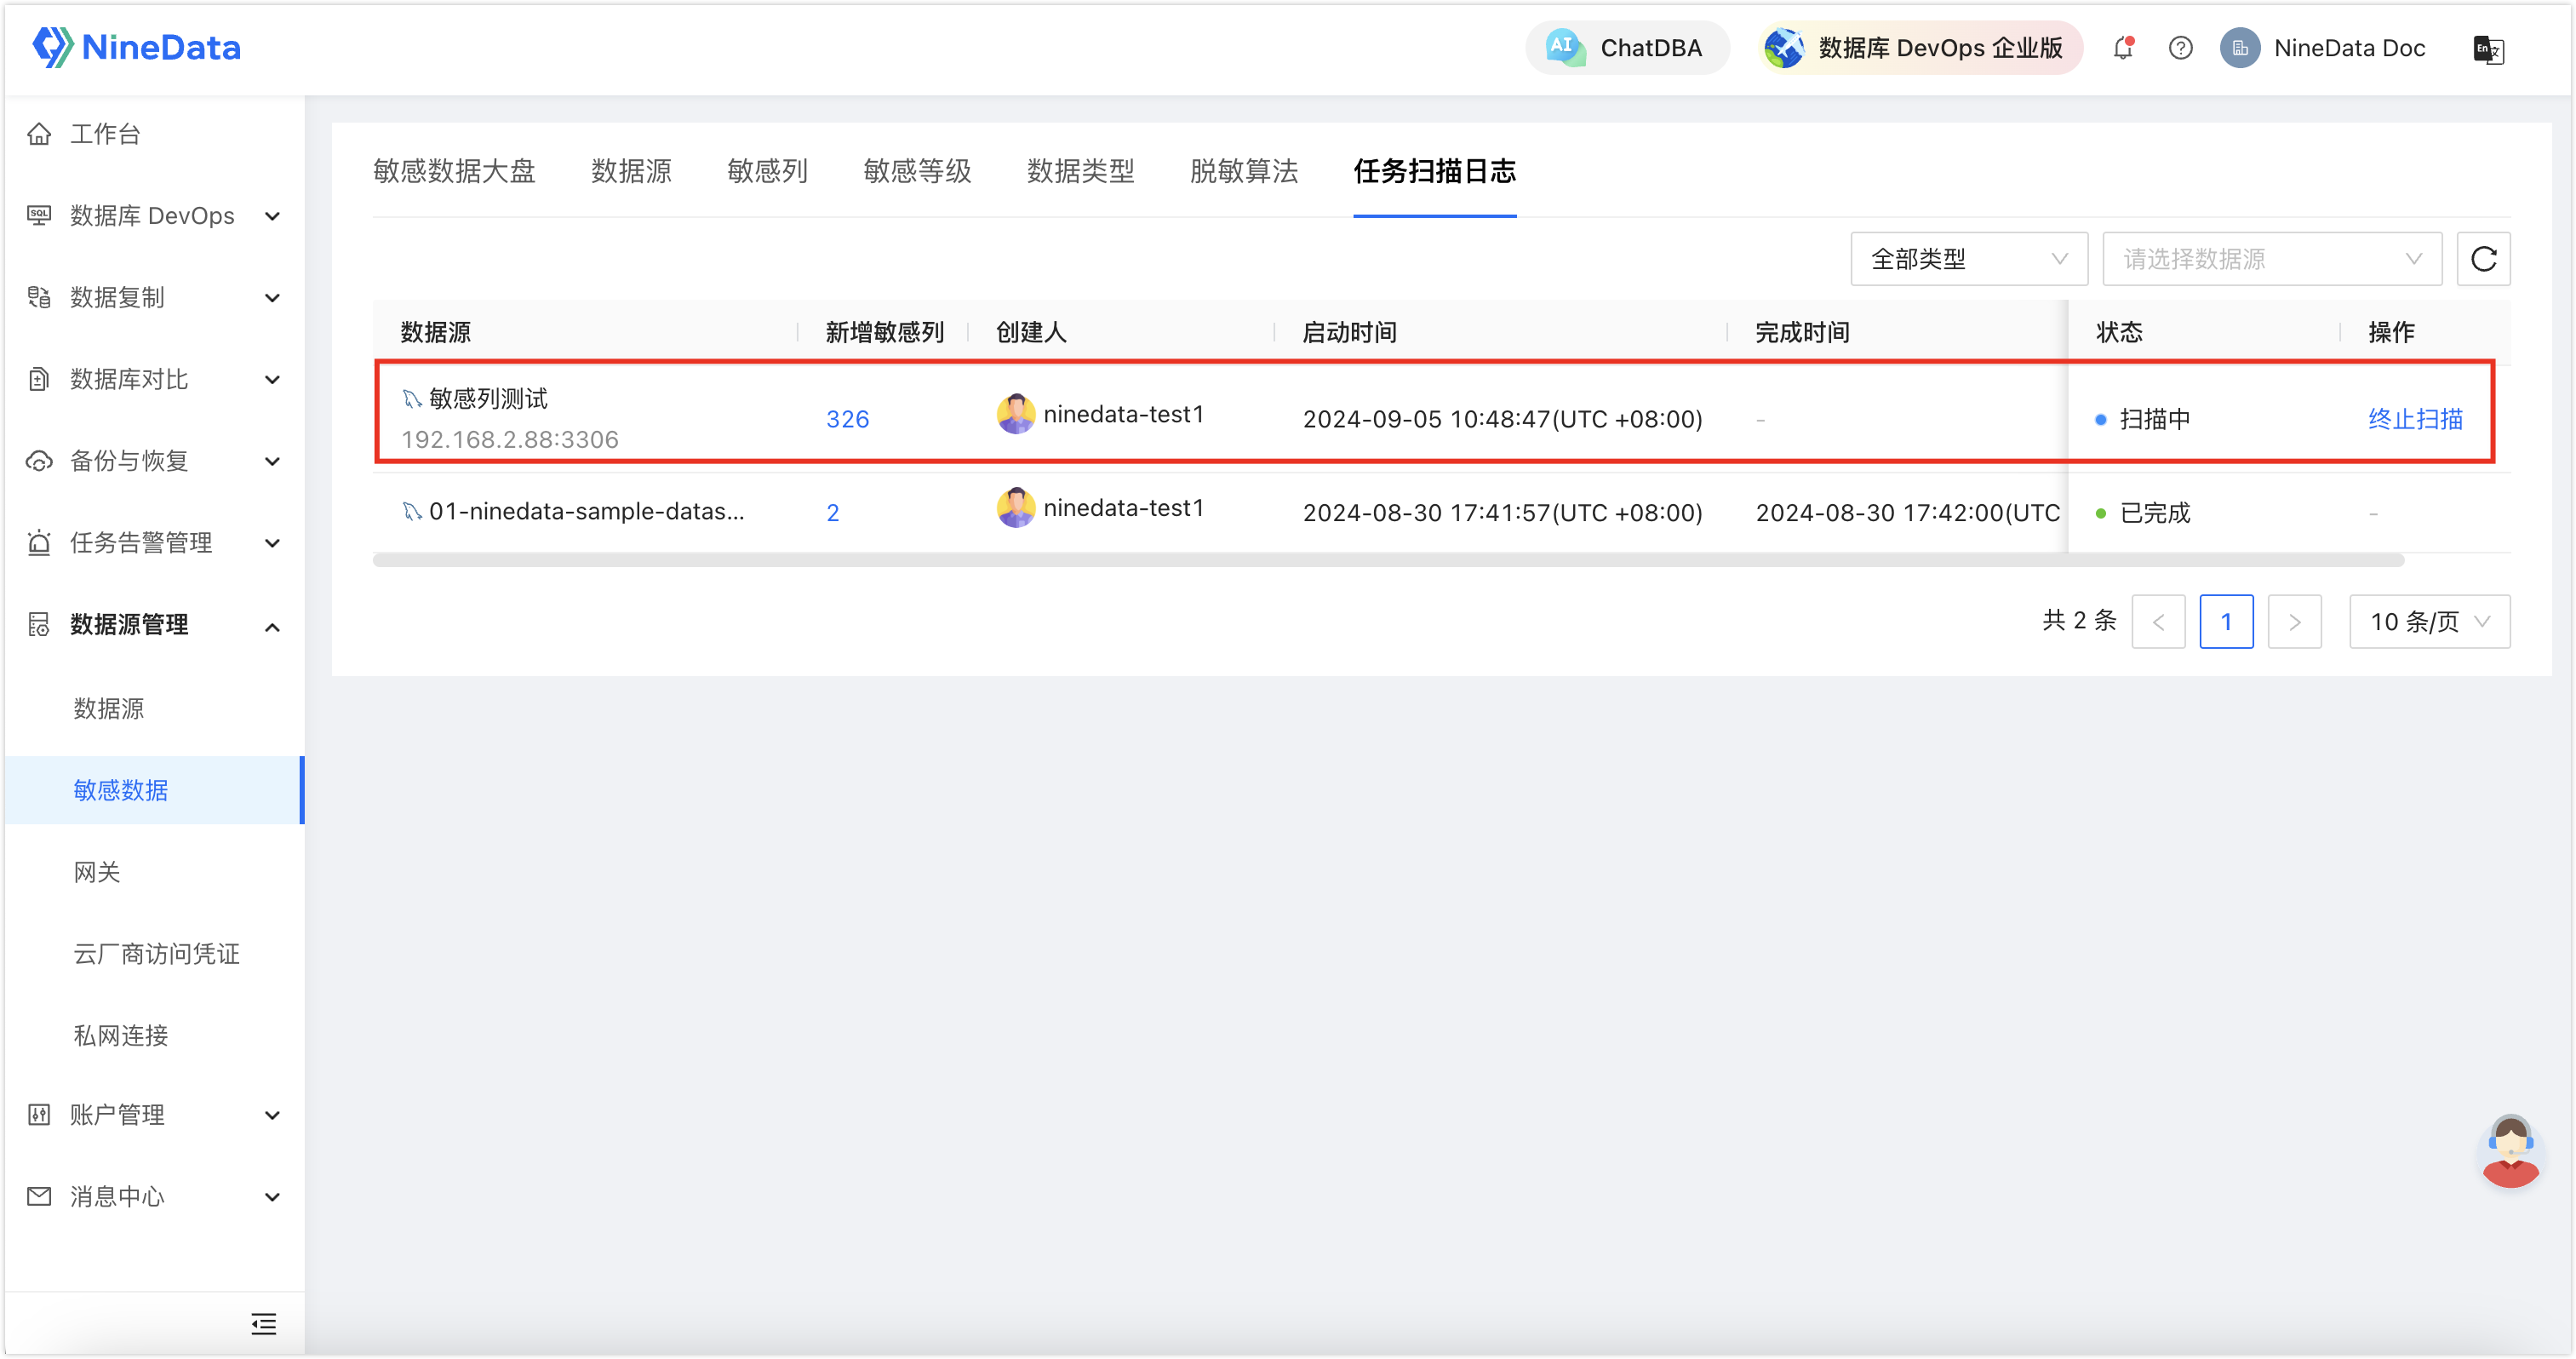
If the table contains sensitive data, NineData adds the detected sensitive columns after the scan finishes. For larger tables, the scan may take a few minutes. Review the scan status in Task Scan Log.
2. Review Sensitive Columns
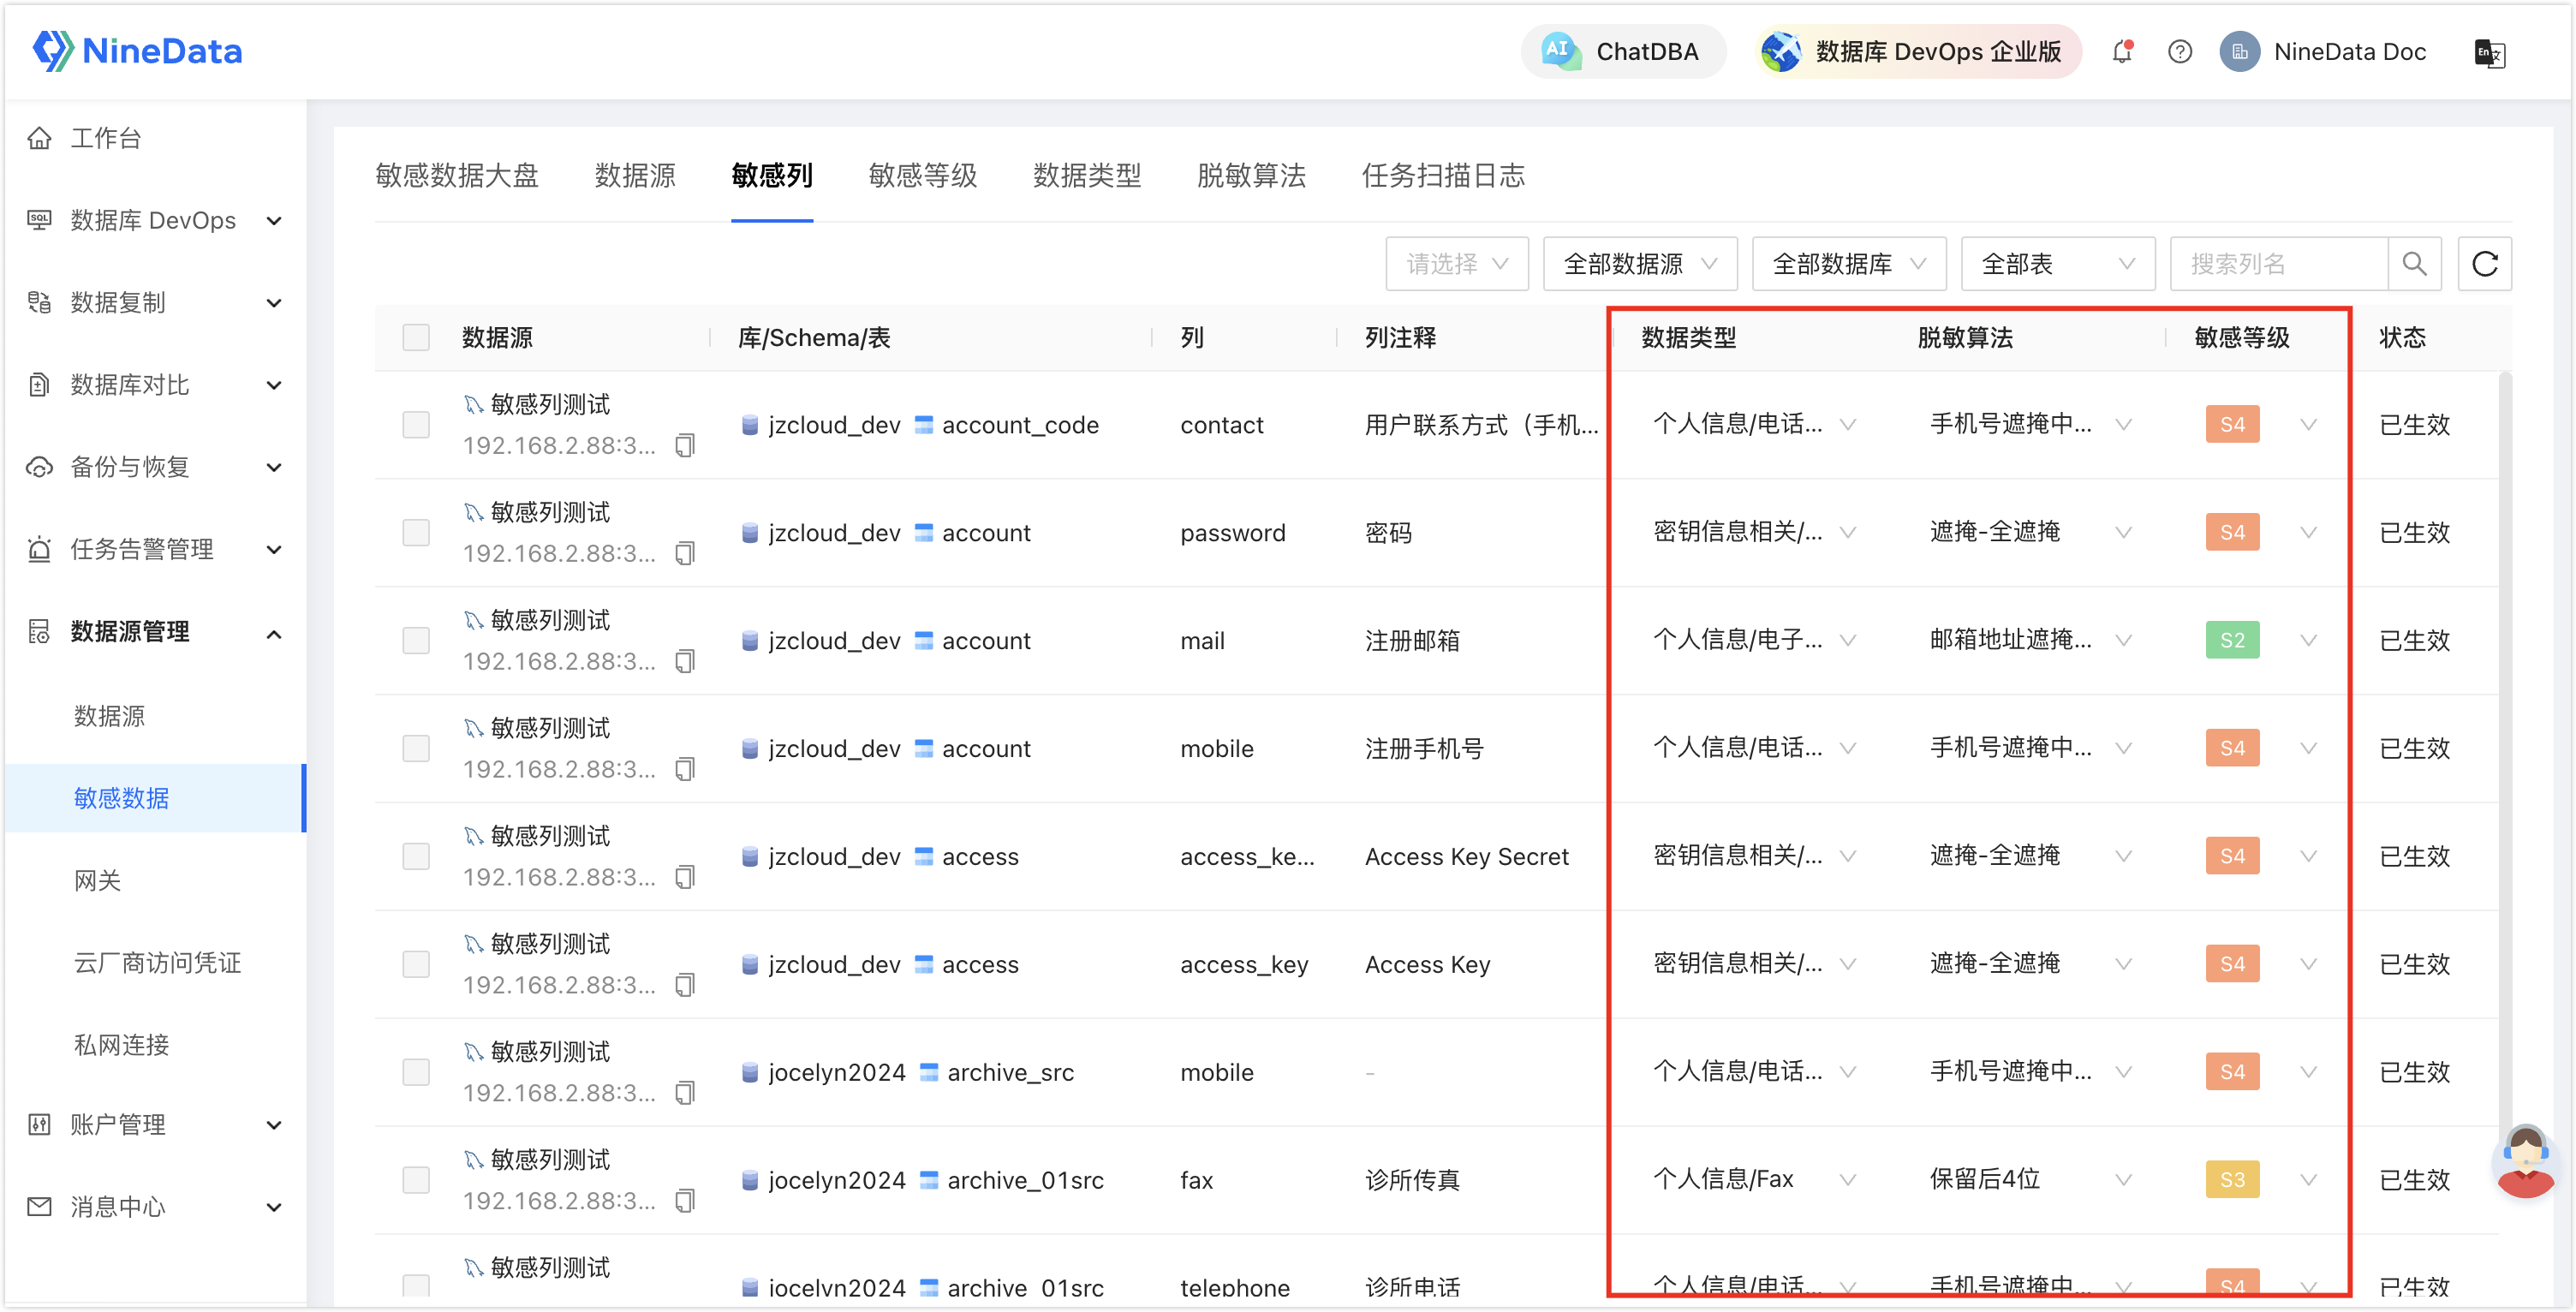
Open the Sensitive Columns tab to review the detected columns. Manually adjust editable fields when the classification needs to be refined.
3. Configure Approvers
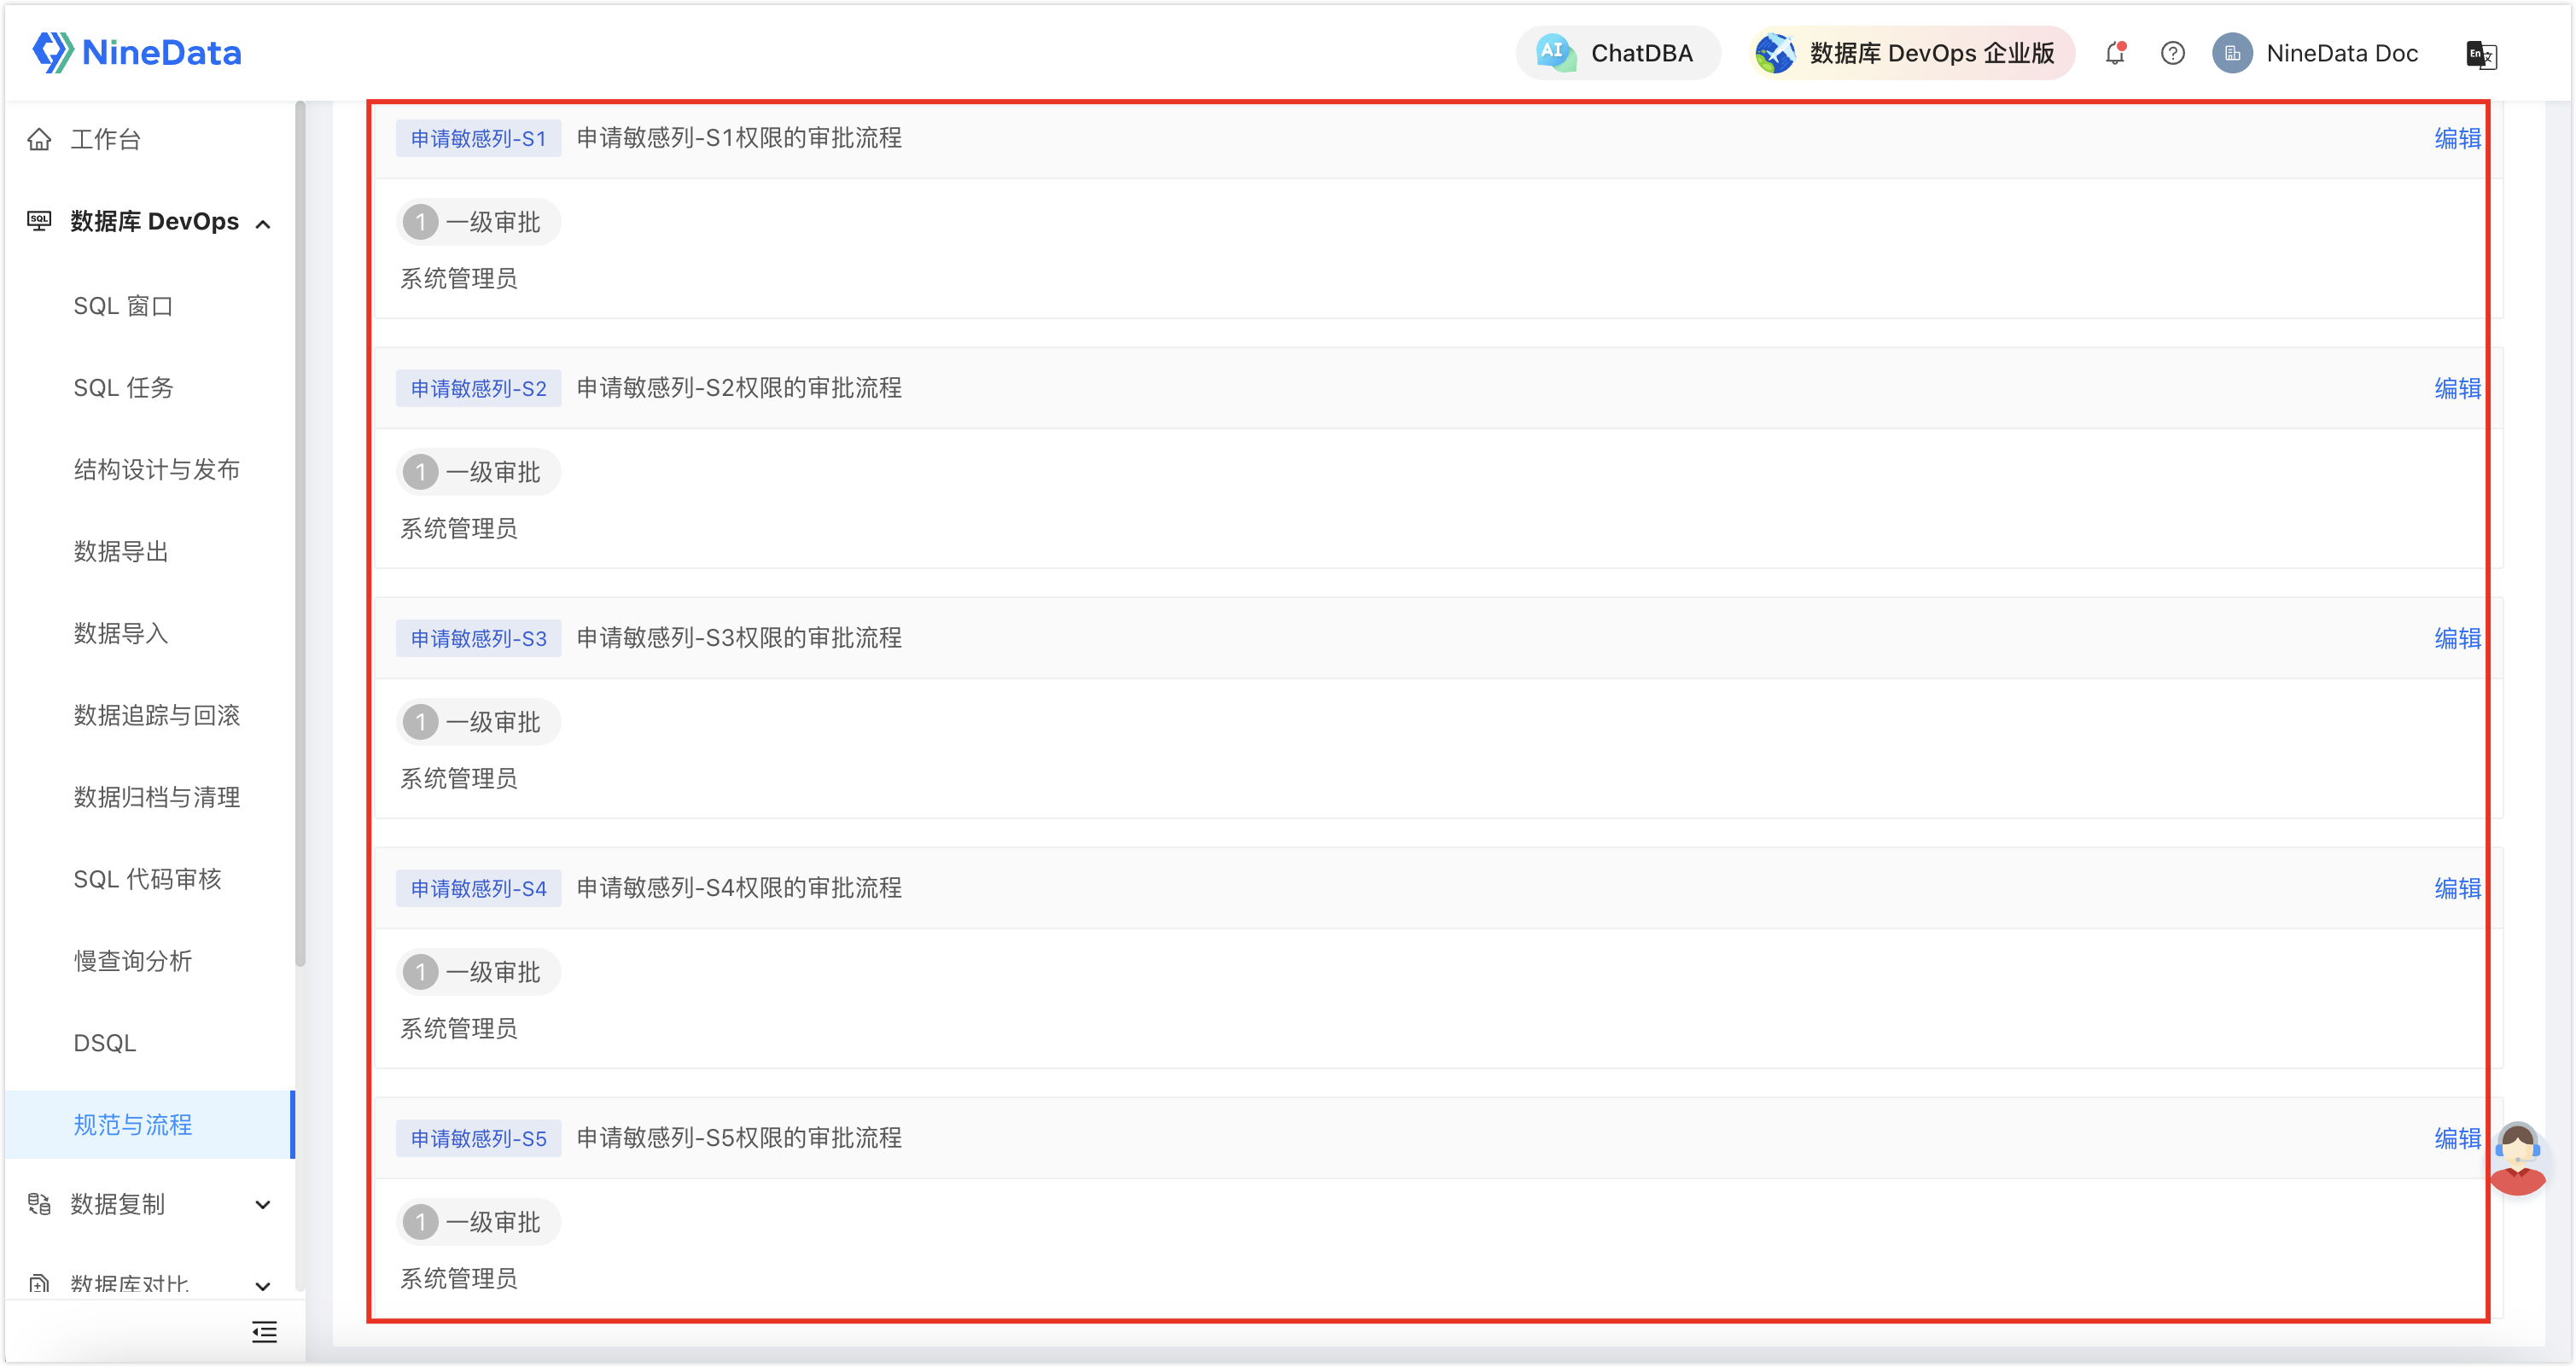
Configure approvers for sensitivity levels S1 through S5. Users who need access to sensitive columns must request the corresponding permission.
4. Verify Masking And Access Requests
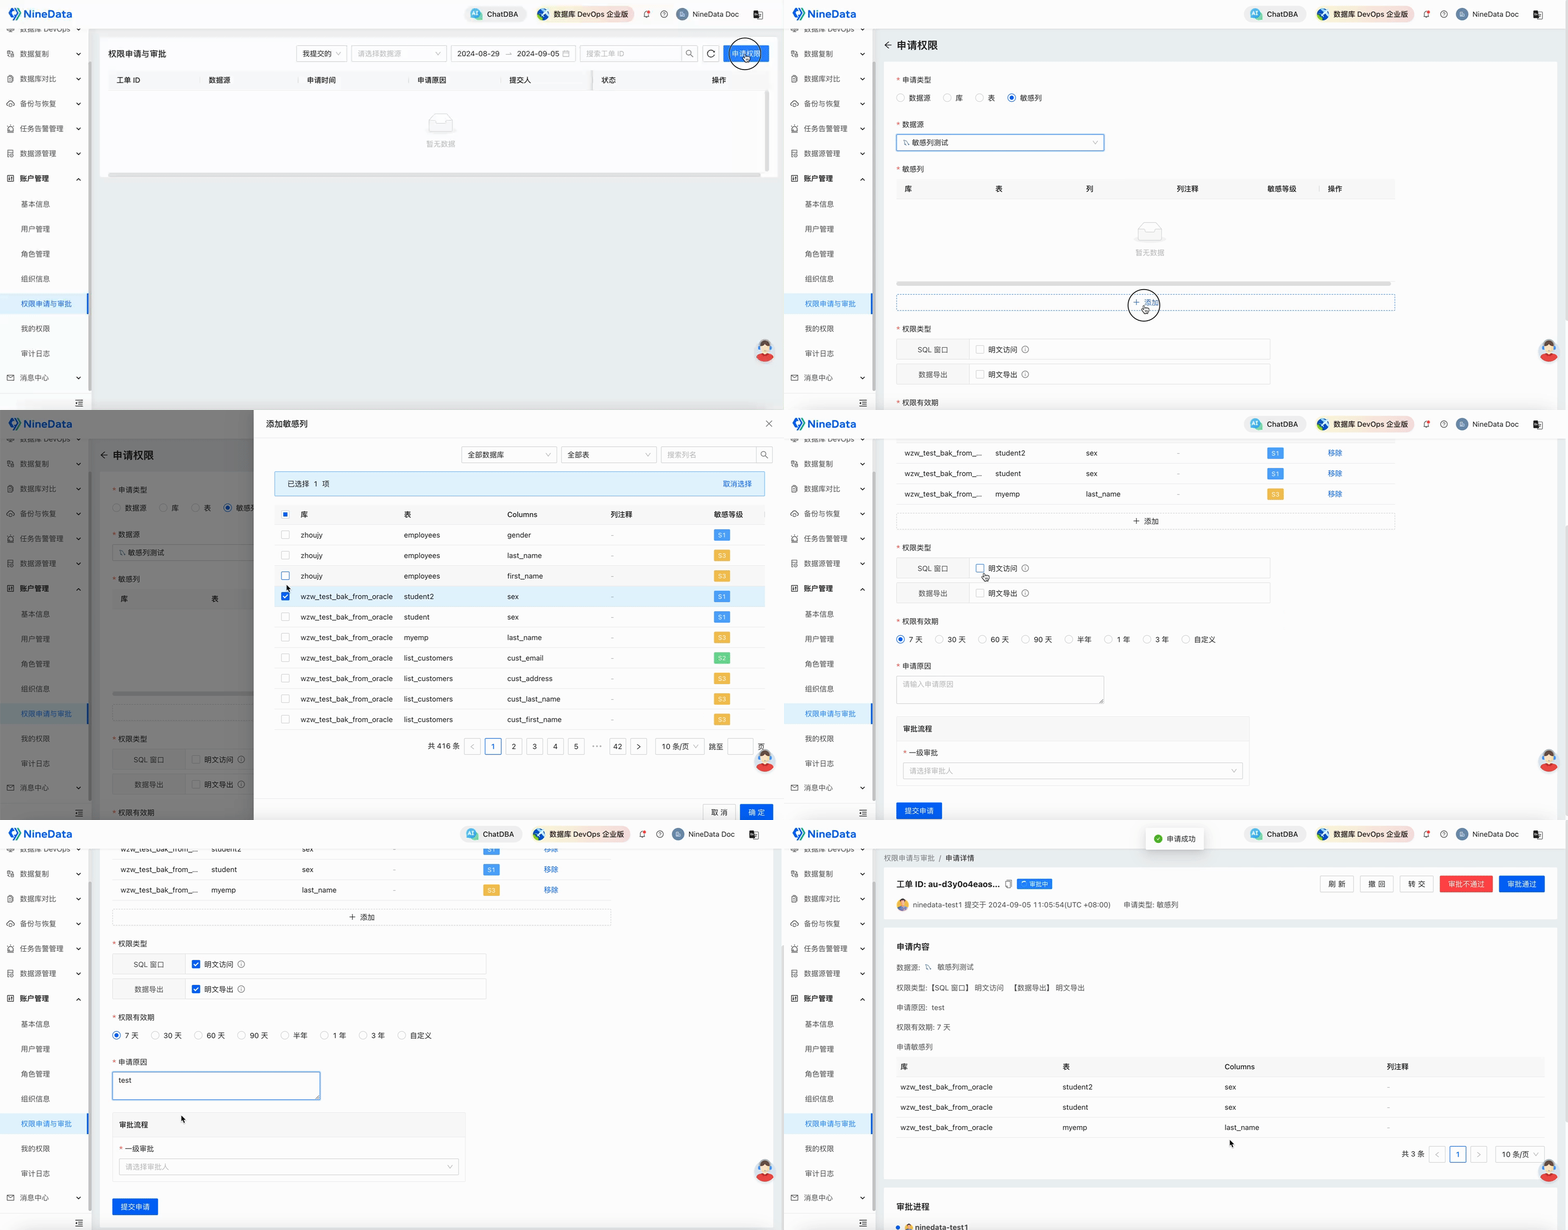
When a user queries a sensitive column without the required permission, NineData masks the value. The user must request access before viewing the original value.
Result
Sensitive columns are classified, unauthorized access is masked, and access requests can be routed to the responsible approvers. Administrators can use dashboard and audit views to monitor sensitive data governance across the organization.
Related Solutions
- SQL Change Review and Release Workflow
- SQL Review and High-Risk SQL Blocking
- MySQL Online DDL: Non-Locking Schema Change
- Large-Scale Data Change: Online DML Batch Execution
- Database Slow Query Analysis and SQL Performance Troubleshooting