Integrate Azure with NineData SSO
This guide uses Azure AD as an example to show how to register for NineData, create an SSO organization, and prepare it for SSO login.
Before you begin
- The NineData registration and login pages are accessible.
- You have a mobile number or email address that can be used for registration.
- You have organization administrator access after signing in.
Procedure
Step 1: Register for NineData
Open the NineData registration page.
Enter your mobile phone number and click Get verification code. After you receive the code from NineData, enter it.
tipCurrently, only mobile phone numbers in mainland China are supported. For phone numbers outside the +86 area, the verification code is sent only by email.
Enter your username and password.
tipThe password requirements are as follows:
- The password can contain English letters, numbers, and special characters.
- The length should be 8-16 characters.
- It must contain English letters and numbers.
- It cannot contain blank characters (spaces).
Enter your email address and company name, read the Terms of Service, select the checkbox, and click Register.
tipIf you entered your email address in the previous step, skip this field.
Step 2: Sign in to the NineData console
Open the NineData login page.
Enter the mobile phone number or email address used during registration and the password, and click Login.
tip- If you are using a phone number outside the +86 area, log in with the email address used during registration.
- If you forget your login password, click Forgot Password in the lower right corner to reset it (Reset Password).
Step 3: Create and switch to an organization
In the NineData console, open the user avatar menu and choose Switch identity > Create organization.
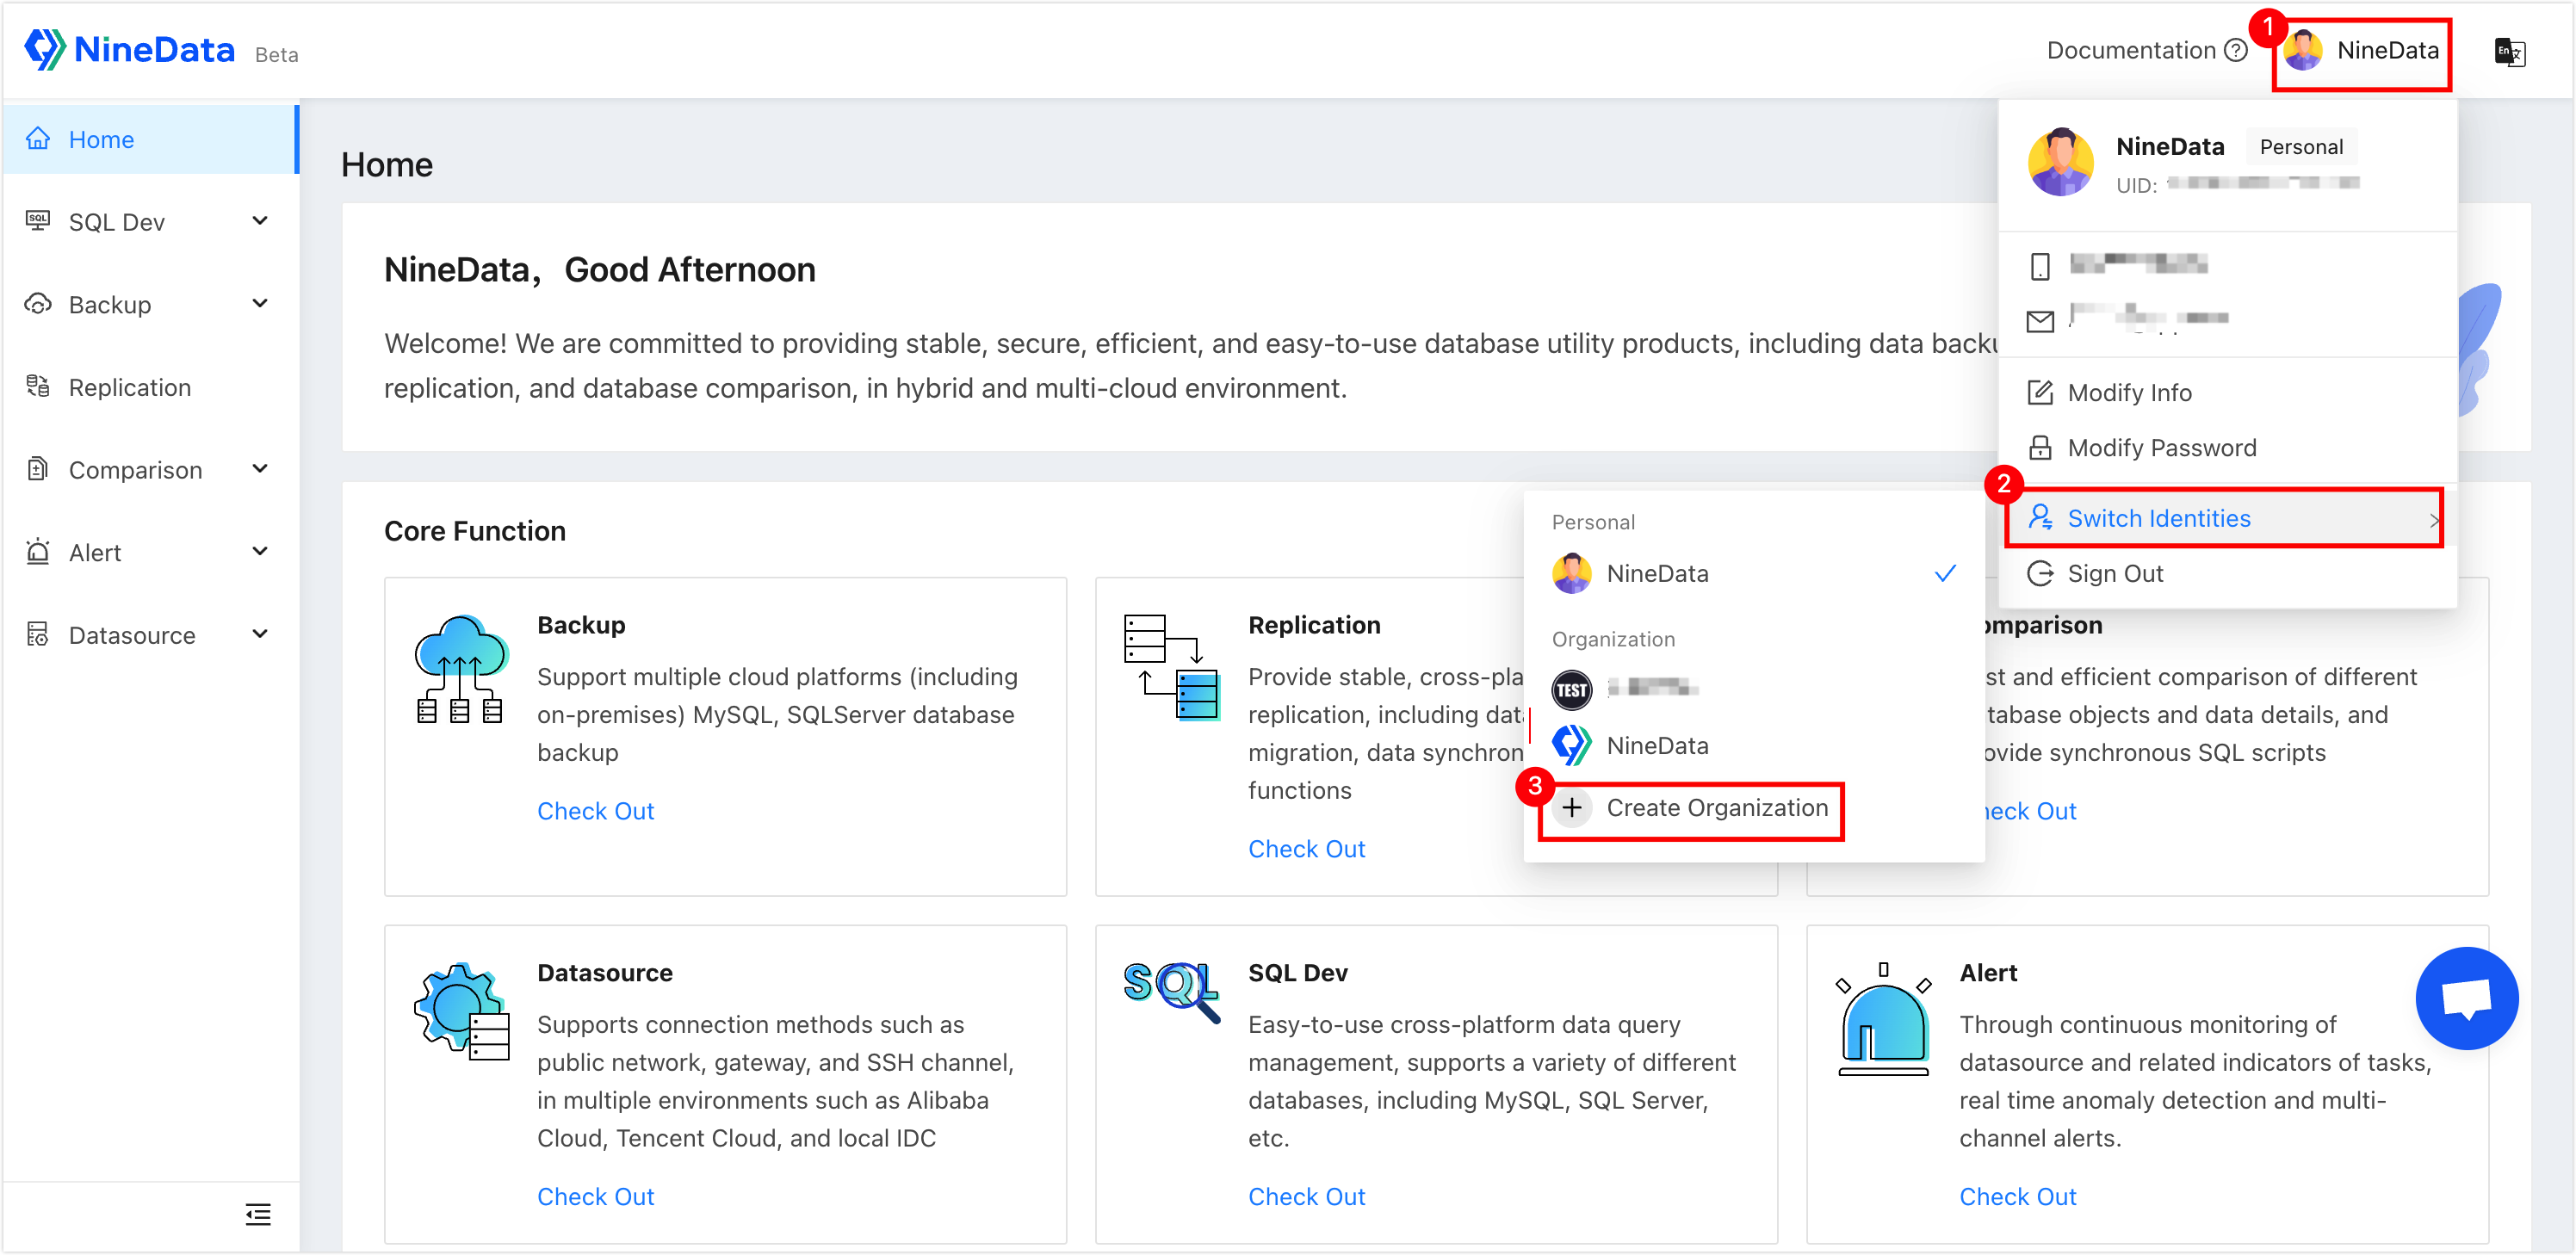
On the Create organization page, enter the fields in the table below.
Parameter Description Organization name Enter the organization name. For easier identification, use your company name. Up to 24 characters are supported. Invite users (optional) Leave this blank. Click OK to create the organization.
Open the user avatar menu, click Switch identity, and select the new organization under Organization.
Step 4: Enable SSO login
In the left navigation pane of the NineData console, open Account > Organization.
On the Organization Info page, turn on the switch next to Login With SSO to enable SSO login.
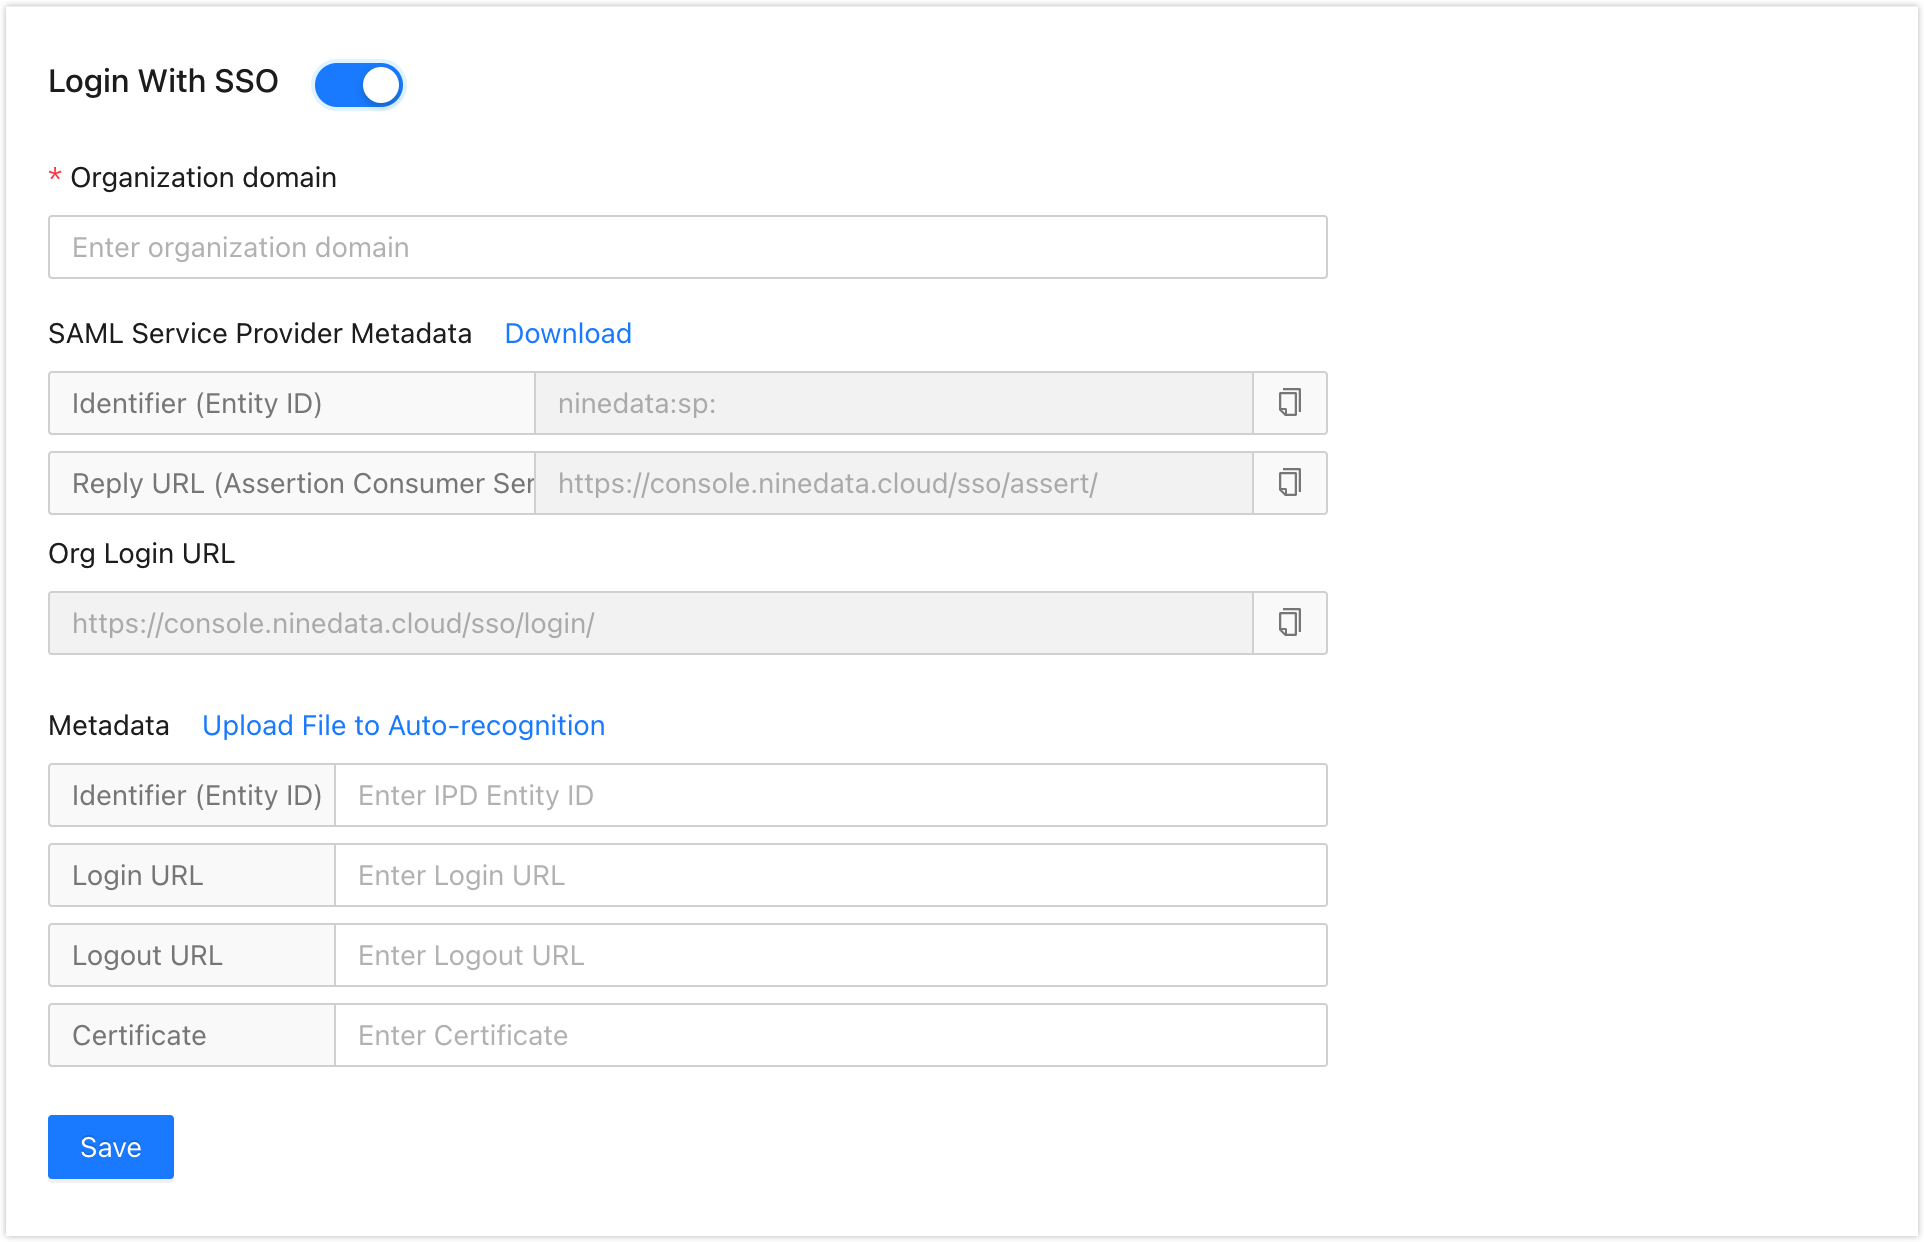
Enter Organization domain. Use your organization name. After you enter it, Identifier (Entity ID) and Reply URL (Assertion URL) are generated under SAML Service Provider Metadata.
Click Download next to SAML Service Provider Metadata to download the XML file with the organization login metadata.
Sign in to the Azure console with an administrator account.
Enter enterprise applications in the top search box and click Enterprise applications in the search results.
Click New application, and on the Browse Azure AD library page, click Create your own application.
In the dialog on the right, enter a custom application name, select Integrate any other application not found in the gallery (Non-gallery) at the bottom, and click Create.
After the application is created, open Single sign-on in the left navigation pane, then choose SAML as the login method.
On the Set up Single Sign-On with SAML page, click Upload metadata file, select the XML file downloaded in Step 4, and click Add.
In the Basic SAML Configuration dialog on the right, click Save.
Scroll down to the third area (SAML certificate) and click Download next to Federation metadata XML.
tipThe XML file contains metadata information (identifier, login address, logout address, certificate) required for SSO login. If you do not download the XML file, manually record the metadata information in the fourth area and download the certificate (base64) in the third area.
Return to the SSO login configuration page in the NineData console. In the Metadata section, click Upload File to Auto-recognition and upload the Federated Metadata XML file downloaded in step 12. NineData fills the metadata fields from the file.
:::tip
Enable Allow SSO Account Auto-join when NineData should add users during their first SSO sign-in. When this option is on, skip Step 5.
After enabling Allow SSO Account Auto-join, also specify the default role for newly added SSO users by using Role Name.
:::
- Click Save Changes.
Step 5: Create SSO users
If you enabled the Allow SSO Account Auto-join option in step 13 of Step 4, skip this step.
In the NineData console, open Account > User.
On the Users page, click Add SSO User, enter Login Name and Username, and select the corresponding Role Name in the dialog.
tipLogin Name must match the complete username in Azure AD.
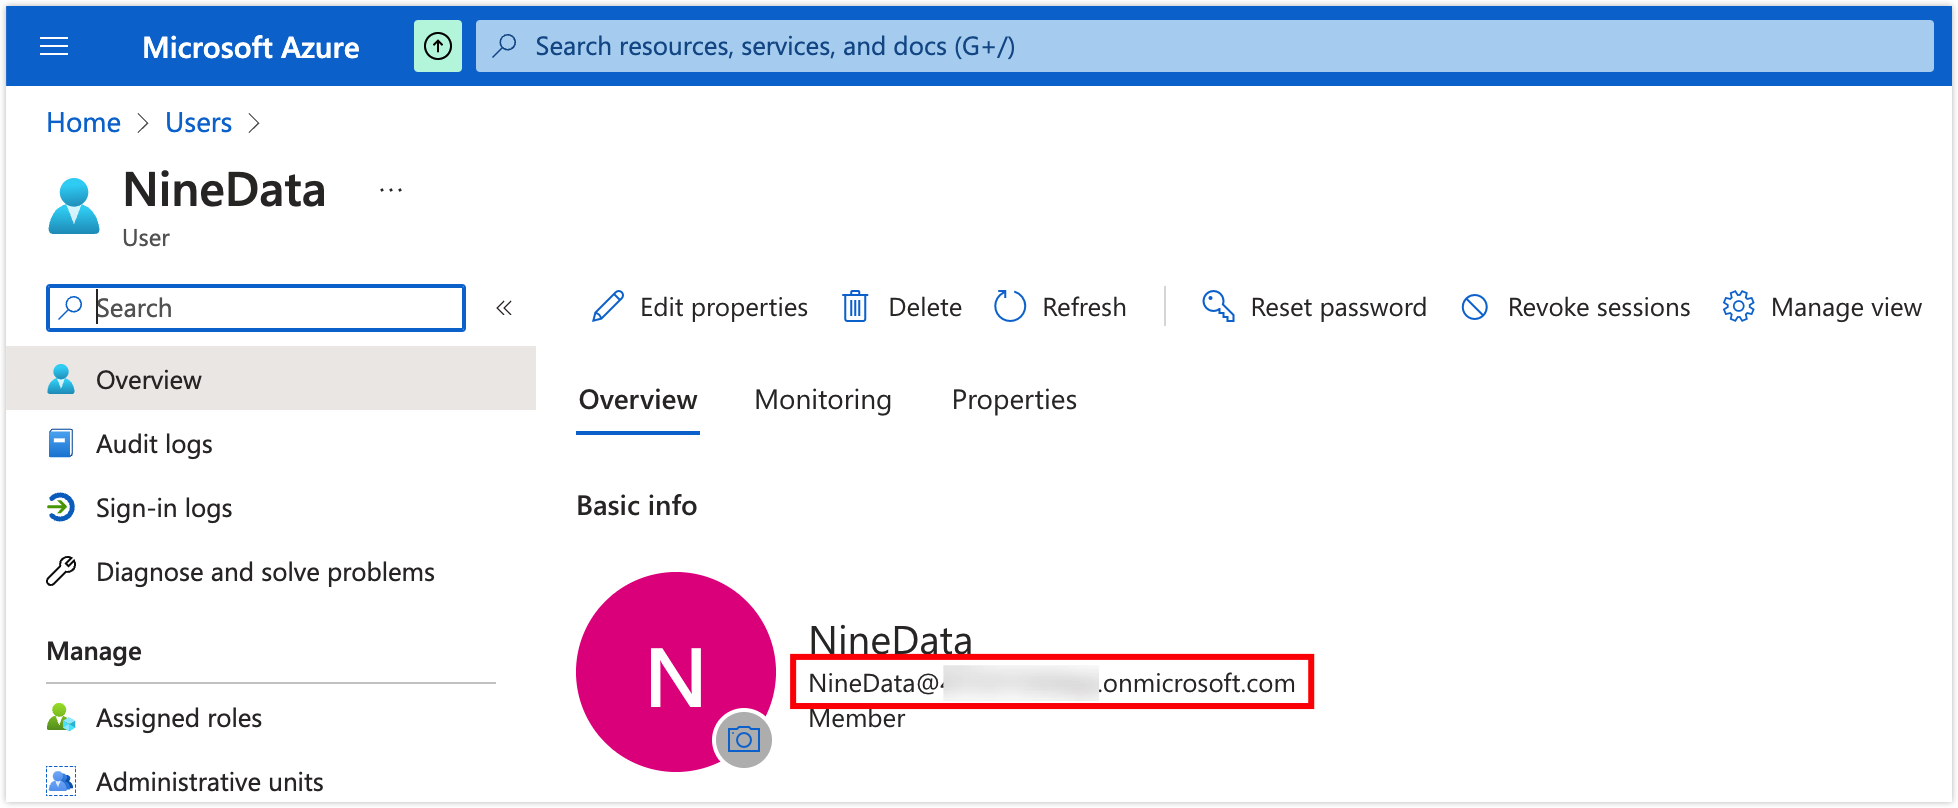
Role Name is optional.
Click OK to create the SSO user.
Open Account > Organization, then share the Org Login URL and Organization domain shown on the page with the user.
Result
After you complete these steps, SSO is enabled for the organization, the metadata file is ready, and users can sign in through the organization URL. If auto-join is enabled, skip manual SSO user creation.