NineData Data Source-Level Permission Control
Use data source-level permission control to limit who can operate tasks that depend on specific data sources. In a NineData dedicated cluster, users who do not have permission for a task's source or target data source can still see the task, but they cannot modify or operate it.
Overview
In NineData dedicated clusters, users can manage running replication tasks from Operations > Schedule.
In multi-user environments, unrestricted task operations can lead to accidental changes, unauthorized intervention, or production impact.
NineData links data source-level permissions with Operations Center task management so that only users with permission for the related data sources can operate a task. This mechanism provides:
- Task visibility: Users can see that a task exists and view its basic information.
- Operation isolation: Only users with the required data source permissions can change or operate the task.
Feature Description
In a NineData dedicated cluster, data source permissions determine both data source access and the operations a user can perform on related tasks:
| Permission Status | Task Visible | View Task Details | Modify Task Workflow & Properties | Start/Stop Operations | Open Terminal |
|---|---|---|---|---|---|
| No target data source permission | Allowed | Allowed | Prohibited | Prohibited | Prohibited |
| With target data source permission | Allowed | Allowed | Allowed | Allowed | Allowed |
Data source permission control uses two dimensions:
| Permission Control | Description |
|---|---|
| Authorization subjects | Subjects are users or roles:
|
| Authorization scope | Authorization supports specific data sources and environments:
|
Scenario Setup
Replication Tasks: The admin user (
admin) creates two replication pipelines in advance:MySQL A > MySQL B, andMySQL C > MySQL D.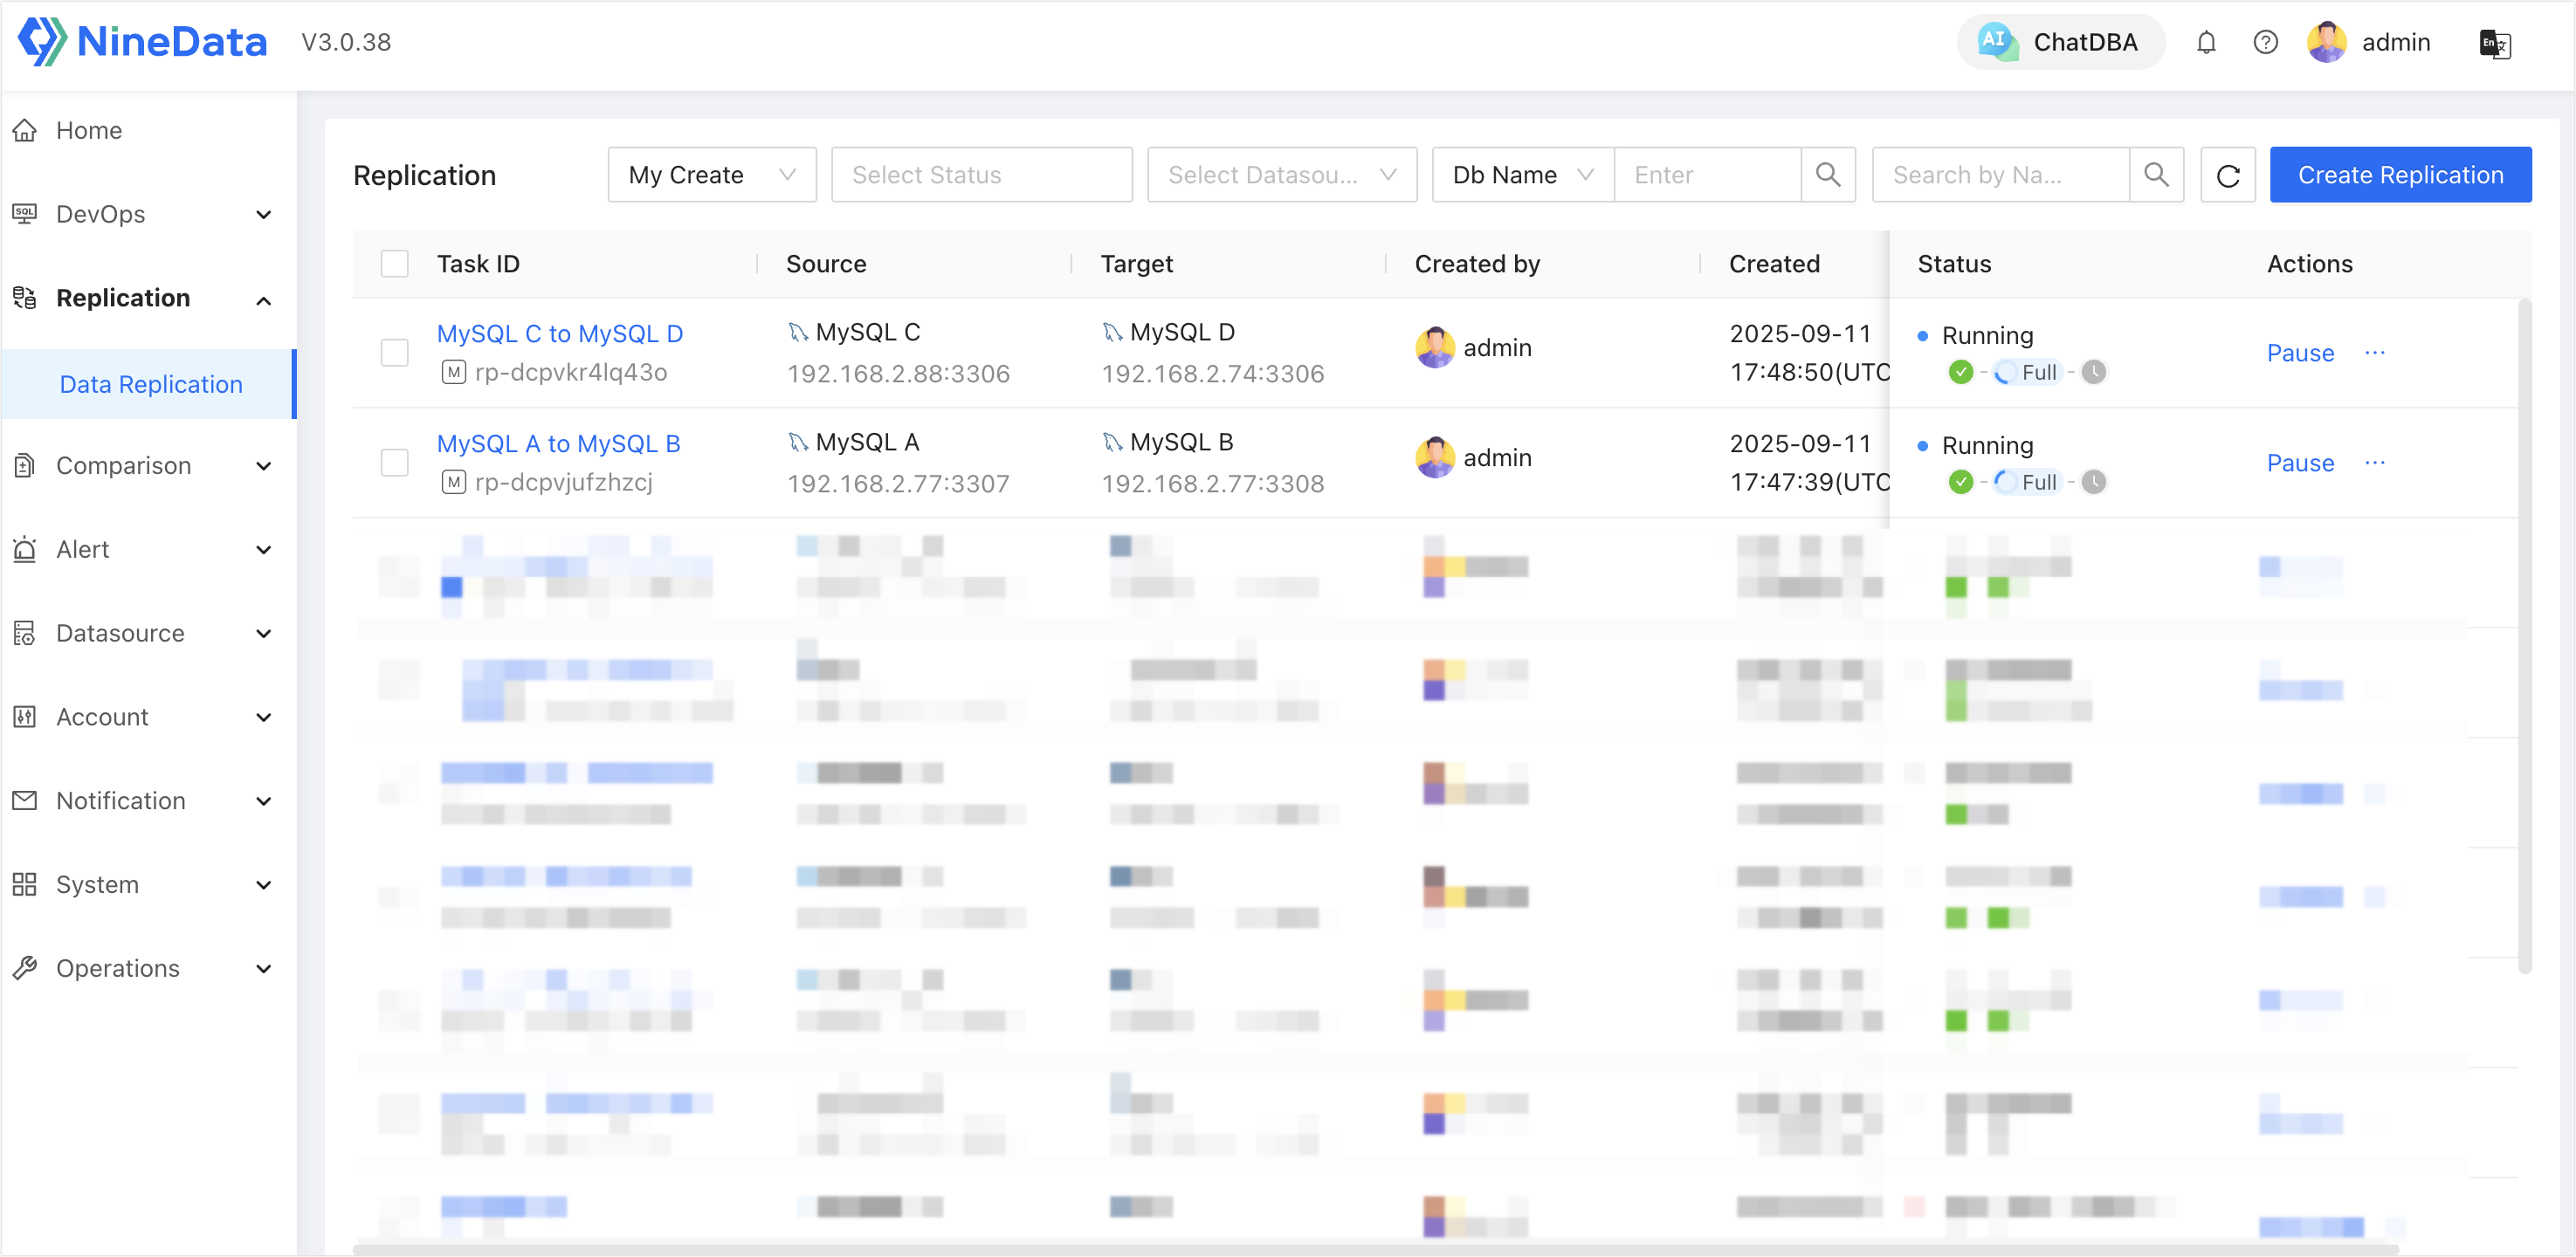
Users: Two users are created and granted different data source permissions. Each user then signs in and attempts to operate tasks that are both inside and outside their permission scope.
User Role Name Authorized Data Sources user_a role_mysql_a-b MySQL A, MySQL B user_b role_mysql_c-d MySQL C, MySQL D Final result:
user_acannot operate tasks related to MySQL C/D.user_bcannot operate tasks related to MySQL A/B.
Step 1: Create Roles and Configure Data Source Permissions
Sign in to the NineData console with a system administrator account.
Go to Account > Role.
Click Create Role and create two roles:
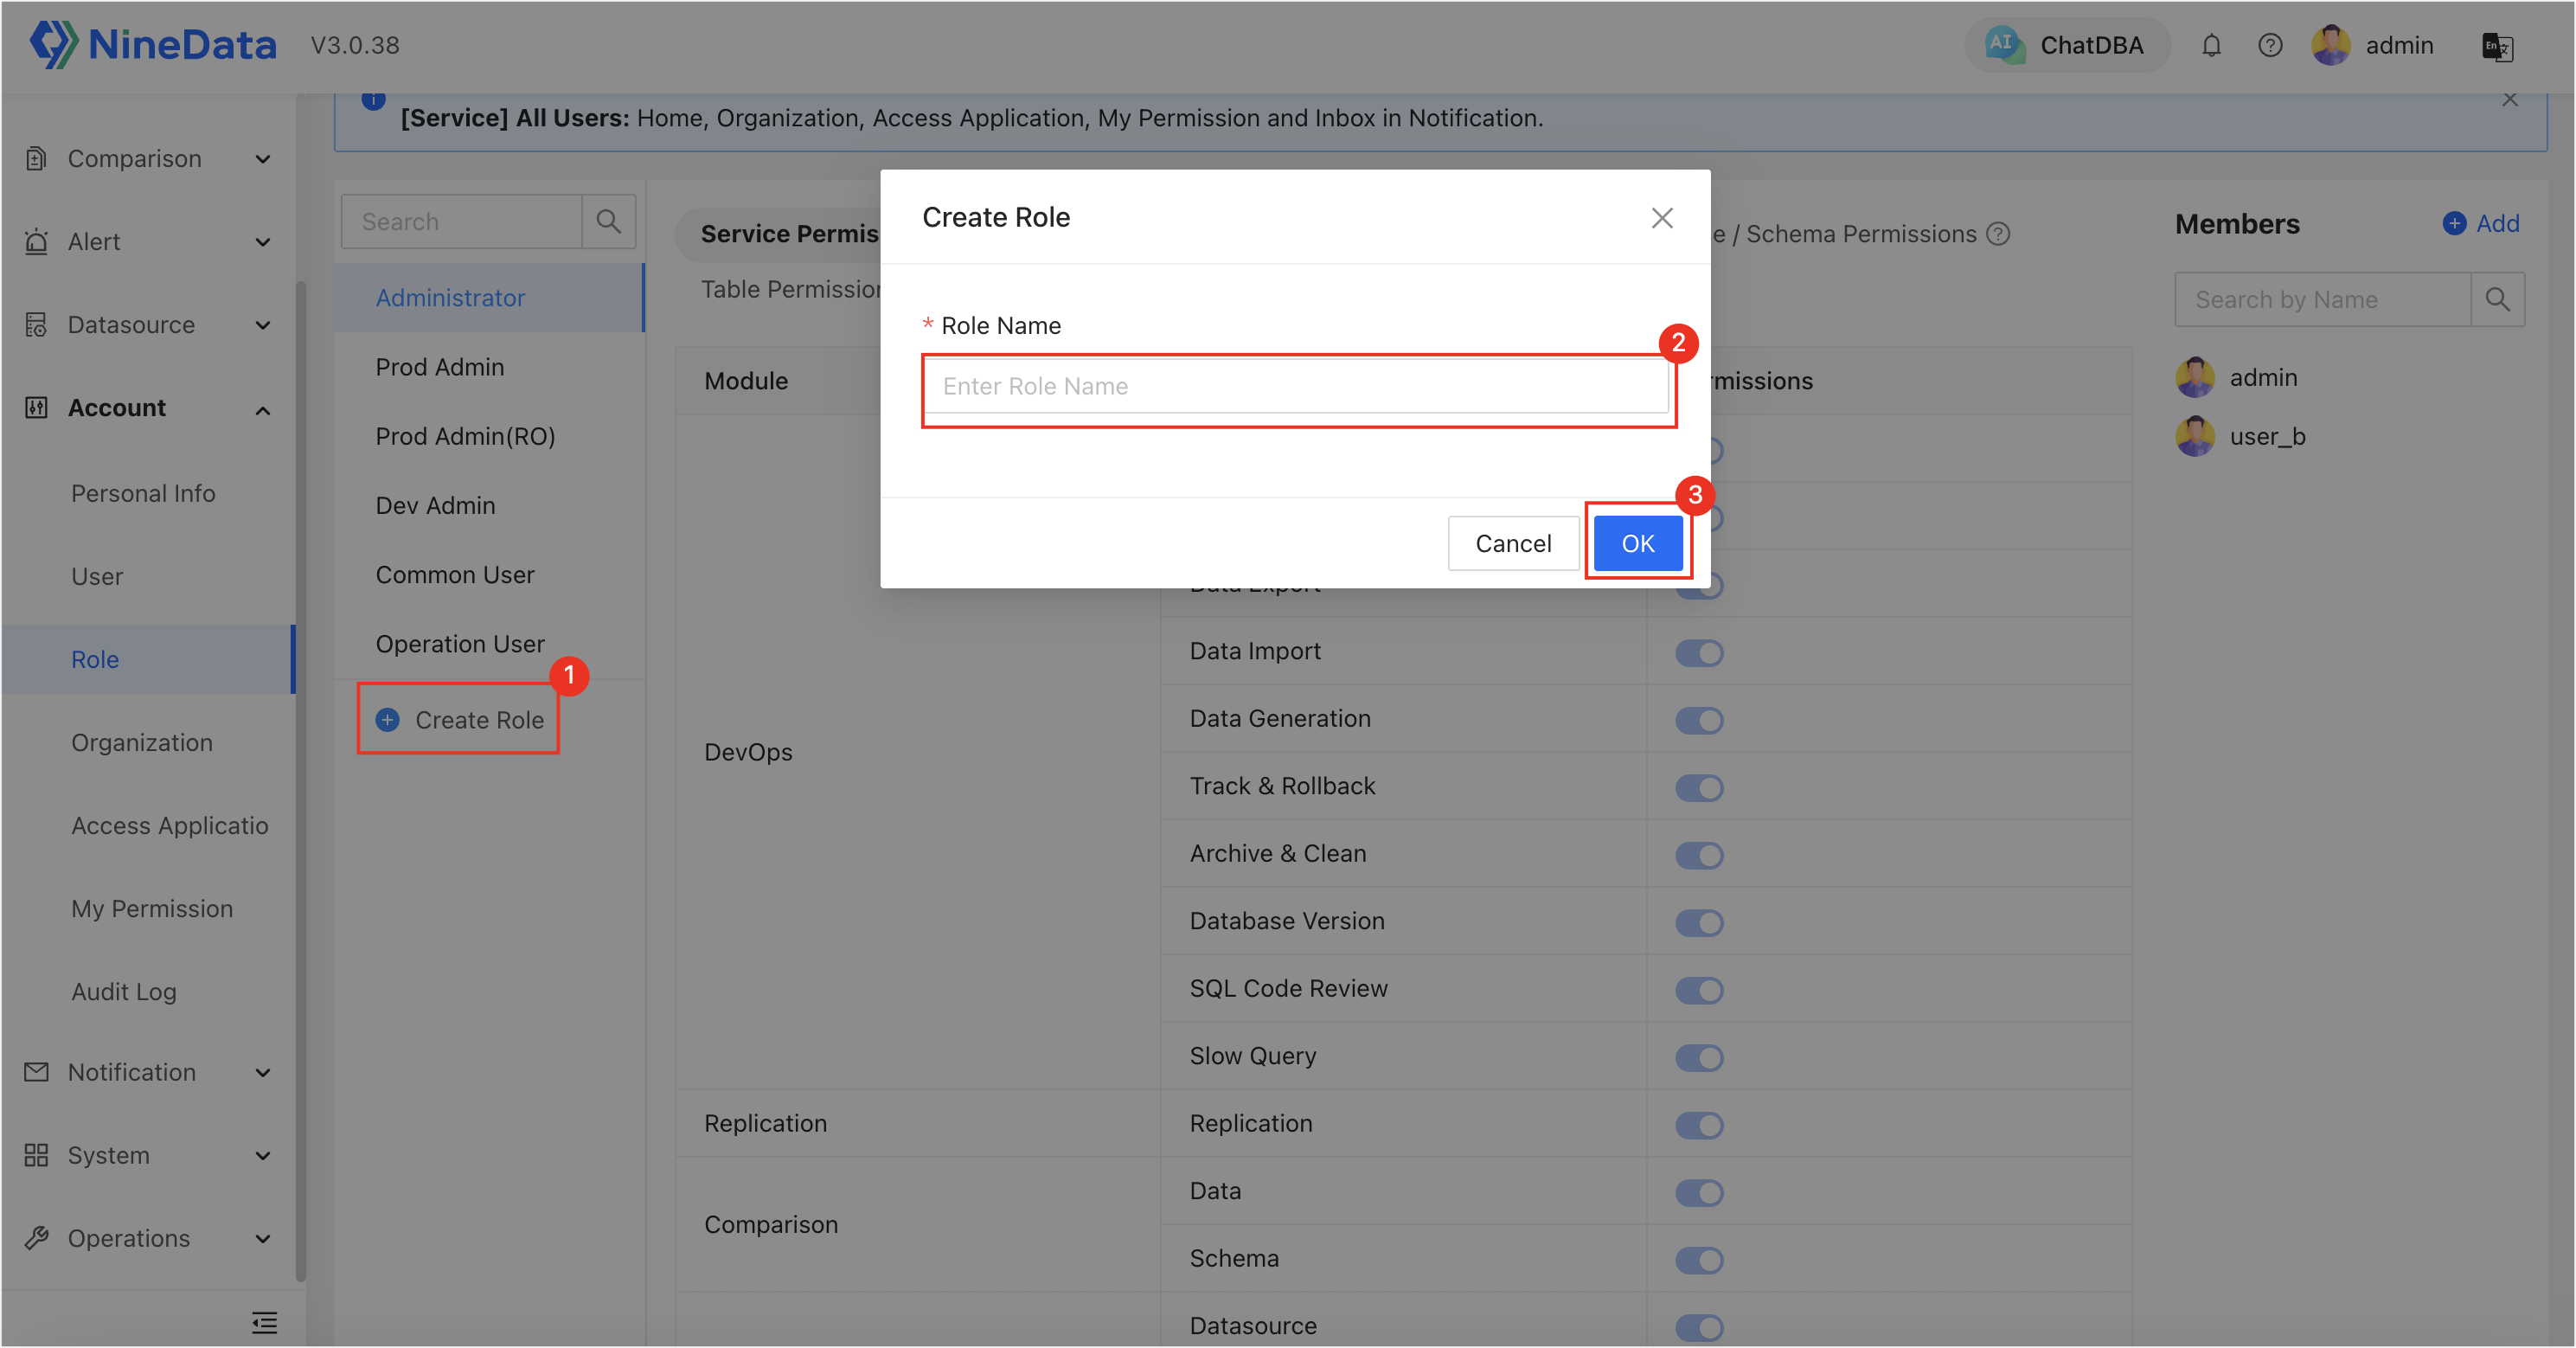
role_mysql_a-brole_mysql_c-d
Open a target role, go to the Datasource Permission tab, and click Add Permission to assign different data source permissions to the roles:
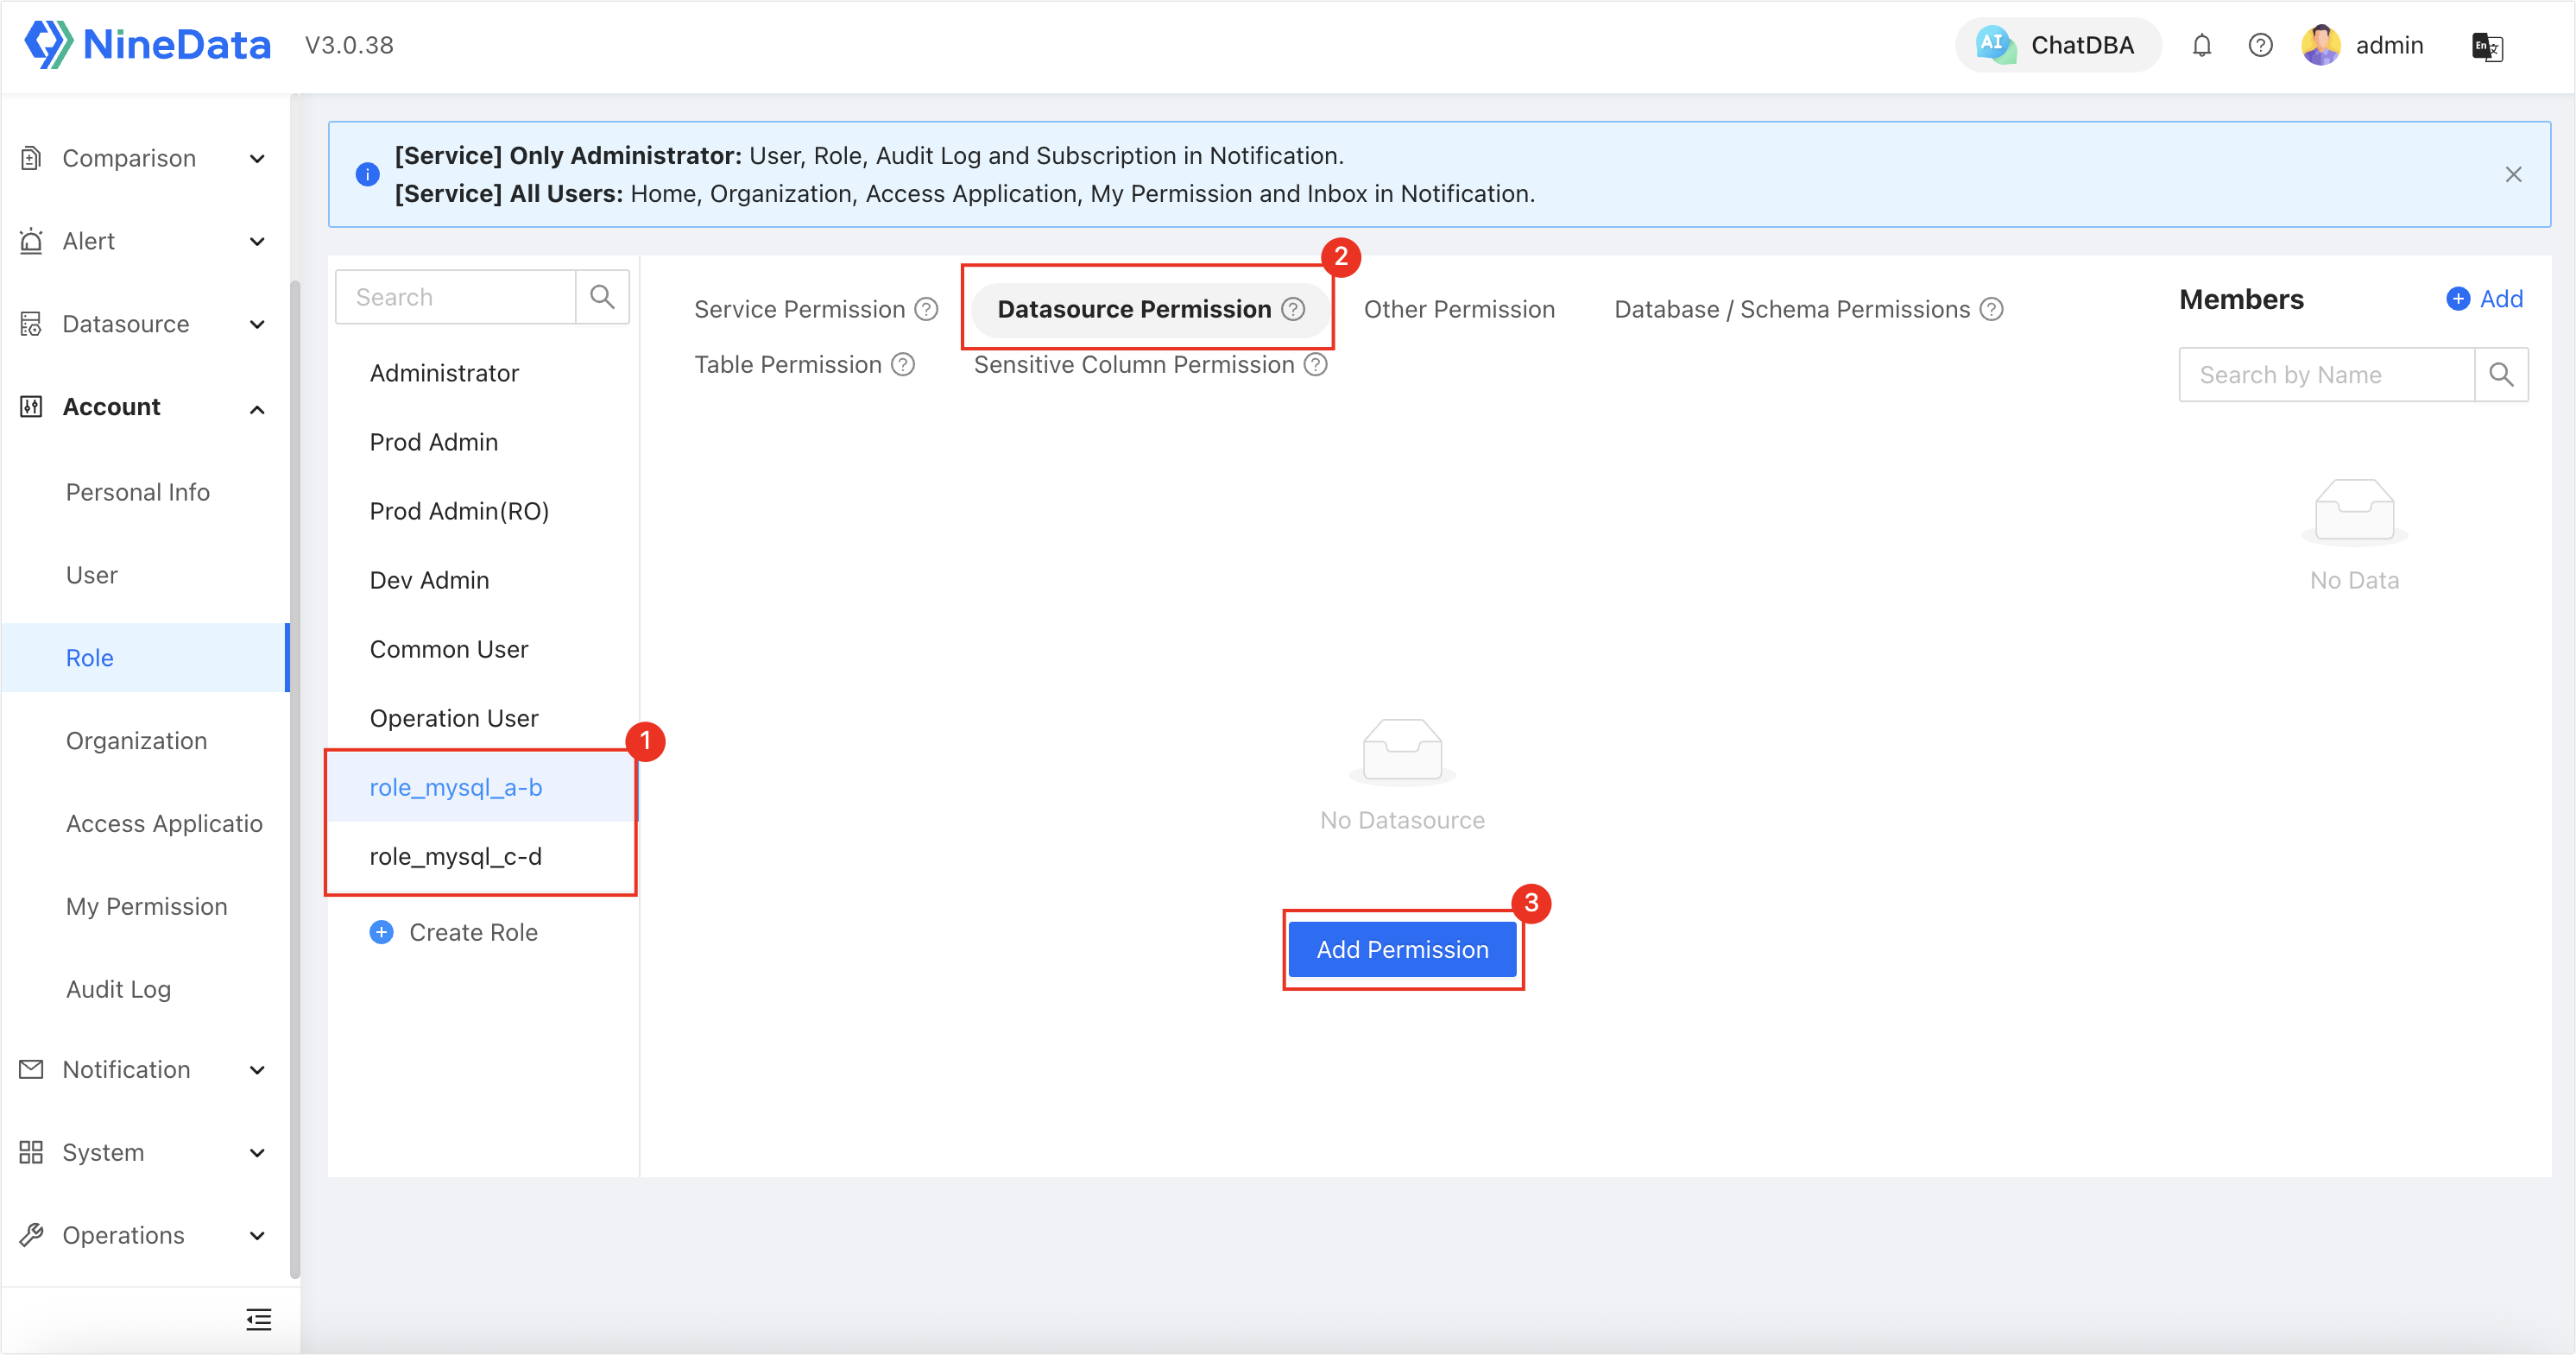
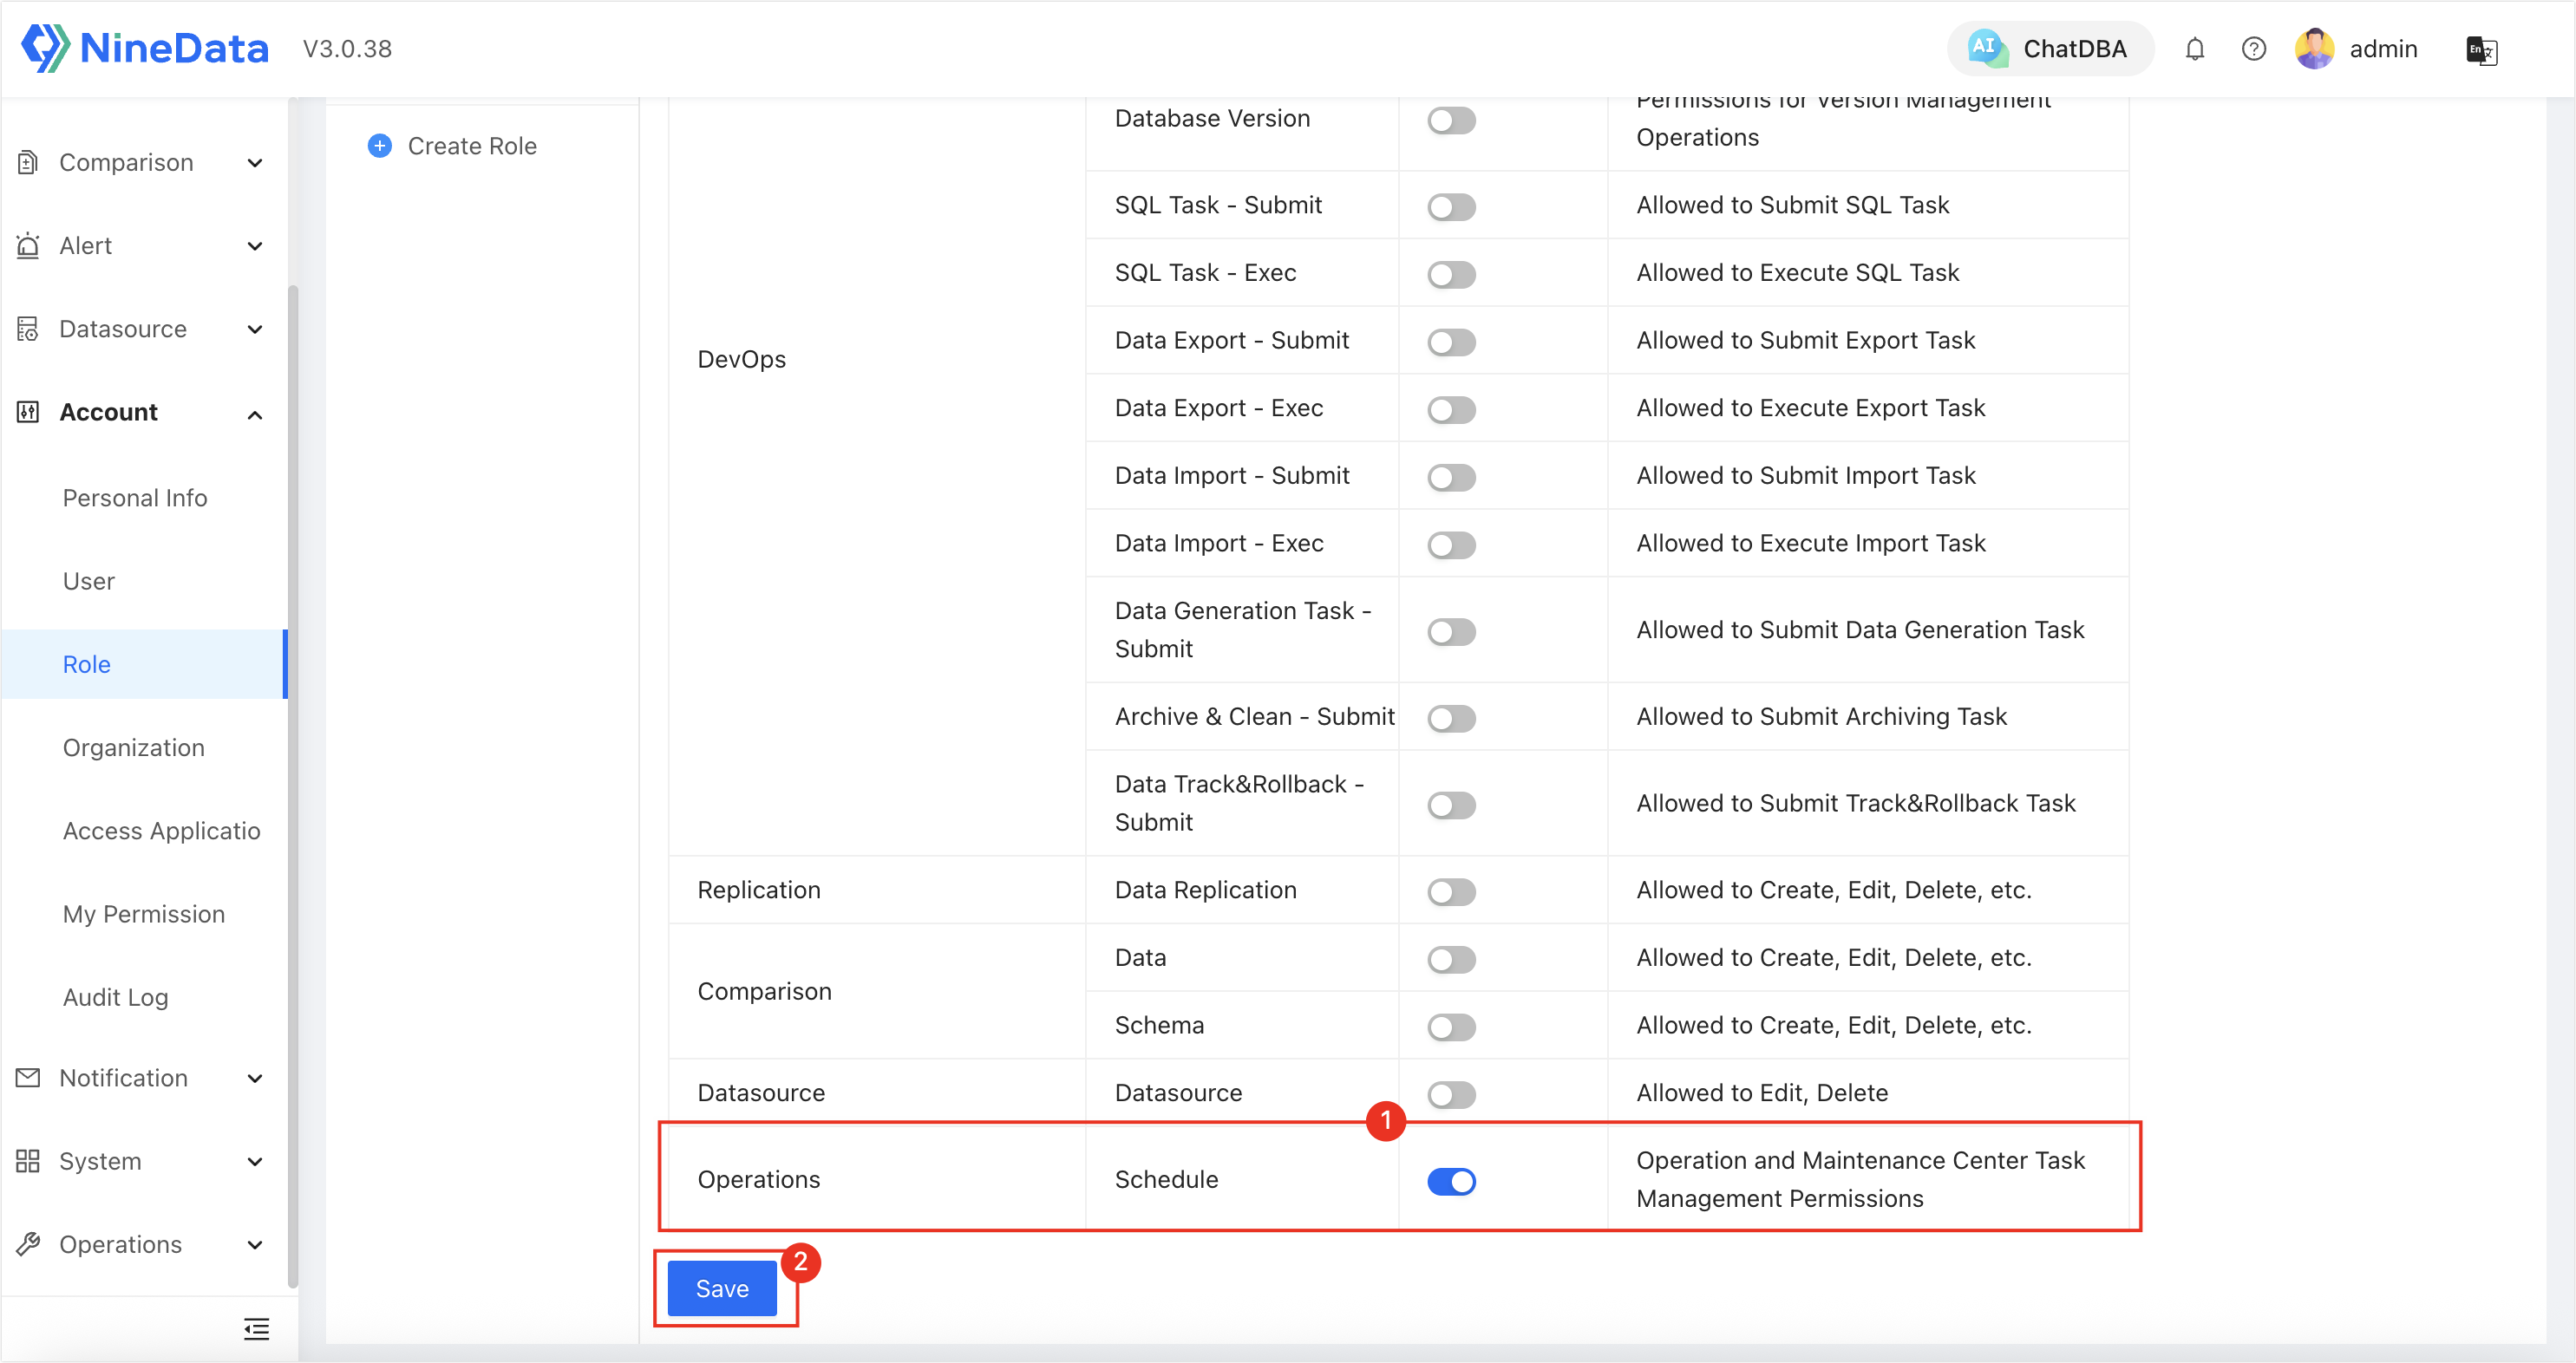
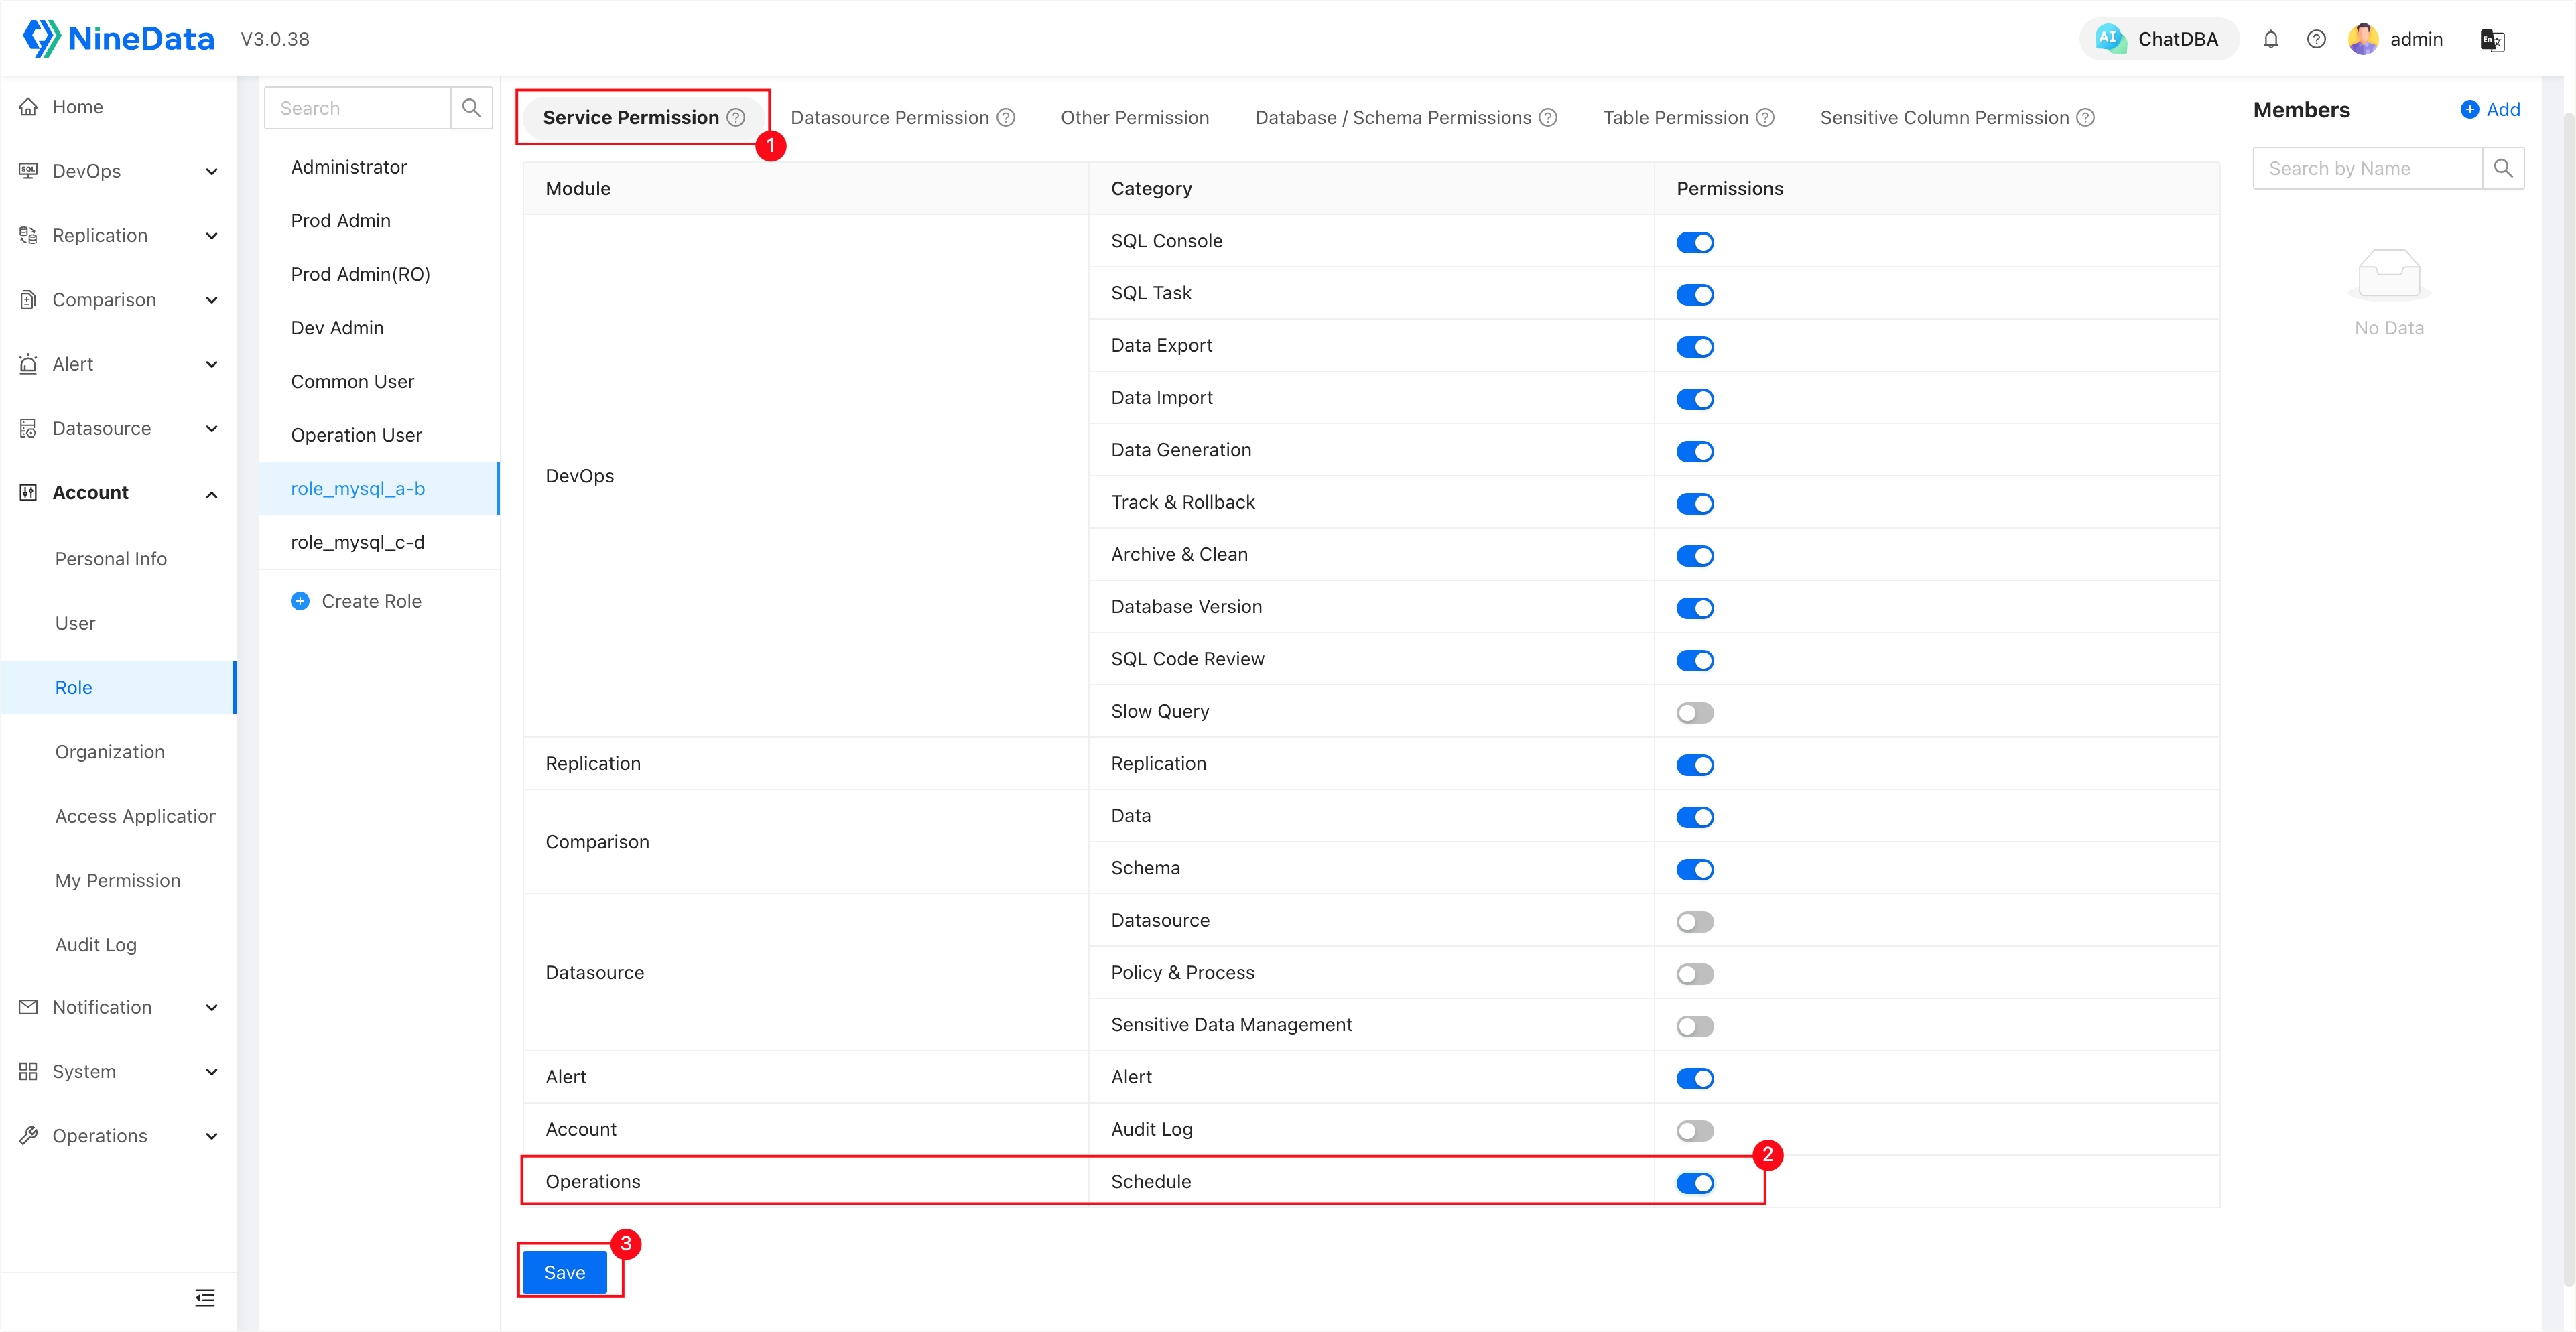
role_mysql_a-b: Authorized to accessMySQL AandMySQL B, and granted Schedule permissions (including Service Permission and Datasource Permission).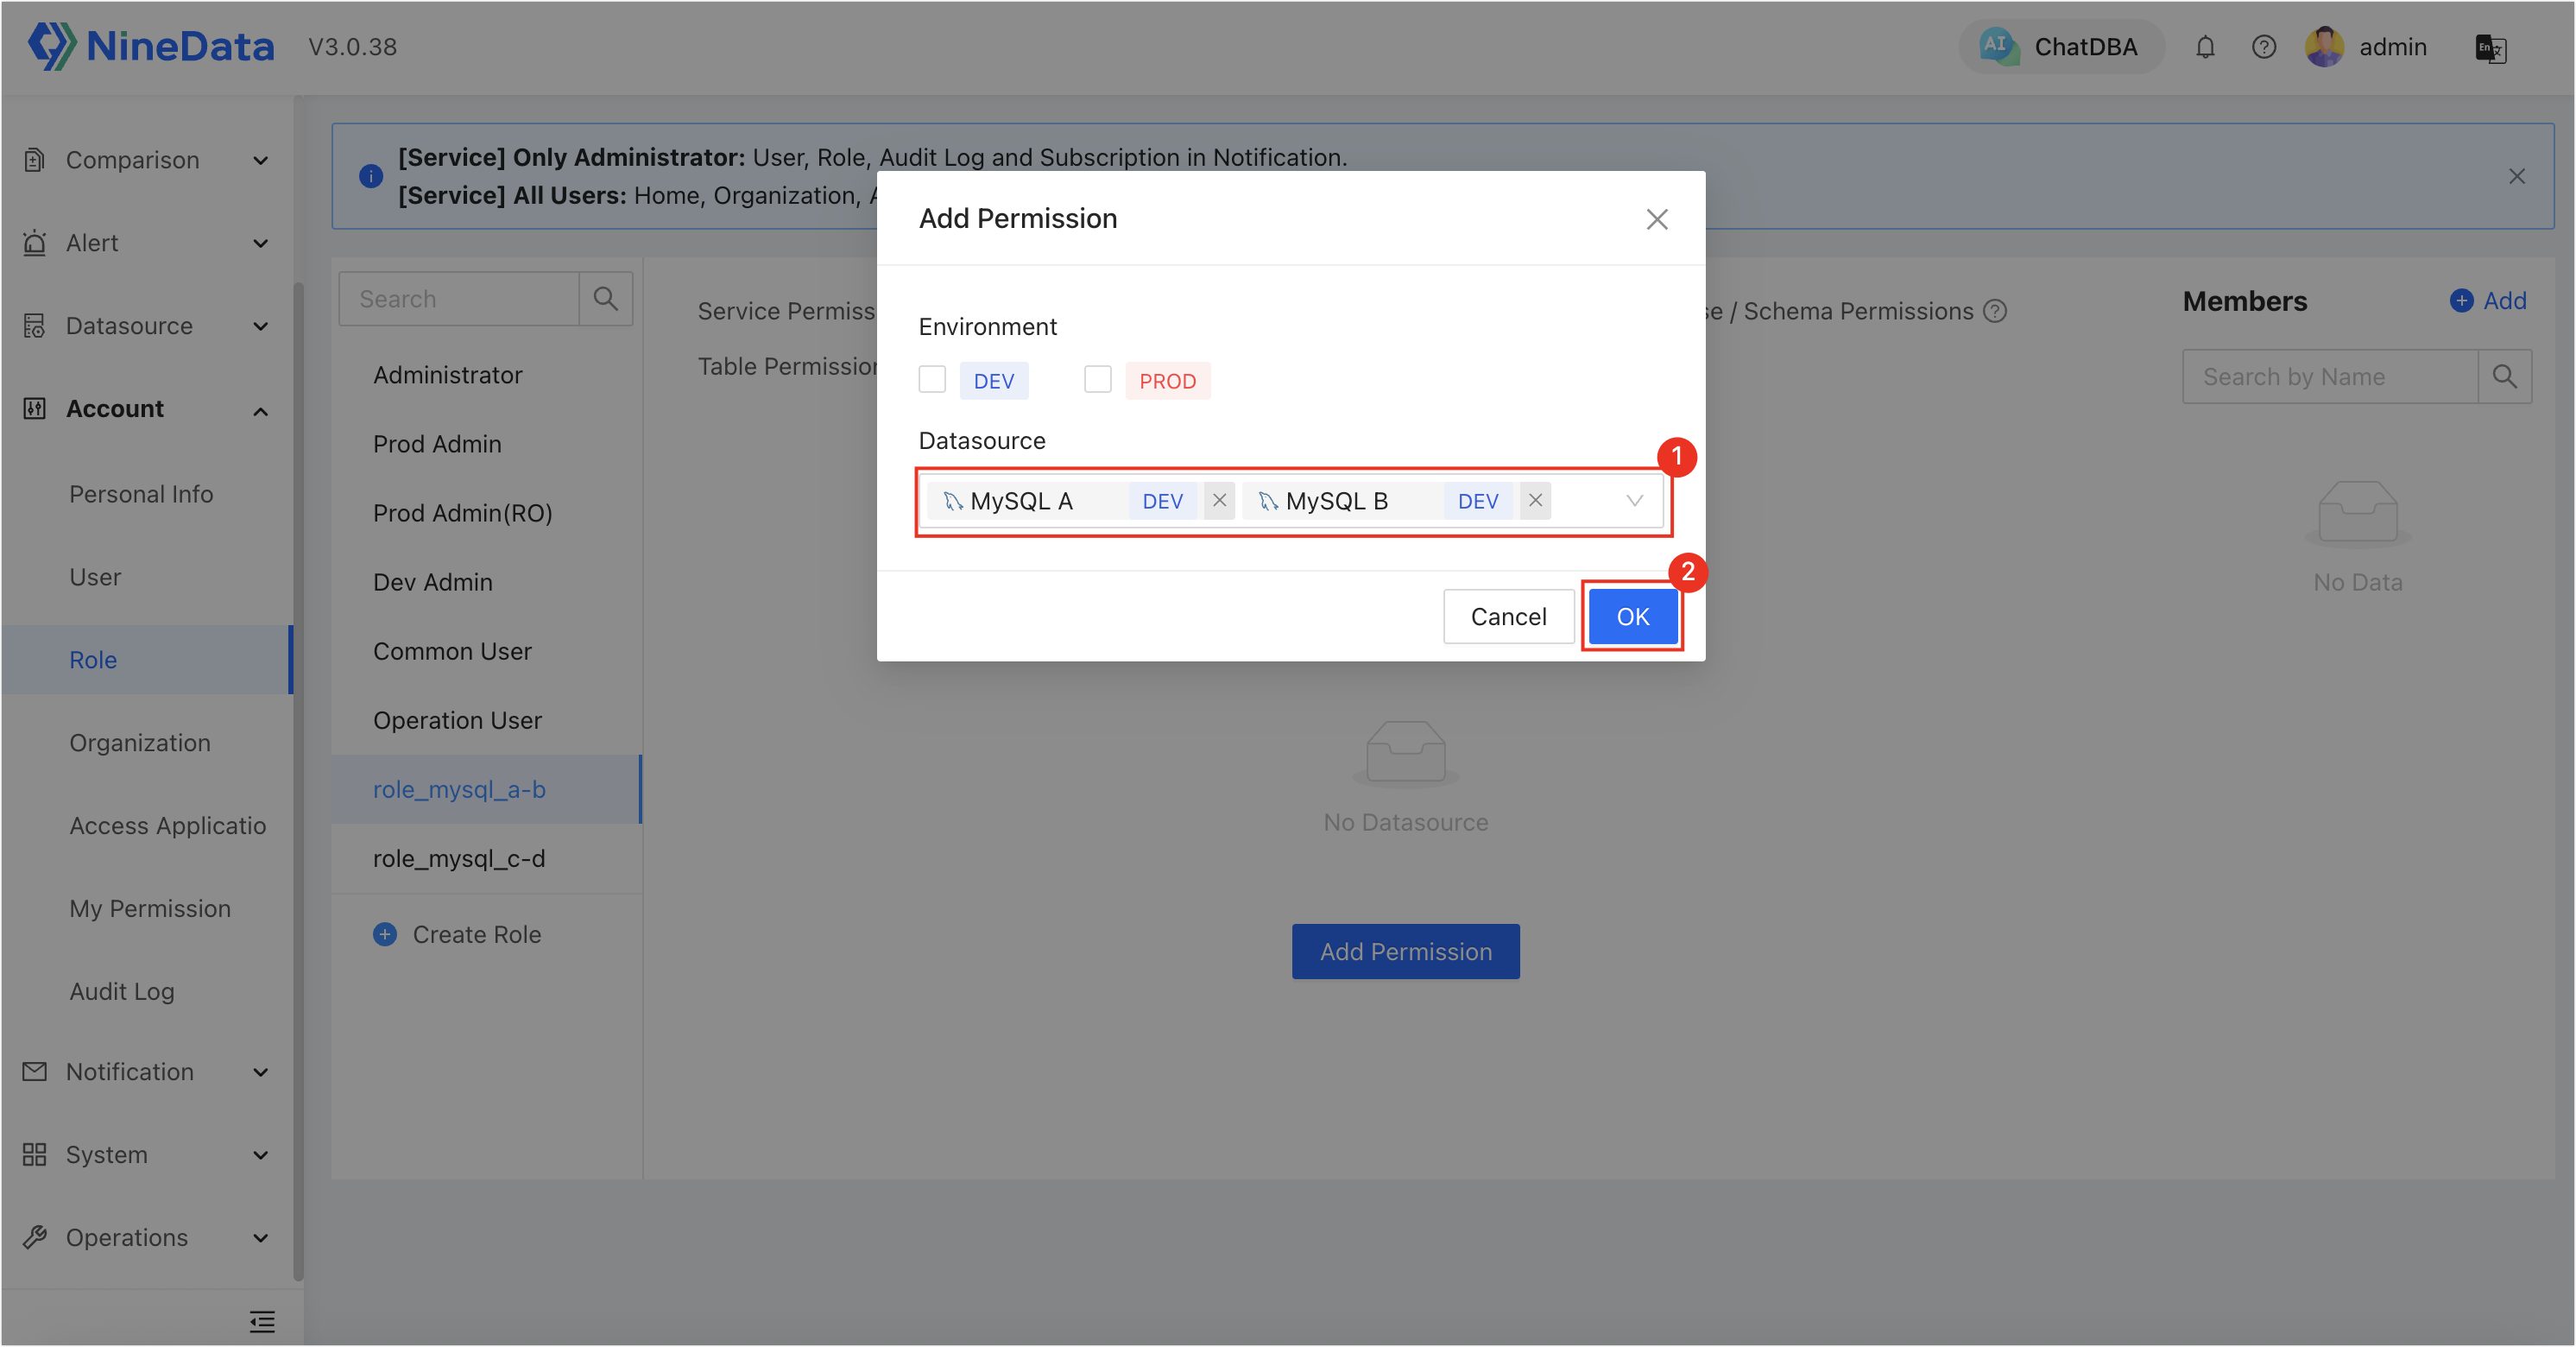
role_mysql_c-d: Authorized to accessMySQL CandMySQL D. Other permissions are the same asrole_mysql_a-b.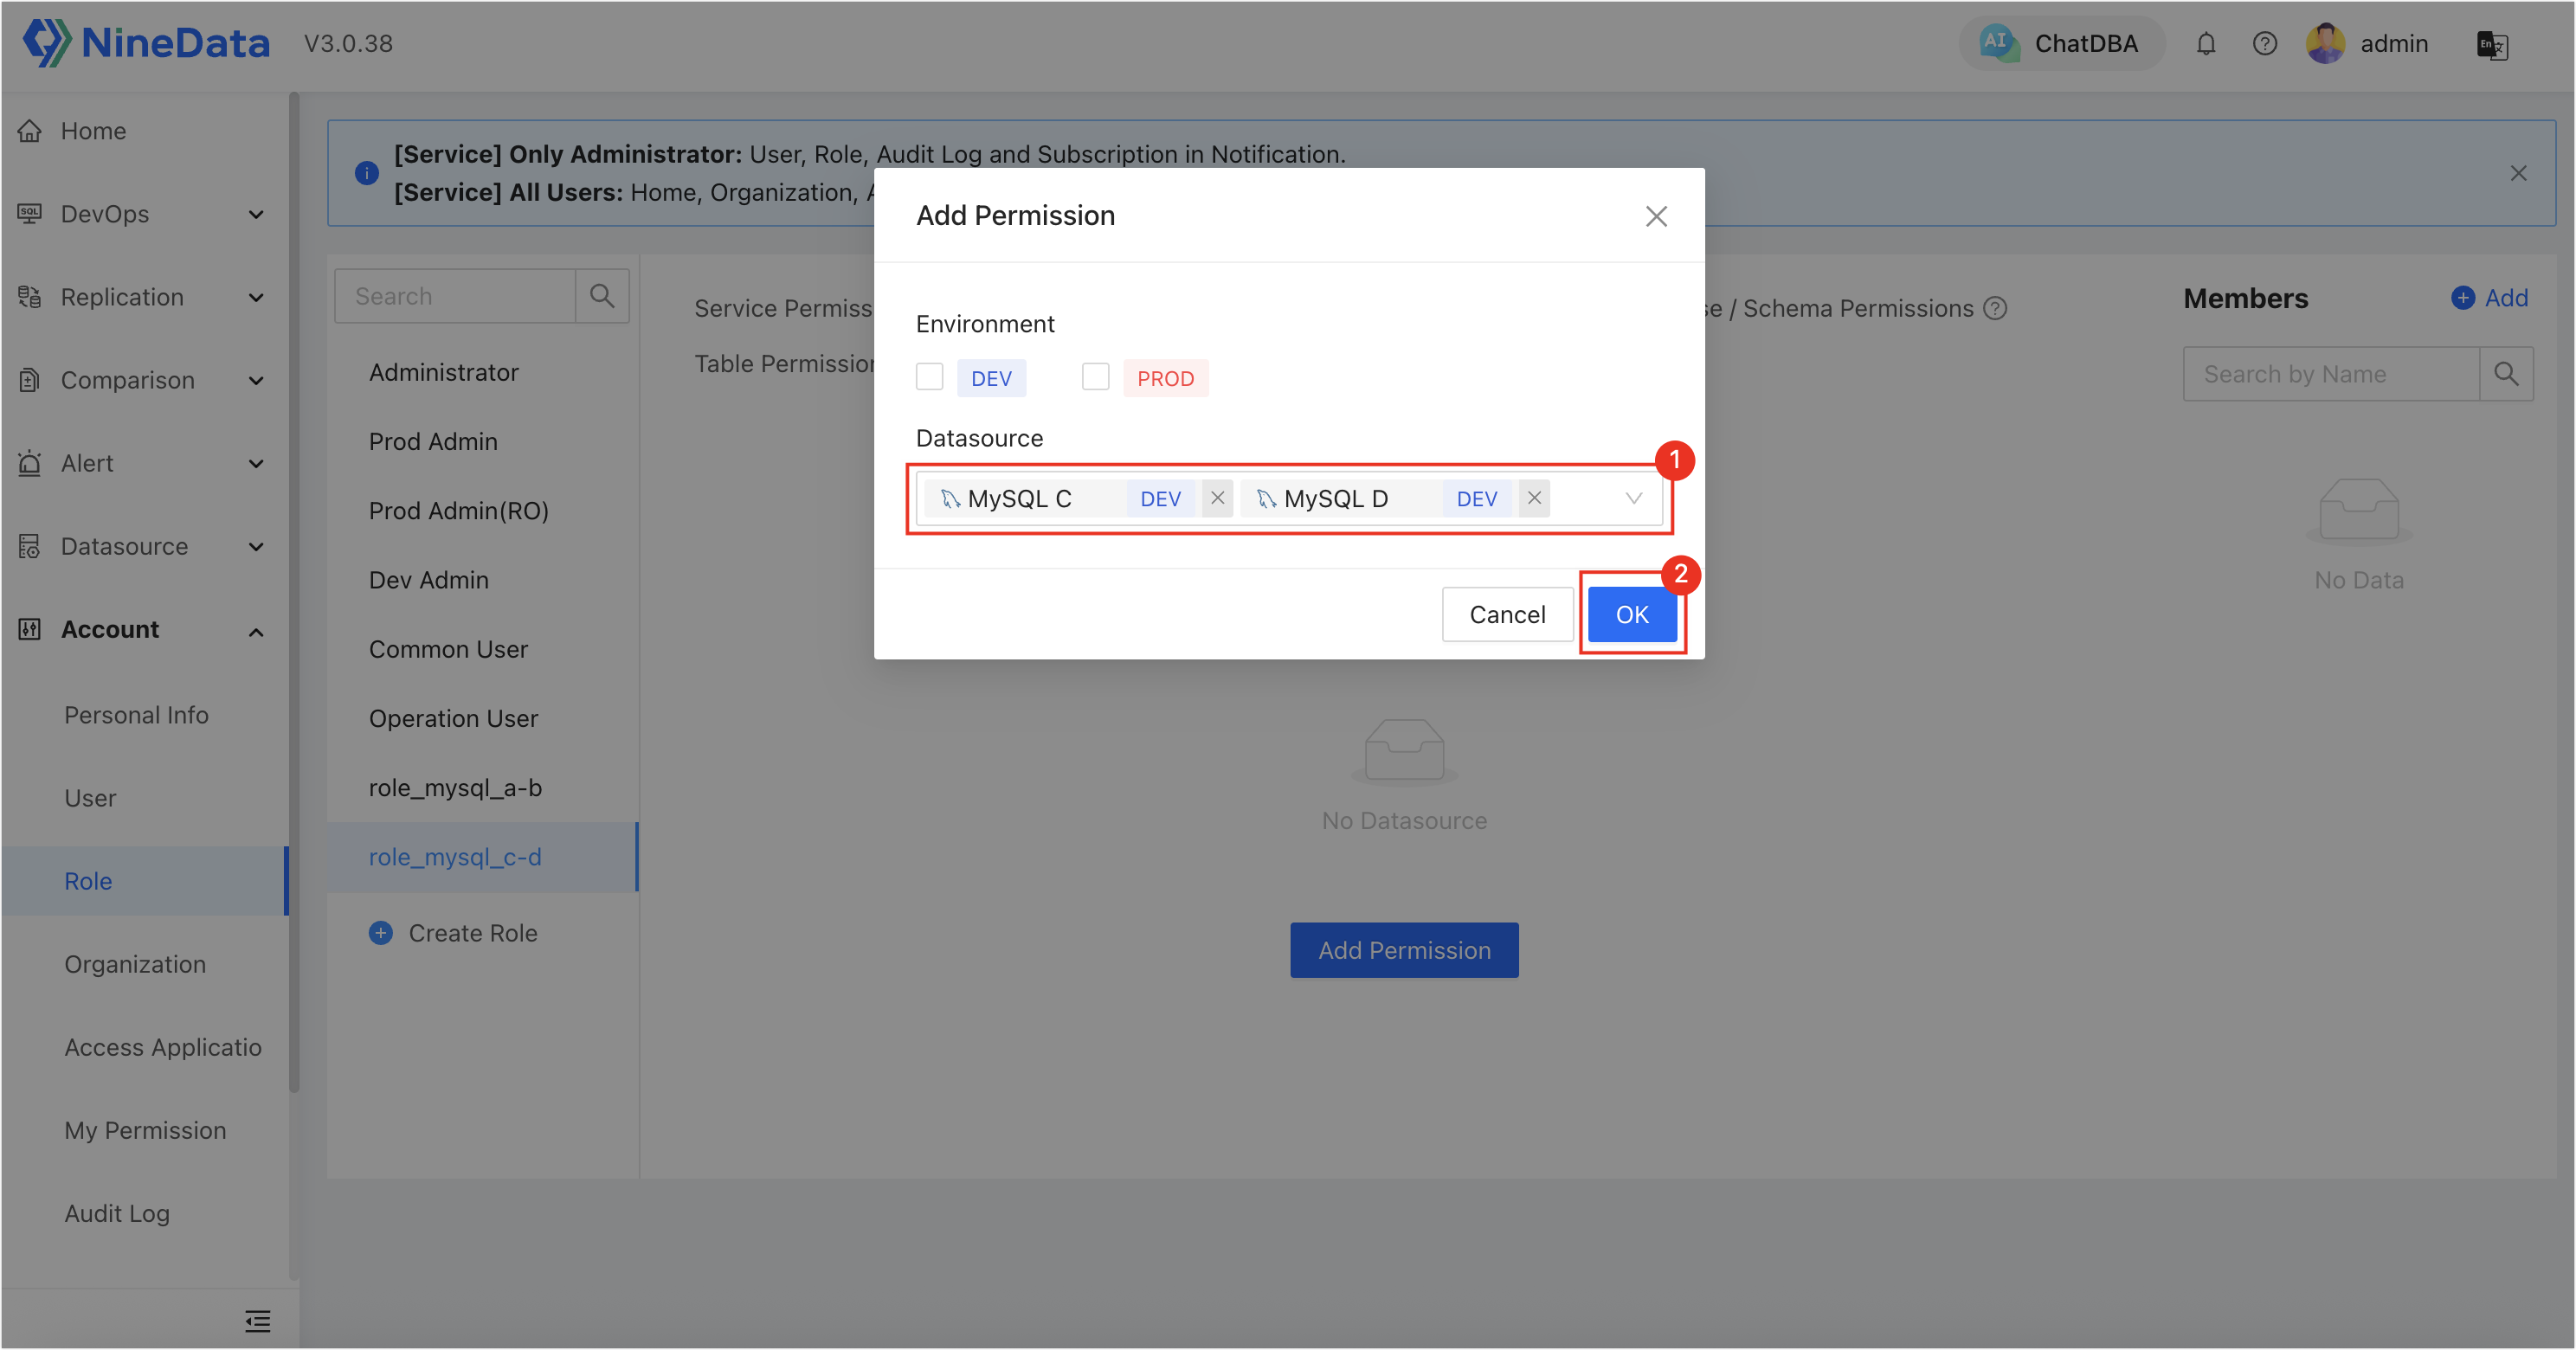
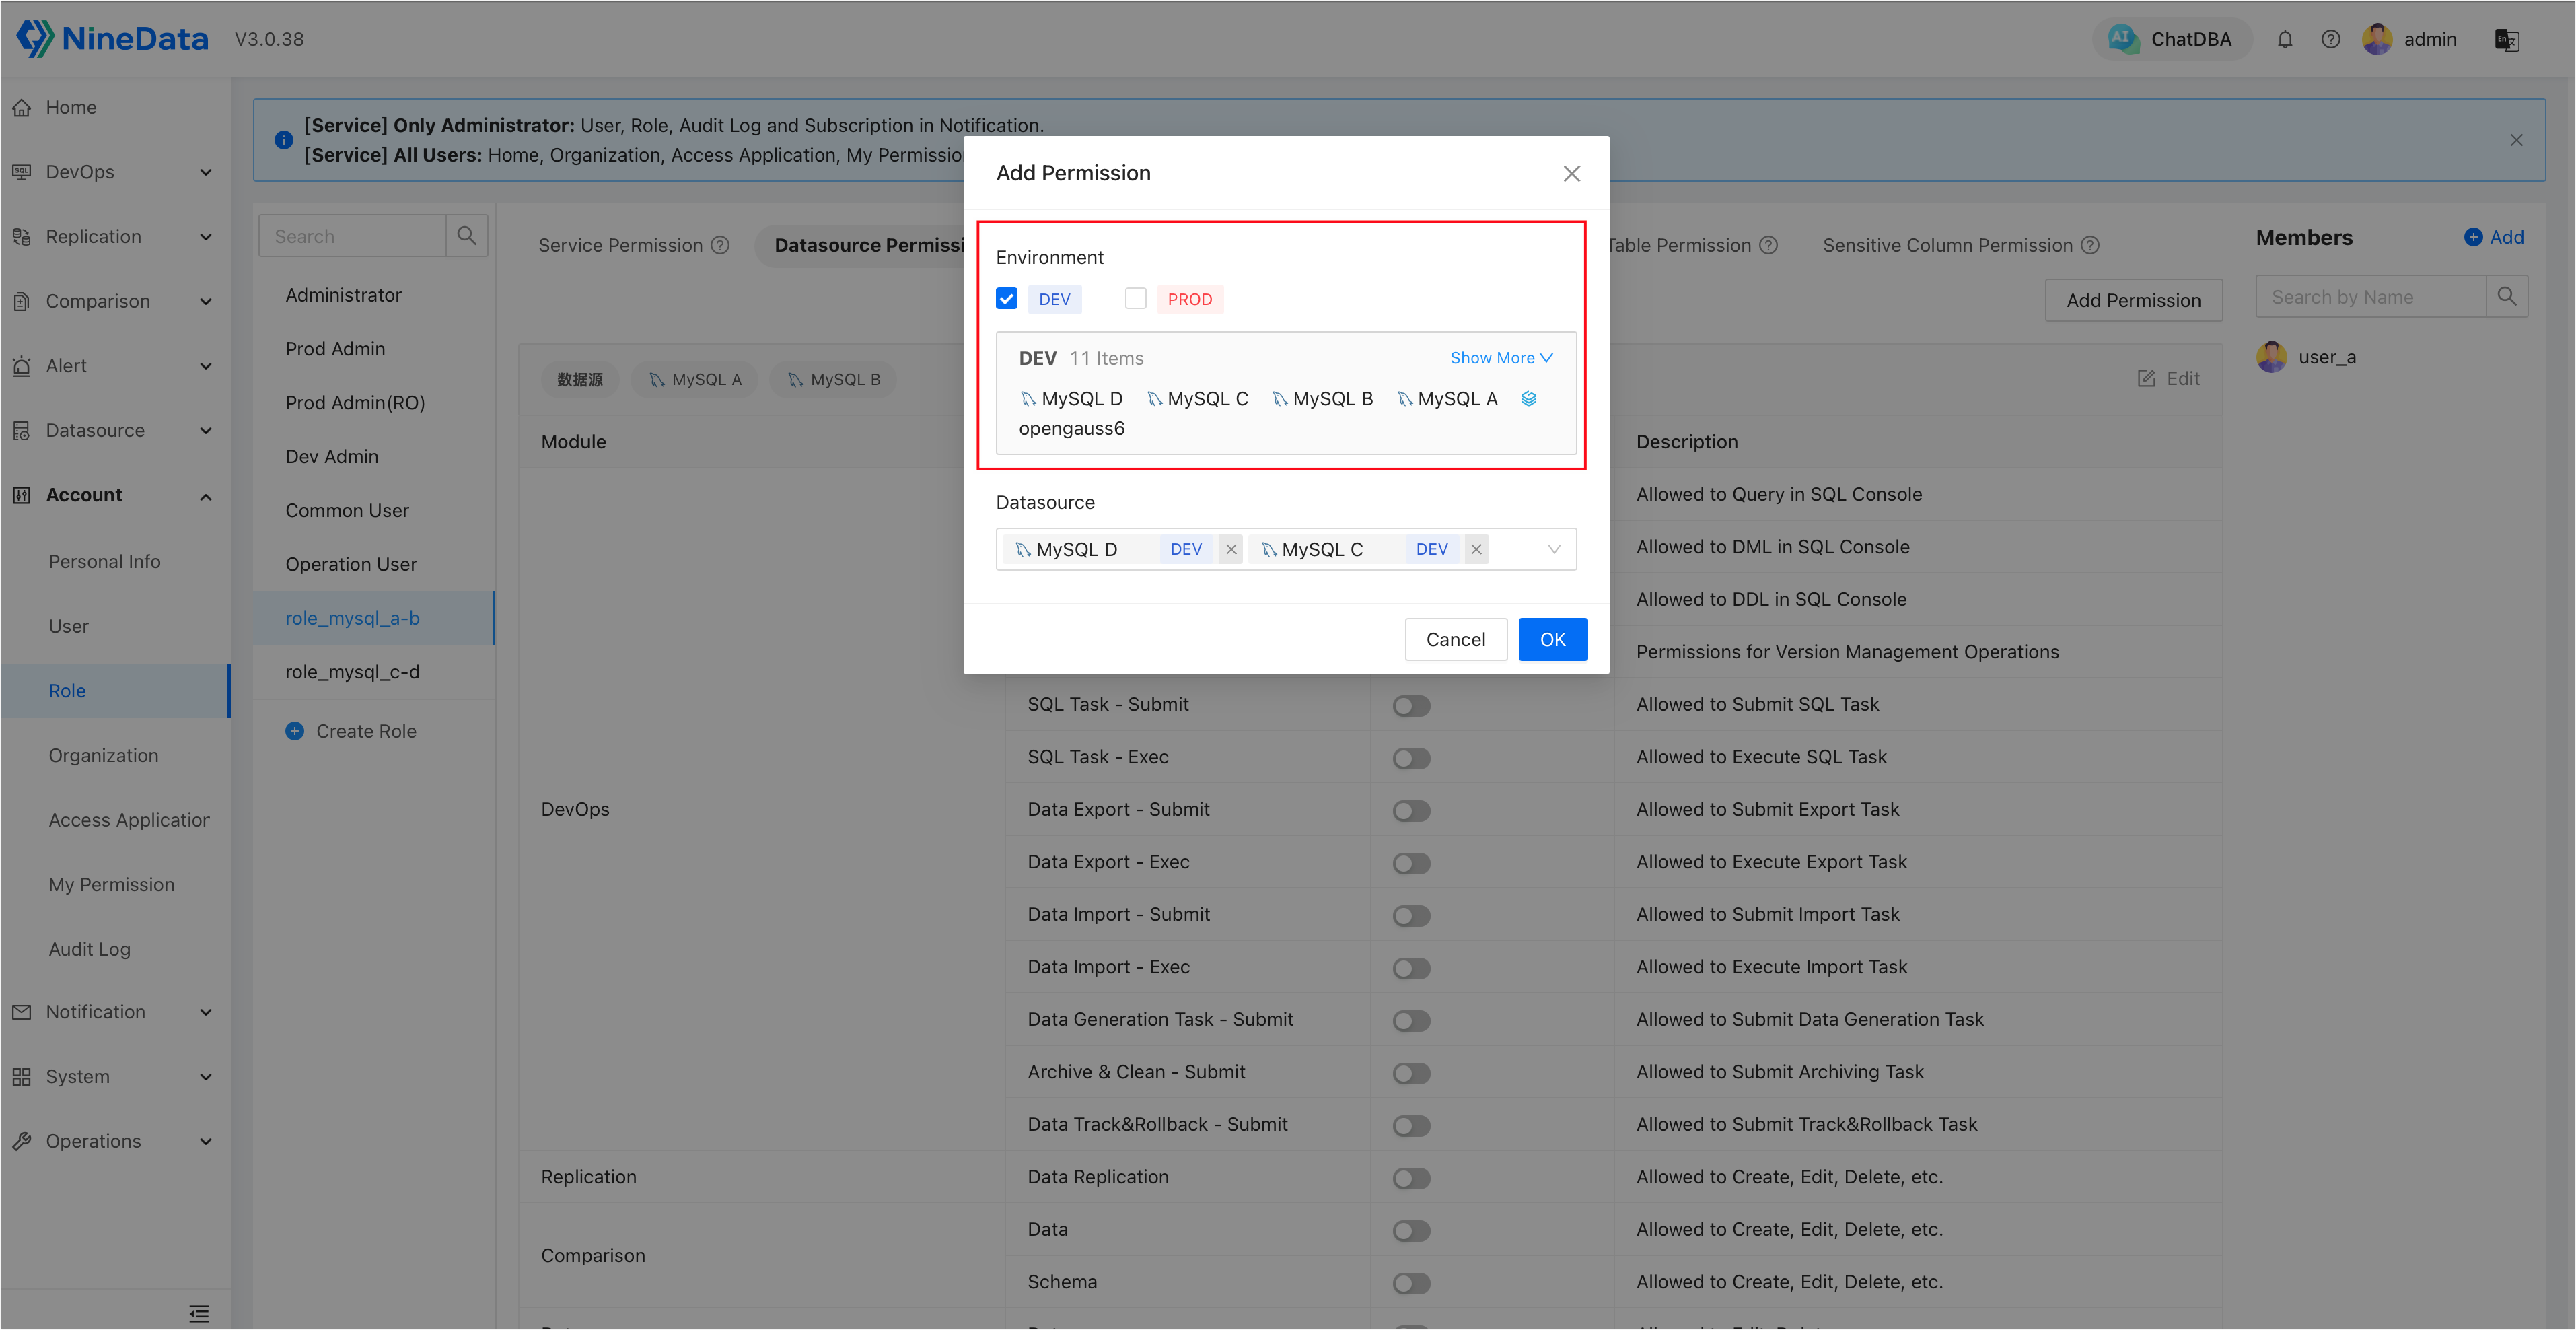
tipIf your data sources are grouped by environment and a role needs access to every data source in one environment, select the environment name under Environment.
Step 2: Create Users and Bind Roles
Sign in to the NineData console with a system administrator account.
Go to Account > User.
Click Invite, create two users, and bind each user to the roles created in Step 1. Click OK. NineData generates login credentials.
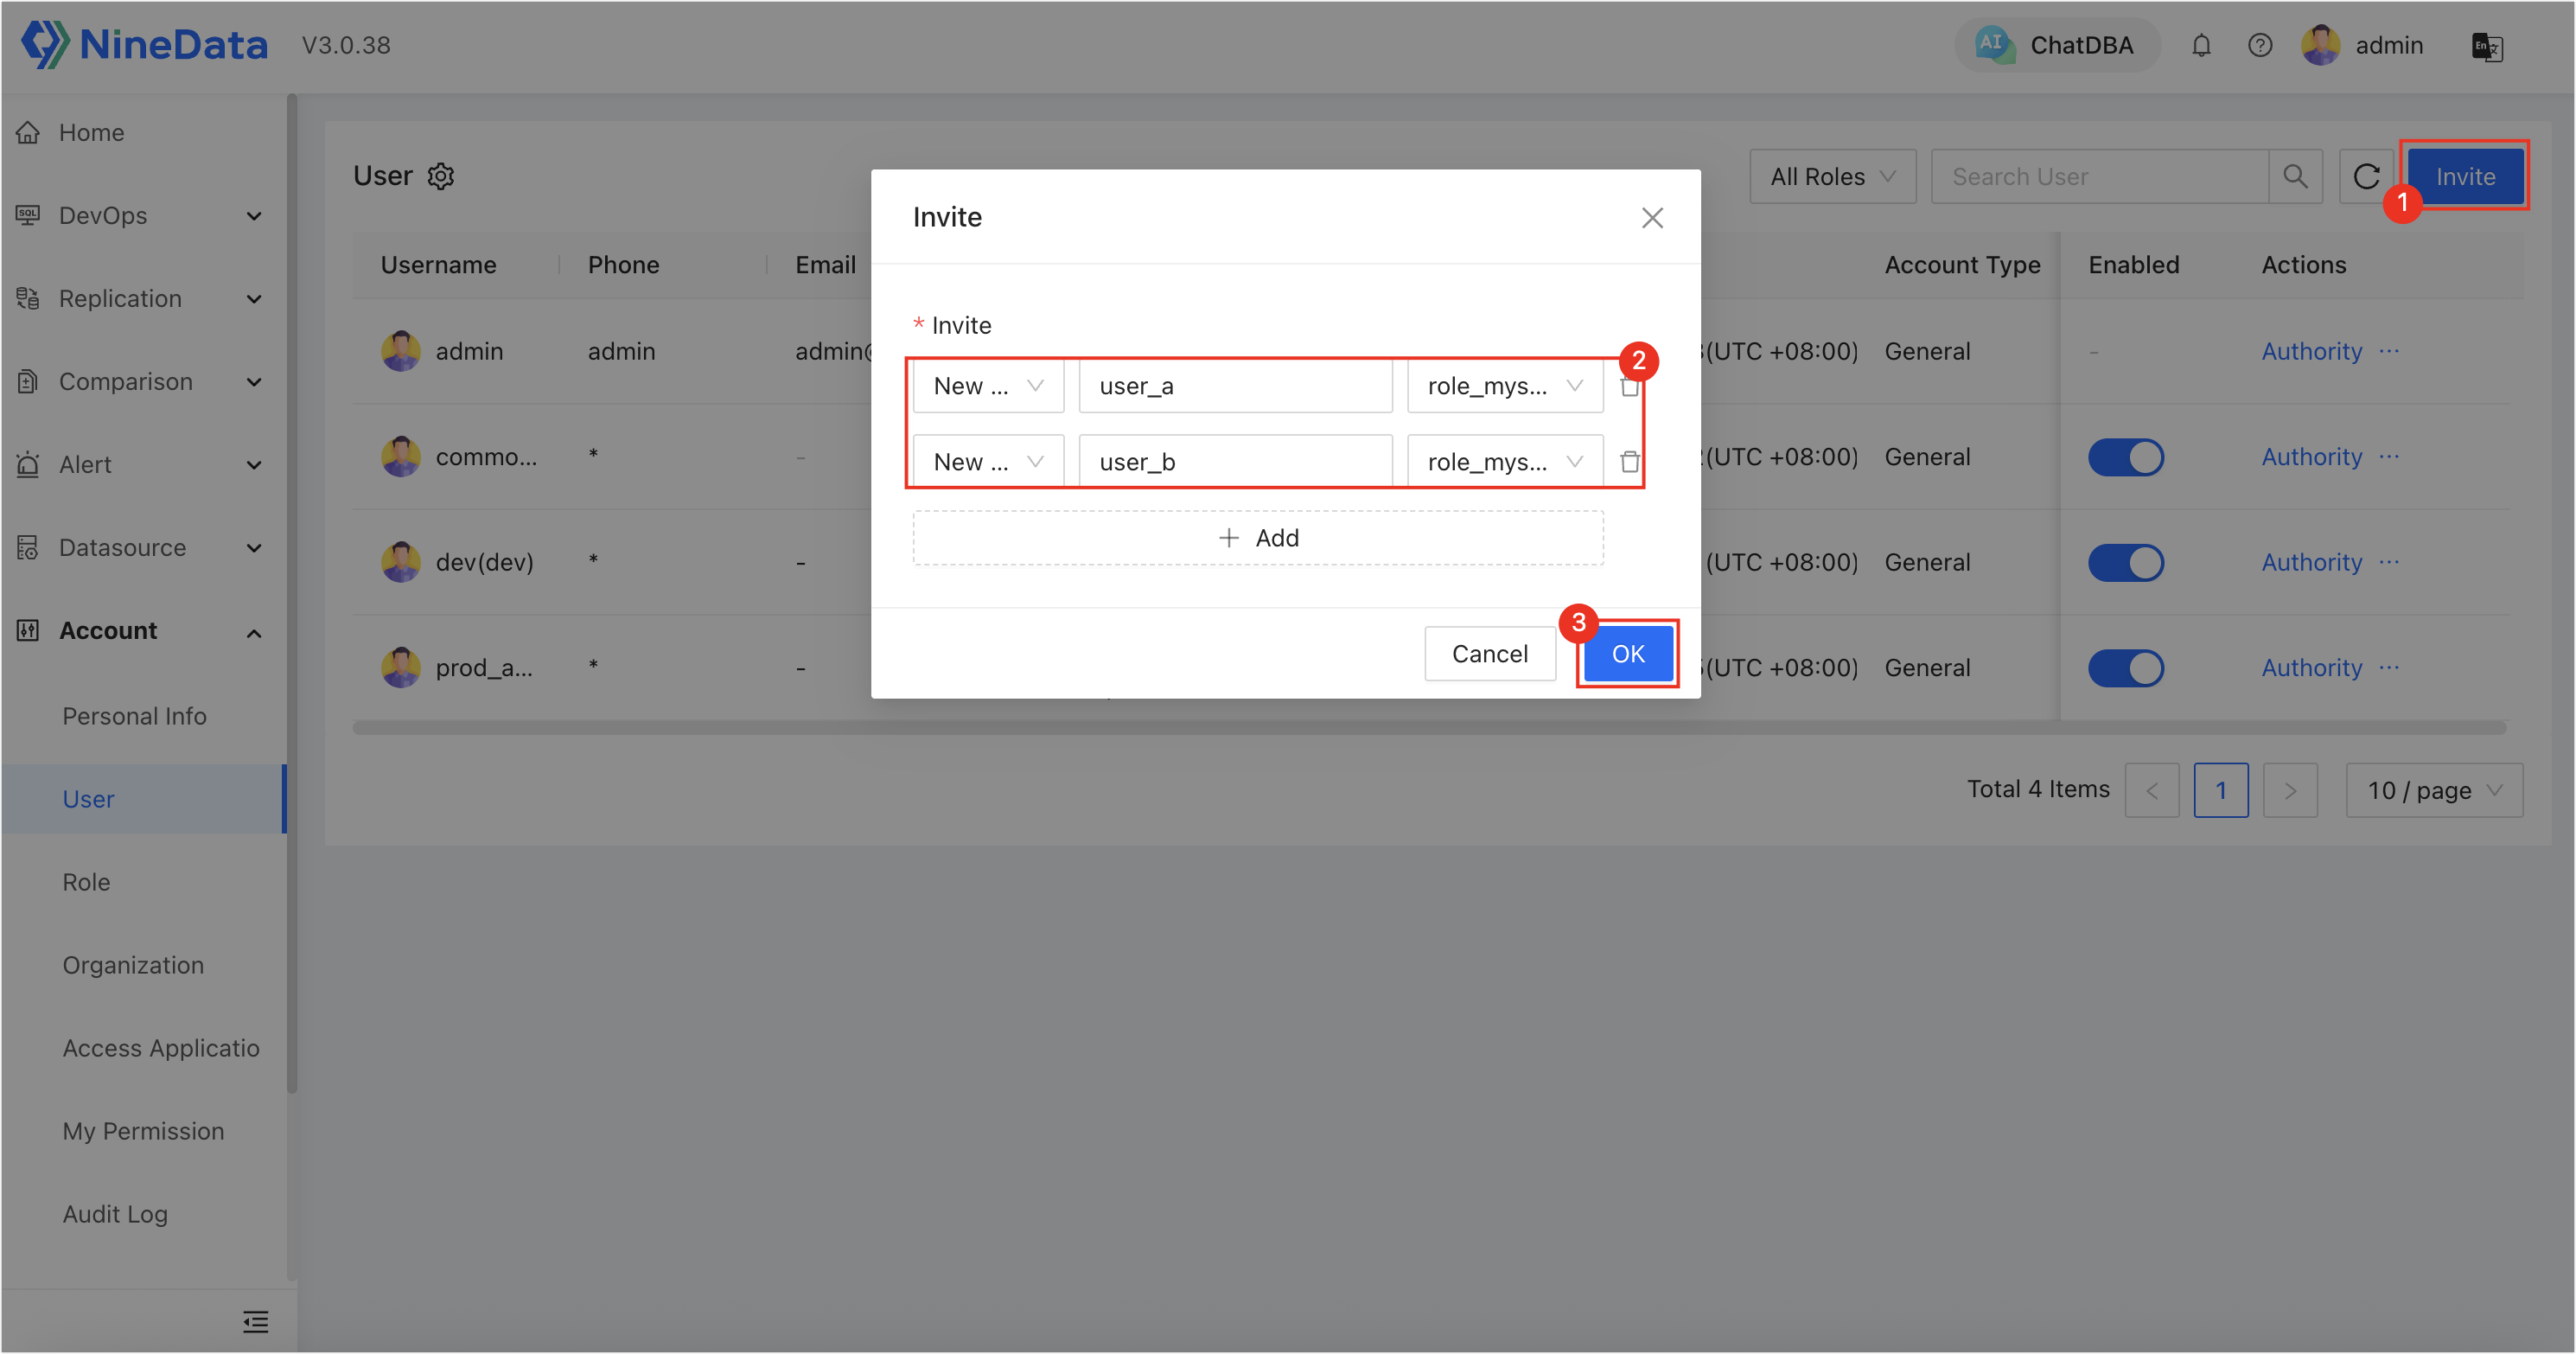
user_a: bound torole_mysql_a-b.user_b: bound torole_mysql_c-d.
Step 3: Use user_a or user_b to View and Attempt Task Operations
Sign in to the NineData console with either of the accounts created in Step 2. This example uses
user_a.Go to Operations > Schedule. On the Task List page, the two replication tasks created by the admin are visible. In this example,
rp-dcpvjufzhzcjis the task for whichuser_ahas data source permission.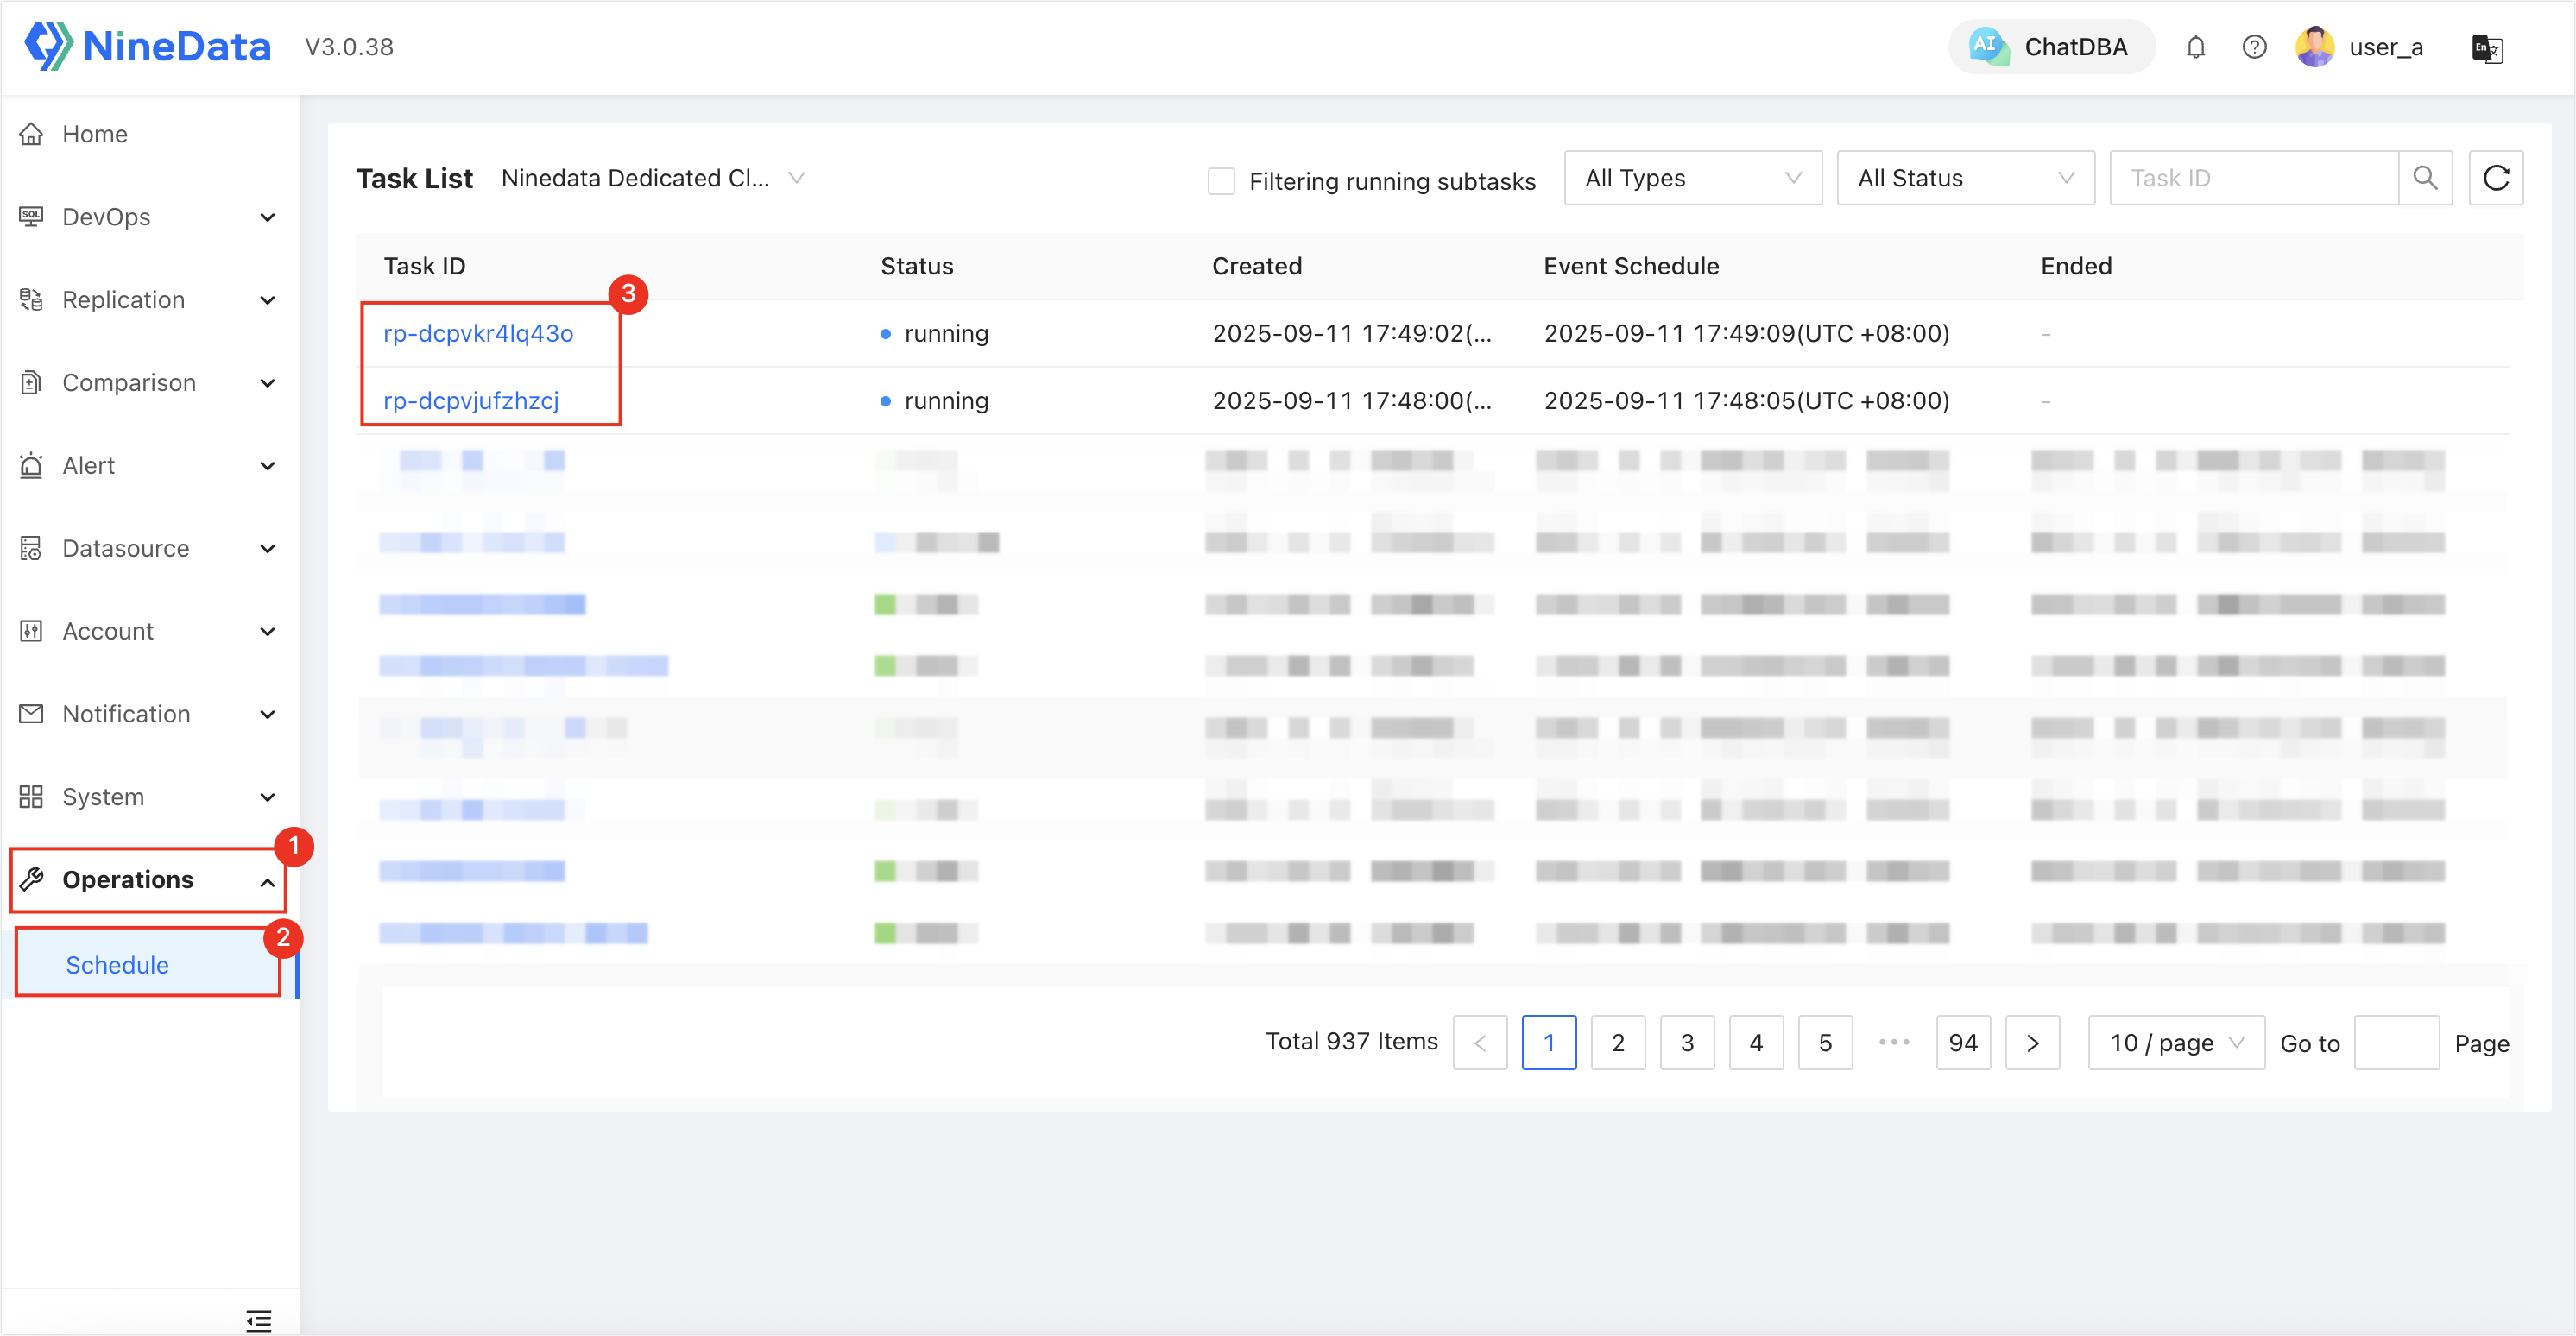
Click the permitted task ID to open the details page, view task details, and perform all available operations.
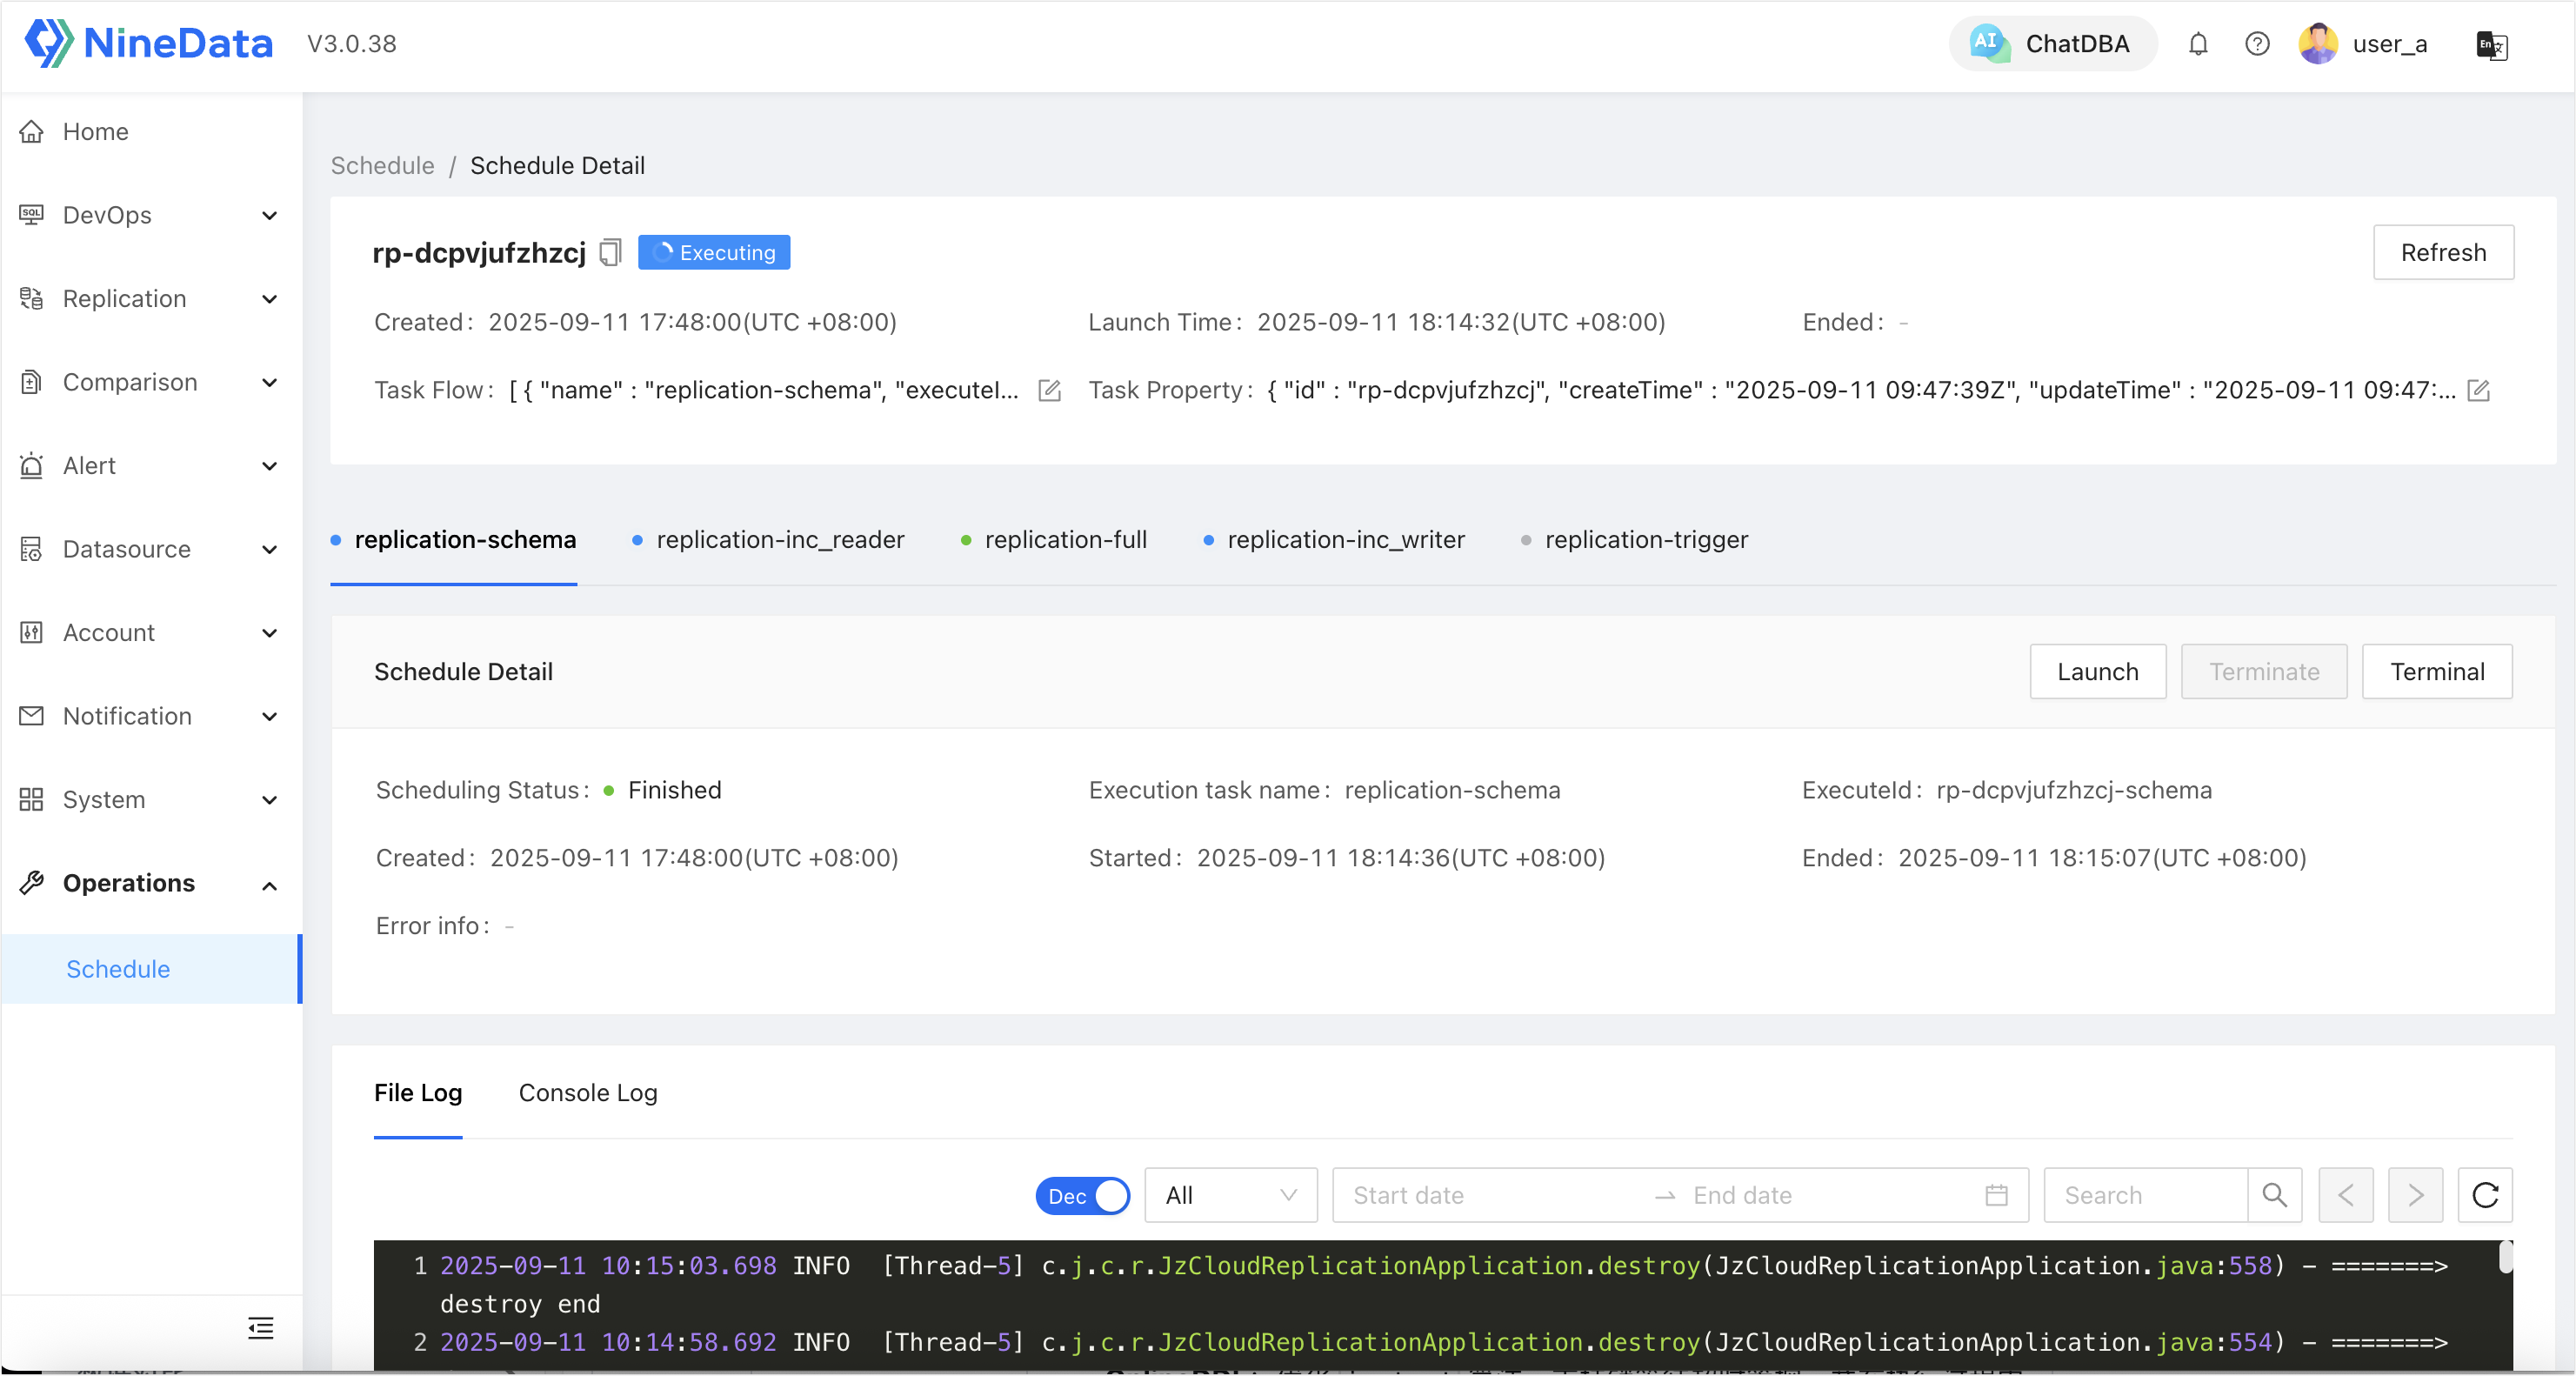
Return to the task list and click a task ID for which the user has no permission. The user can view the task details, but all task operations are blocked and a no-permission message appears.
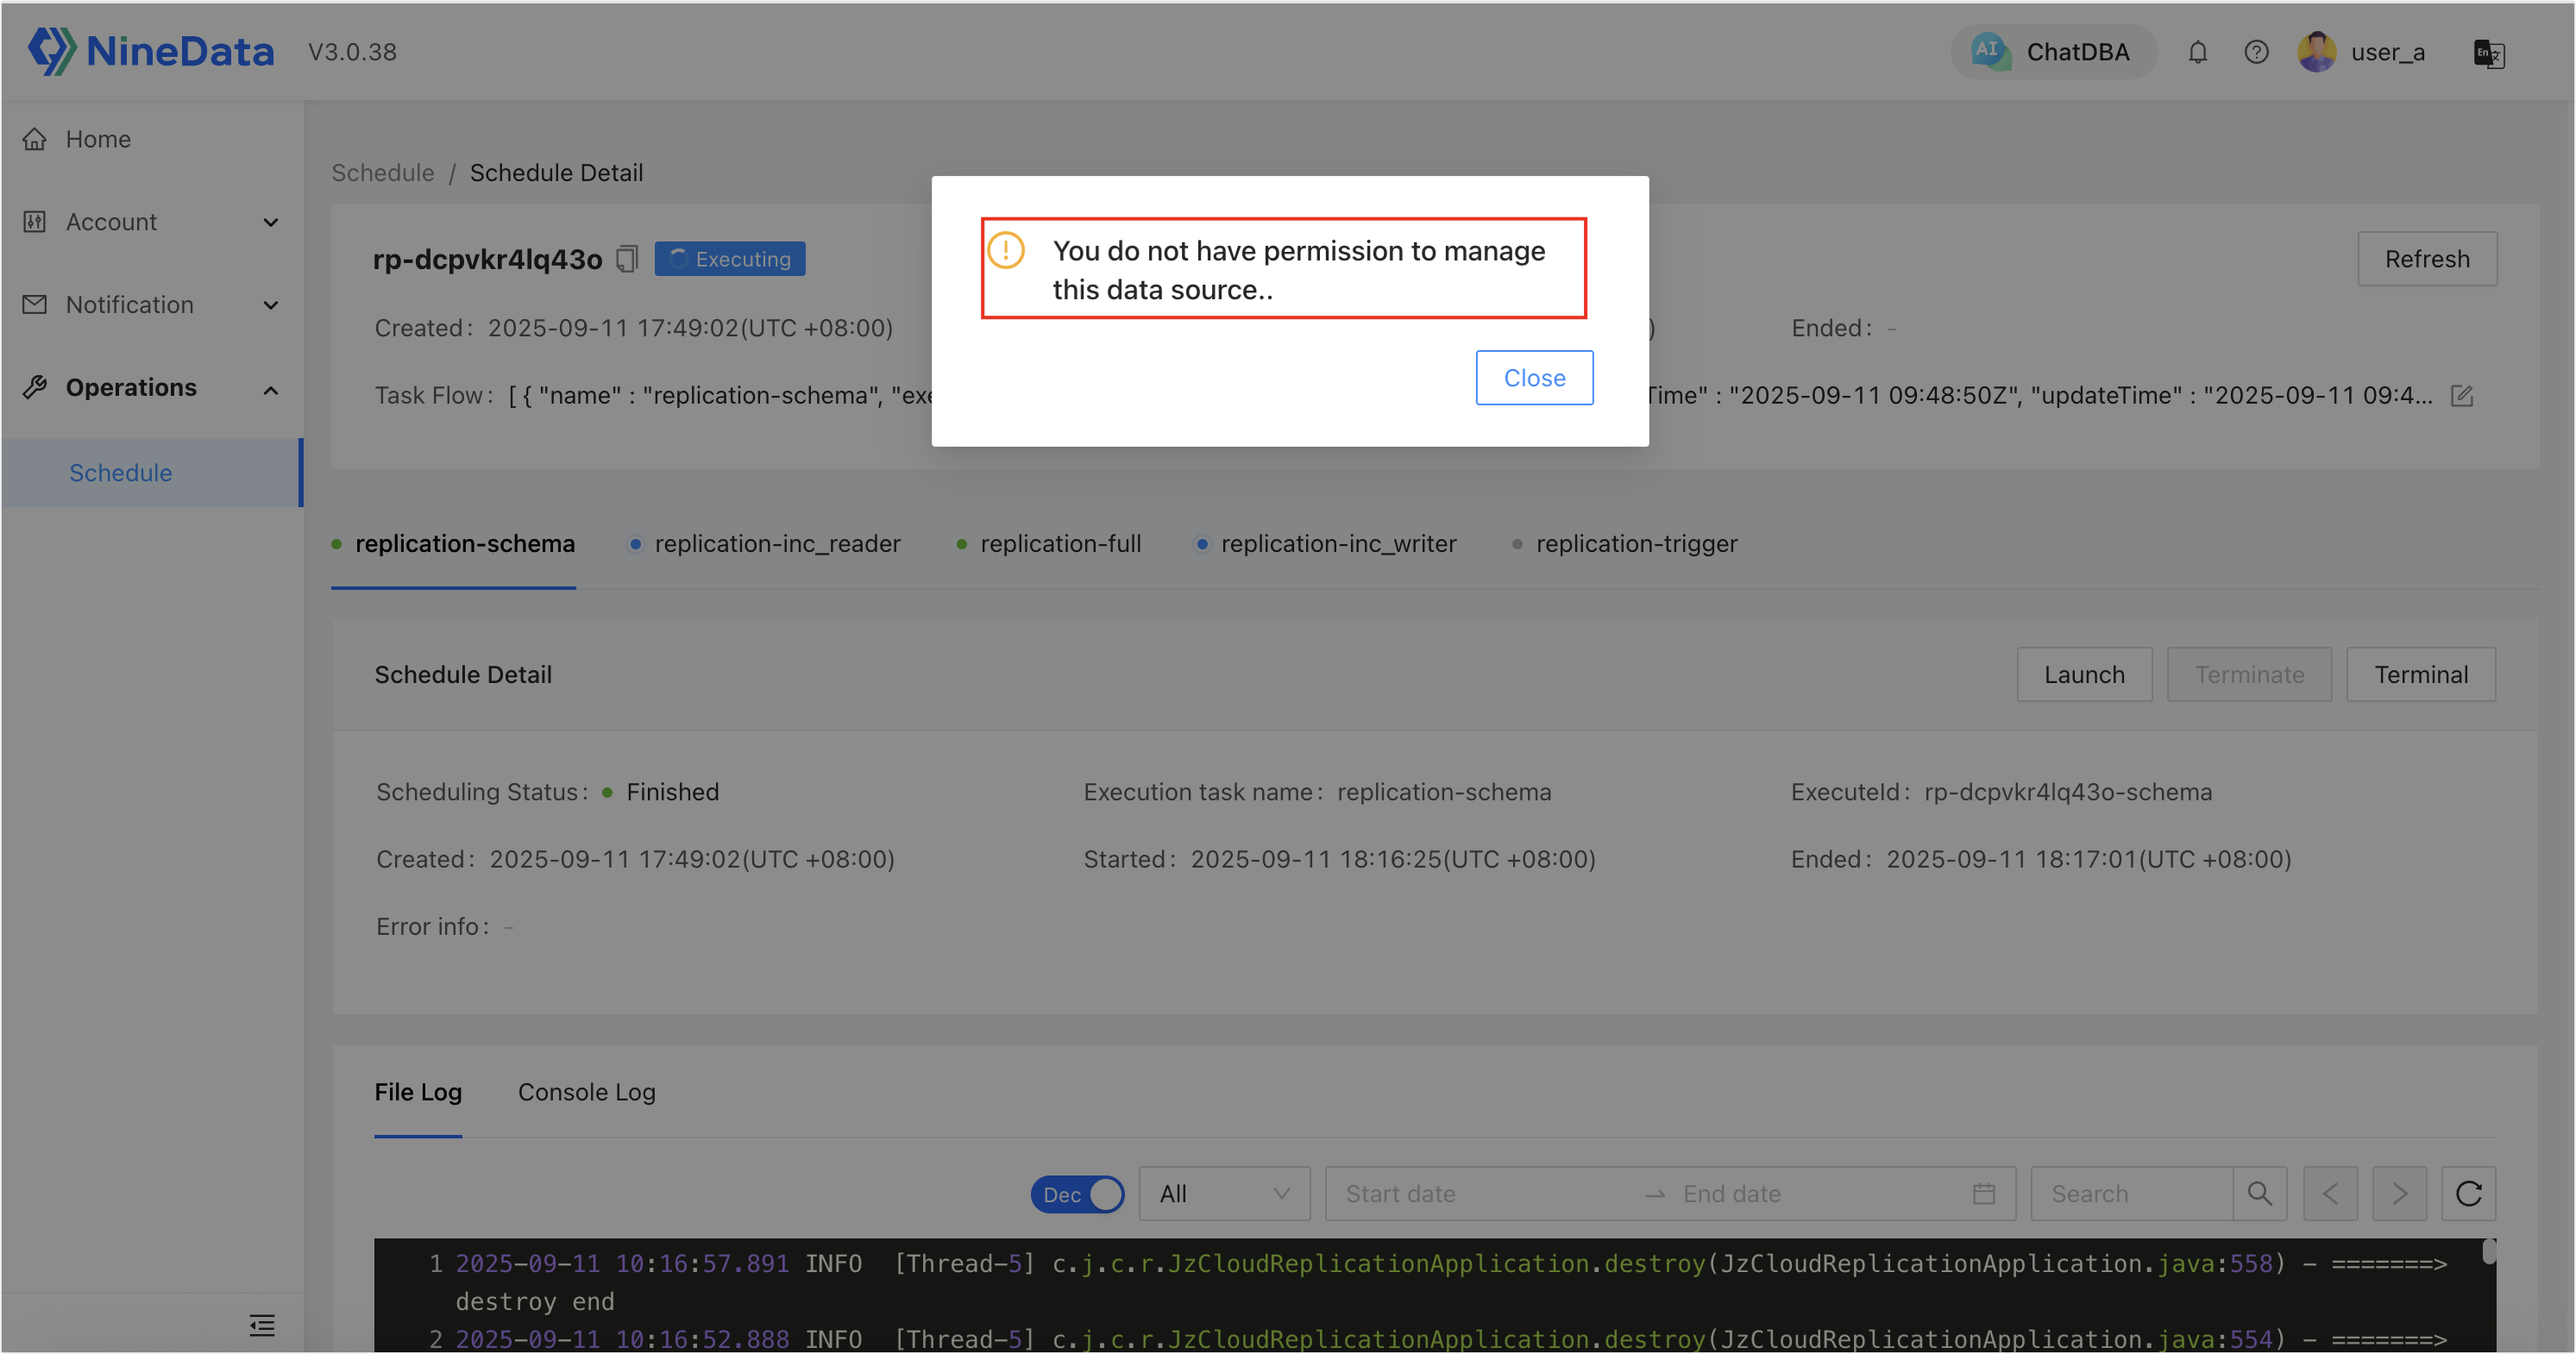
Result
Users can view task information across the Operations Center, but task operations are limited by the data source permissions assigned to their user account or role. This helps administrators keep shared task visibility while preventing unauthorized task changes.