Schema Design and Release
Use Schema Design and Release to move database changes through development, test, and production environments in a controlled workflow. NineData collects baseline changes, generates ordered SQL scripts, and helps teams validate and approve database changes before production release.
How it works
Enterprise database changes usually move through multiple environments before production. To protect production data, many teams require SQL scripts to run and pass validation in a lower environment before release. During development, the same change set may go through several rounds of edits. If those changes are not applied to production in the correct order, teams may miss changes or cause application release failures.
Schema Design and Release consolidates change tasks executed against the baseline data source in the development or test environment into one SQL script. NineData preserves the execution sequence and dependencies. When users submit changes to non-baseline data sources, administrators can require changes to be executed only from the generated SQL script, reducing errors caused by missed or out-of-order changes.
Project administrators can monitor workflow progress and execution status. Developers and collaborators can view task status, identify issues earlier, and keep the release process moving.
Script tasks and cross-environment releases
In addition to SQL tasks, a Schema Design and Release workflow supports script tasks. A script task runs a defined, tested script and works as a subtask alongside SQL tasks. Configure different task types for different nodes to include database changes, artifact-package uploads, and artifact-package downloads in one release workflow.
For example, run database changes and an artifact upload script in a development node, then run an artifact download script and subsequent database changes in a test or production node. The workflow advances in node order and tracks every task in the cross-environment release.
Script tasks are not bound to a data source or environment. When you create one, select the script object associated with the workflow node and provide the required input parameters defined by that script. If the script returns a file identifier, a later node can use it to hand off the artifact package.
View and maintain task people
In 5.3.3, the DevOps task details page adds a View People entry. Use it to view and maintain the people associated with the task. The task creator and administrators can edit the people configuration, and people can be assigned by account or role. The entry name, editable scope, and people visible to the current account depend on the current console.
Add a script task to a release workflow only after the script, its inputs, and its artifact-transfer method have been tested. Keep fixed paths and file-naming rules in the script where possible; avoid changing them when a task is running.
Before you begin
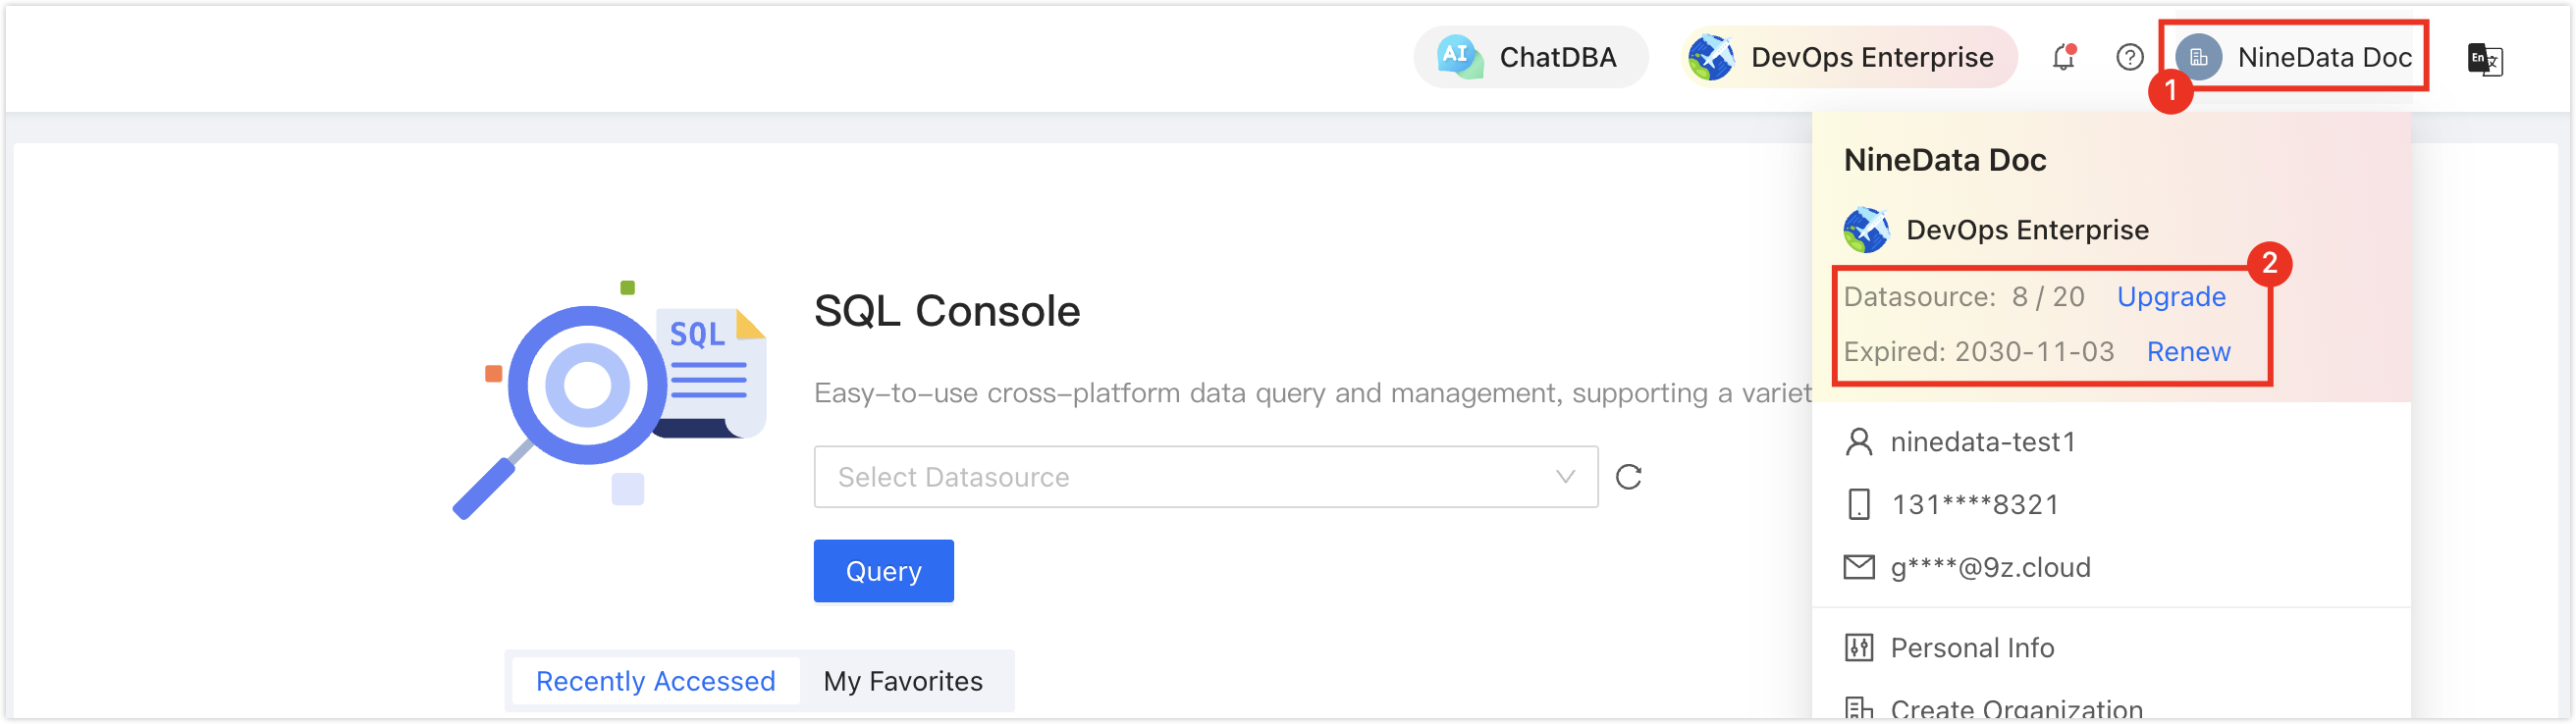
In the commercial versions (DevOps Pro, DevOps Enterprise), make sure your monthly or yearly subscription has not expired. An expired subscription may prevent you from using the Database DevOps service. Check the remaining quota and expiration date in the NineData Console header.
Procedure
Follow these steps to configure a process template, create a Schema Design and Release workflow, submit change tasks, and move the workflow through its nodes.
Configure a Schema Design and Release process
NineData includes a default process configuration with two nodes: Publish to Dev and Publish to Prod. These nodes allow development team members to skip the current node, edit SQL executed in the previous node, and roll back to the previous node.
Edit the default process or create a new process from it. This procedure uses a new Schema Design and Release process as the example.
Sign in to the NineData Console.
Go to DevOps > Policy & Process.
Click the Schema R&D Configuration tab, then click Create Process in the toolbar to open the Create Process window. Configure the process, then click OK.
Alternatively, click Duplicate in the Actions column of an existing process.
Parameter Description Duplicate Schema Design & Release Flow Select an existing Schema Design and Release process to create a new one based on that process. If you use Duplicate, NineData fills this field for you. Name Enter the name of the Schema Design and Release process, up to 32 characters. Description Enter a description of this Schema Design and Release process. Click the newly created Name, or click Details in the Actions column of the process to open the Schema R&D Details page.
Because the current process is copied from another process, edit the node whose No. is 1 first. Click Edit for this node, configure it for the task type that the first node must run, and click OK.
- SQL task: Select SQL Task and change Datasource. The data source for the first node must be globally unique, or you cannot save the node configuration.
- Script task: Select Script Task, then select the script that this node can run under Target Script. A script-task node does not require a data source.
Click Add Node in the toolbar to add nodes to the process. For example, add a Test Environment node between the default Publish to Dev and Publish to Prod. Configure the node in the table, then click OK.
Parameter Description Node Name Enter the name of the node to be added. For example: Test Environment. Task Type Select the task type permitted in this node: SQL Task or Script Task. Each node supports one task type. If a release process must run SQL and a script in sequence, configure separate nodes. Datasource Displayed for an SQL Task node. Select the data sources available for changes in this node. Add data sources by By Envir. or By Datasource. Do not add the same data source or environment as the first node. - By Envir.: All data sources in this environment are available for changes in this node.
- By Datasource: Select the target database or schema for the target data source to control which data sources are available for changes in this node. Click Add Datasource to add multiple data sources.
Target Script Displayed for a Script Task node. Select the scripts that the node can run. After a Schema Design and Release workflow is created, collaborators can submit only the target scripts associated with that node and must provide the input variables defined by the selected script. Node Config - Allow Rollback: Whether to allow rollback from the current node to the previous node.
- Modify Alter SQL: Whether to allow users to edit SQL scripts when making changes to non-baseline databases in the standard process.
- Allow Skip: Whether to allow skipping the current node and directly advancing to the next node without executing any changes.
Script-task nodesA script-task node is not bound to a data source, database, or executor. If the first node is a script task, activate the process and then select this development process when you create a Schema Design and Release workflow. Provide the input variables defined by the first node's target script, and NineData creates the initial script task from those values.
After creating the nodes, sort, edit, and delete nodes on the page as required.
- Sort: Hover over the target node row, then click the
 icon next to No. to move the node up.
 - Edit: Click Edit in the Actions column of the target node to edit its details.
- Delete: Click Delete in the Actions column of the target node to delete it.
Shortcut switchesOn the Schema R&D Details page, use shortcut switches to edit node settings (Allow Rollback, Modify Alter SQL, and Allow Skip) without opening each node's edit page.
- Sort: Hover over the target node row, then click the
Return to the Schema R&D Configuration page, then turn on the switch in the Status column of the target process to activate it.
Create a Schema Design and Release workflow
Sign in to the NineData Console.
Go to DevOps > Schema Design & Release.
Click Create Schema Design & Release in the toolbar.
On the Create Schema Design & Release page, configure the workflow, then click Create Schema Design & Release.
Parameter Description Name Enter a workflow name. Use a meaningful name so collaborators can identify the release. Up to 64 characters are supported. Baseline data source/database group/development process Select the baseline object type. Select Data Source or Database Group for a database-change workflow. Select Development Process for a script-first workflow; the list includes only development processes whose first node is a script task. Process Template (Optional) Select a process template. After you select Process Template, Datasource / DbGroup / Flow Config lists only the data sources bound to that template. If you leave this field blank and select Datasource / DbGroup / Flow Config first, NineData selects the process template bound to that data source. Datasource / DbGroup / Flow Config When the baseline object type is Datasource or Database Grouping, select the baseline data source. NineData organizes all SQL executed against this data source into scripts in execution order. The process can restrict non-baseline database changes to this generated SQL script. Development process When the baseline object type is a development process, select a process whose first node is a script task. NineData displays the script and input variables associated with that node. Database Select a database as the baseline database. Configure this field only when the baseline object is a data source or database group. Executor Select the user who executes SQL after the change is approved. Configure this field only when the baseline object is a data source or database group.
Note: The options in the Executor list depend on whether the data source uses development specifications:- If the current data source is configured with development specifications, the options are based on the SQL Task Executor Config rule in the current specification. This rule is located on the SQL Task & Console tab. For configuration details, see Edit Specifications.
- If the current data source is not configured with development specifications, the options are users who have the SQL Task - Exec permission for the current data source. For permission configuration, see Configure User Permissions.
Collaborator (optional) Select collaborators who can participate in the current Schema Design and Release workflow and help drive development work. Note (optional) Add notes for unfinished items in the current Schema Design and Release workflow. On the details page, hover over a long note to view the full text. Input variables Displayed when the baseline object is a development process. Provide the required inputs defined by the first-node script. NineData passes these values to the initial script task. A database, executor, and change SQL are not required. Alter SQL Enter the change SQL to execute, or upload a file that contains the change SQL. - SQL Text: Enter the SQL statement directly in the text box.
- SQL File: Click Upload File, then select and upload the file that contains the SQL statements to execute.
Note: After uploading, hover over the uploaded file name and select to preview the file or
  to delete it.
NineData opens the task details page and creates the initial task based on the baseline object:
- Data source or database group: NineData creates a SQL change task for the baseline database. In Task List, move this task from Submit Approval to Execute. Continue after the task status changes to Success.
- Development process: NineData creates the first-node script task and passes the input variables from the creation page to that task. Run the script task immediately after it passes the precheck.
In the Schema Design and Release task editor, select SQL code to start an AI query. NineData passes the relevant task context, and you can insert the AI response back into the editor. Review the change scope and execution risk before using inserted content.
Use the Schema Design and Release process
The Schema Design and Release process can have multiple nodes. Advance through each configured node in order. By default, the process contains Publish to Dev and Publish to Prod. Each node has a task list. Collaborator can submit SQL tasks or script tasks permitted for the node.
Submit tasks
For a node that allows script tasks, select the target script associated with that node and provide its required input parameters before you submit the task. Script tasks do not require a data source, database, or executor and run immediately. After a task completes, the workflow records its execution status and result. When a later node needs SQL or an artifact package produced by an earlier task, select that task only from the source scope allowed by the node configuration. If a script returns a file identifier, use it as the artifact handoff information for the later node.
Sign in to the NineData Console.
Go to DevOps > Schema Design & Release, not Datasource > Policy & Process.
Click the target Pipeline ID, or click Details in the Actions column.
In Task List, click Submit. Configure the task in the dialog, then click OK.
Parameter Description Target Select the data source for the change. Target DB Select the database for the change. Executor Select the user who executes the current task after approval.
Note: The options in the Executor list depend on whether the data source uses development specifications:- If the current data source is configured with development specifications, the options are based on the SQL Task Executor Config rule in the current specification. This rule is located on the SQL Task & Console tab. For configuration details, see Edit Specifications.
- If the current data source is not configured with development specifications, the options are users who have the SQL Task - Exec permission for the current data source. For permission configuration, see Configure User Permissions.
Alter SQL Source Optional when neither Target nor Target DB is the baseline data source. In this case, select the data source where the task has been executed. The executed SQL script appears in the code box below. Alter SQL Optional when both Target and Target DB are the baseline data source. Enter the change SQL to execute, or upload a file that contains the change SQL. - SQL Text: Enter the SQL statement directly in the text box.
- SQL File: Click Upload File, then select and upload the file that contains the SQL statements to execute.
Note: After uploading, hover over the uploaded file name and select to preview the file or to delete it.
After you submit the task, its substeps, such as withdrawal, approval, execution, pause, and restart, follow the same process as a SQL task.
Advance the process
After all tasks in the current node reach the final state, Success, advance the development pipeline to the next node. Running tasks, tasks that passed the precheck but have not run, and failed tasks block advancement. Complete the task successfully or terminate a task that no longer needs to run. If the administrator enabled Allow Skip in Configure a Schema Design and Release process, advance the process even when the current node has no tasks.
Sign in to the NineData Console.
Go to DevOps > Schema Design & Release.
tipIf Schema Design & Release does not appear, make sure your console is in organization mode. To switch from personal mode to organization mode, see Switch to an organization.
Click the target Pipeline ID, or click Details in the Actions column.
In Task List, click Push to Next. In the confirmation window, click Push to Next again to advance the process to the next node. If there are no more nodes ahead, the development pipeline ends.
Roll back the process
If the administrator enabled Allow Rollback in Configure a Schema Design and Release process, and the current non-initial node has no tasks or all tasks have reached a final state, roll back the process to the previous node when required.
Sign in to the NineData Console.
- Go to DevOps > Schema Design & Release.
- Click the target Pipeline ID, or click Details in the Actions column.
- In Task List, click
 next to Push to Next > Rollback to Prev., then click Rollback to Prev. again in the confirmation window to roll back the process to the previous node.
Terminate a Schema Design and Release process
While a Schema Design and Release process is running, administrators cannot adjust node configuration, such as adding nodes, changing node order, renaming nodes, or deleting nodes. To change these settings, terminate the process first.
Sign in to the NineData Console.
- Go to DevOps > Schema Design & Release.
- Click the target Pipeline ID, or click Details in the Actions column.
- In Task List, click Terminate in the toolbar, then click Terminate again in the confirmation window.
Result
The Schema Design and Release workflow moves database changes through the configured nodes. Administrators can monitor progress, and collaborators can submit, approve, execute, advance, roll back, or terminate tasks based on the process configuration.