Manage organizations
Organizations let teams manage shared data sources, users, roles, and security settings in one place. Use this guide to create an organization, switch from personal mode to organization mode, and maintain organization-level settings.
Pricing
After you create an organization, NineData includes 10 DevOps Pro instances free of charge indefinitely. To activate paid DevOps Pro or DevOps Enterprise instances, see Billing overview.
Limits
A single account can create or join up to two organizations.
Create an organization
When you register a NineData account, NineData creates an organization with the same name as your username. To create another organization, follow these steps.
Before you begin
Register a NineData account. To register, open the NineData registration page.
Procedure
Sign in to the NineData Console.
Open the user avatar menu and click Switch Identities > Create Organization.
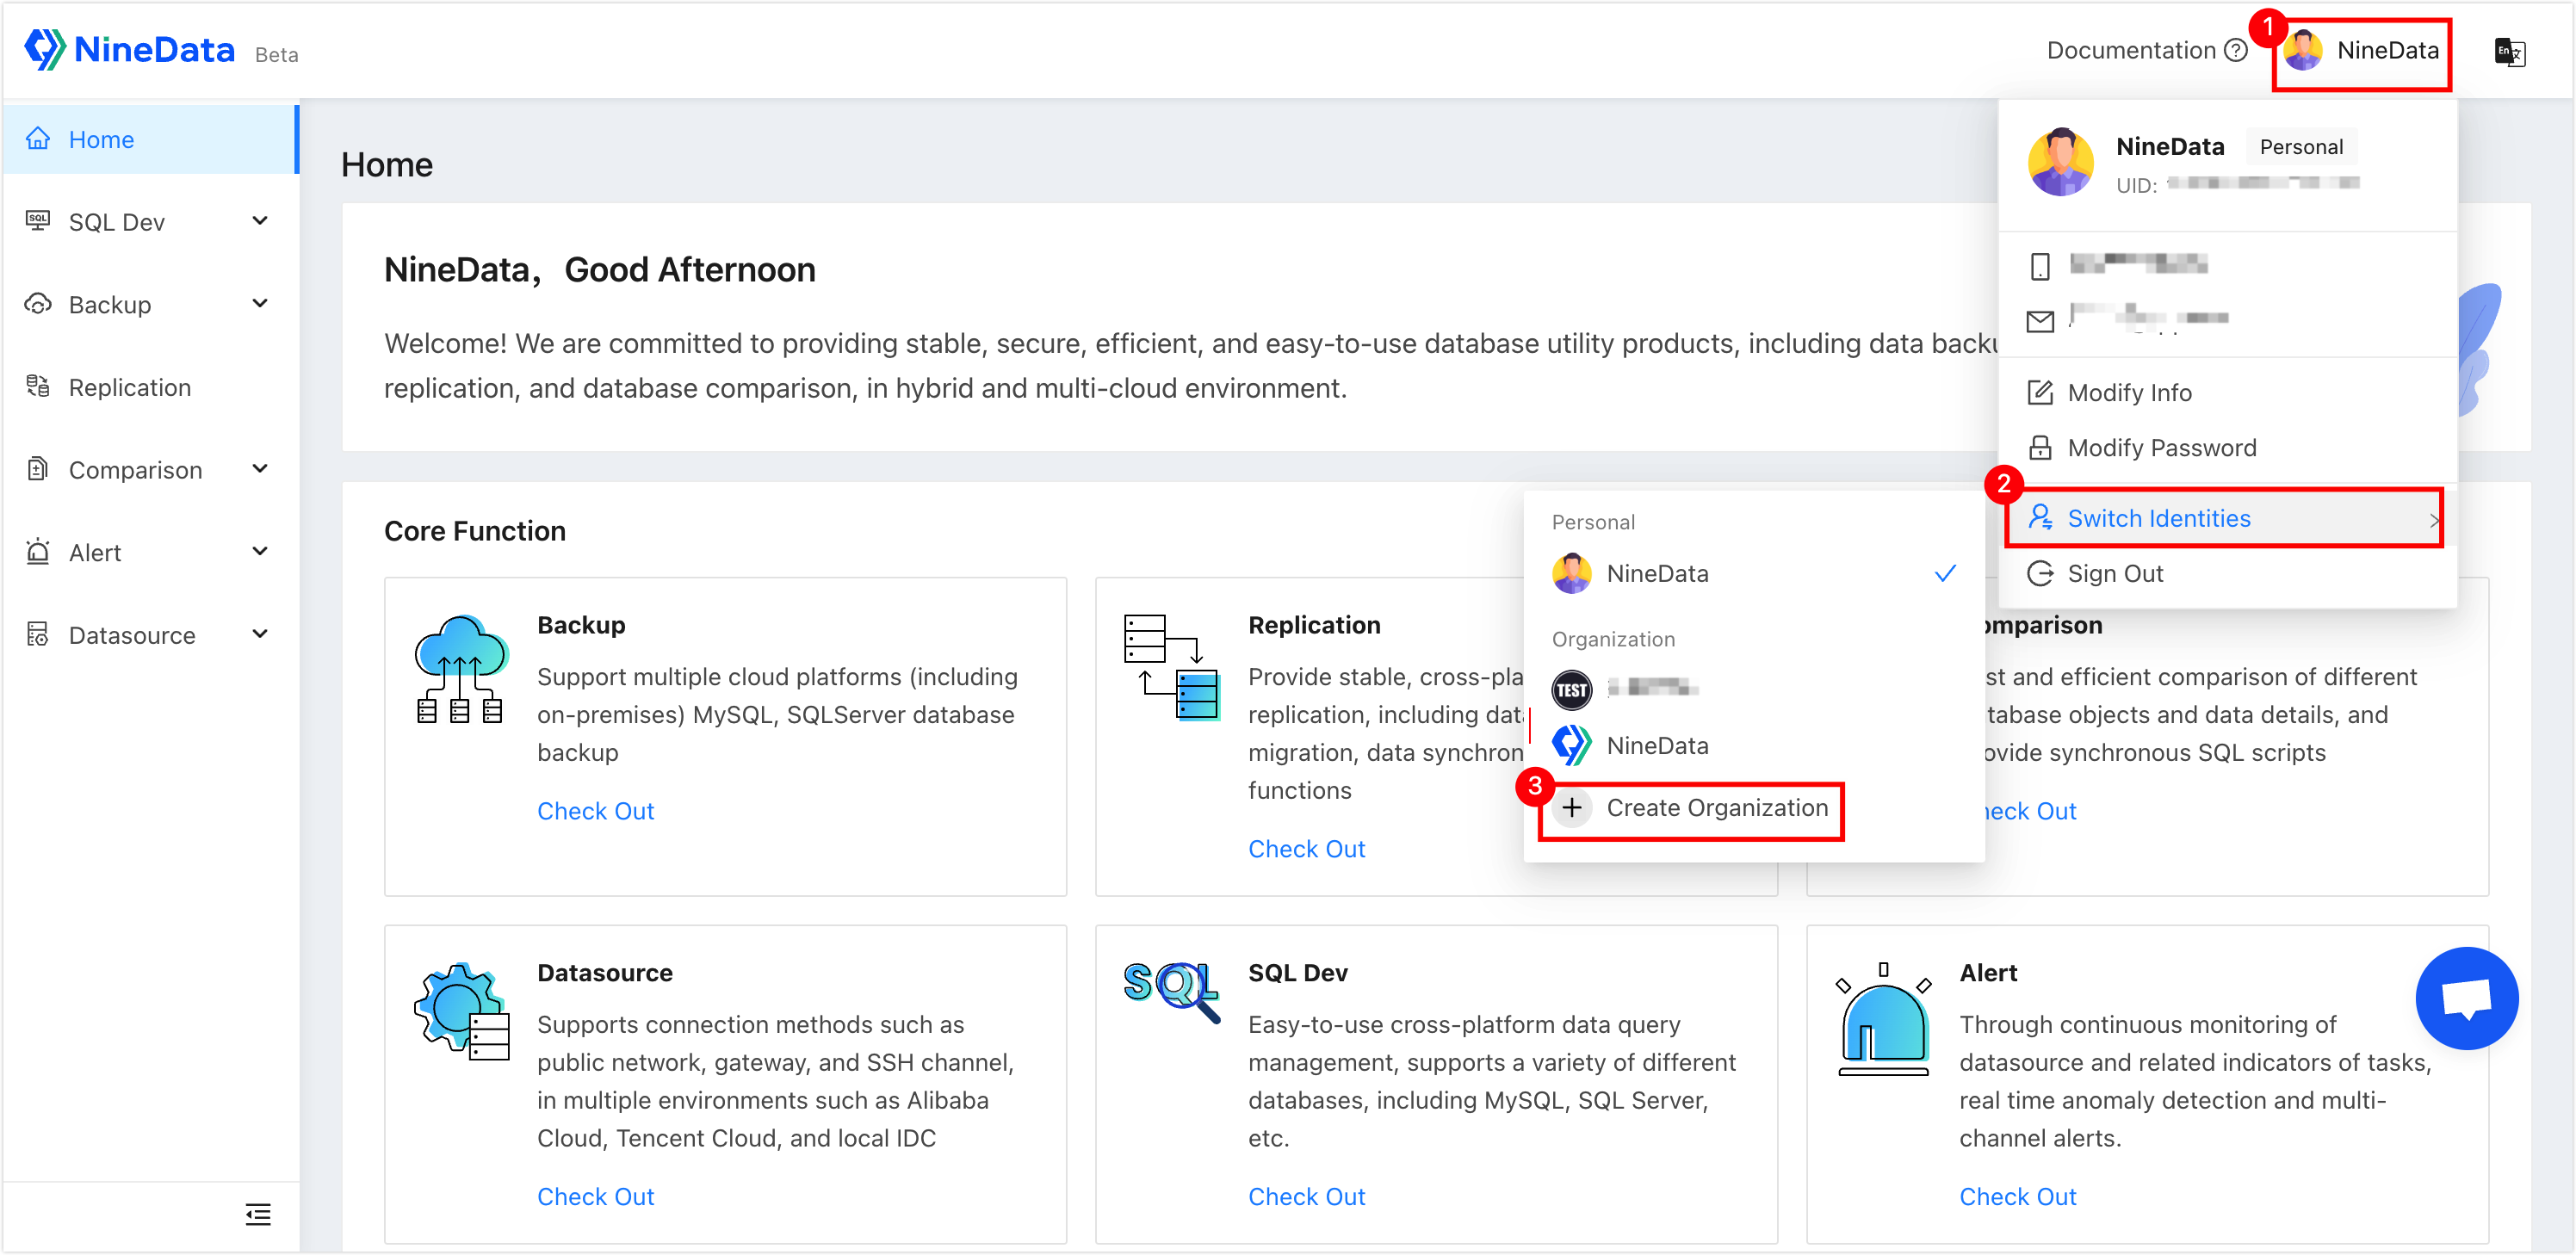
On the Create Organization page, configure the settings in the table.
Parameters Description Name Enter an organization name. Use a clear name for later identification. Up to 24 characters are supported. Invite (optional) Enter the email addresses of members to invite, select the role that each user receives after joining, and click Add to add each invitation record. Invite multiple users during organization creation. Note: To invite users later, see Invite users. Click OK to complete the creation of the organization.
Switch to an organization
Before you begin
- An organization has been created. For details, see Create an organization.
- The value of Account Type is General.
Procedure
Sign in to the NineData Console.
Open the user avatar menu, click Switch Identities, and select the created organization under Organization.
After the switch, open Account Management to manage organization users, roles, and settings.
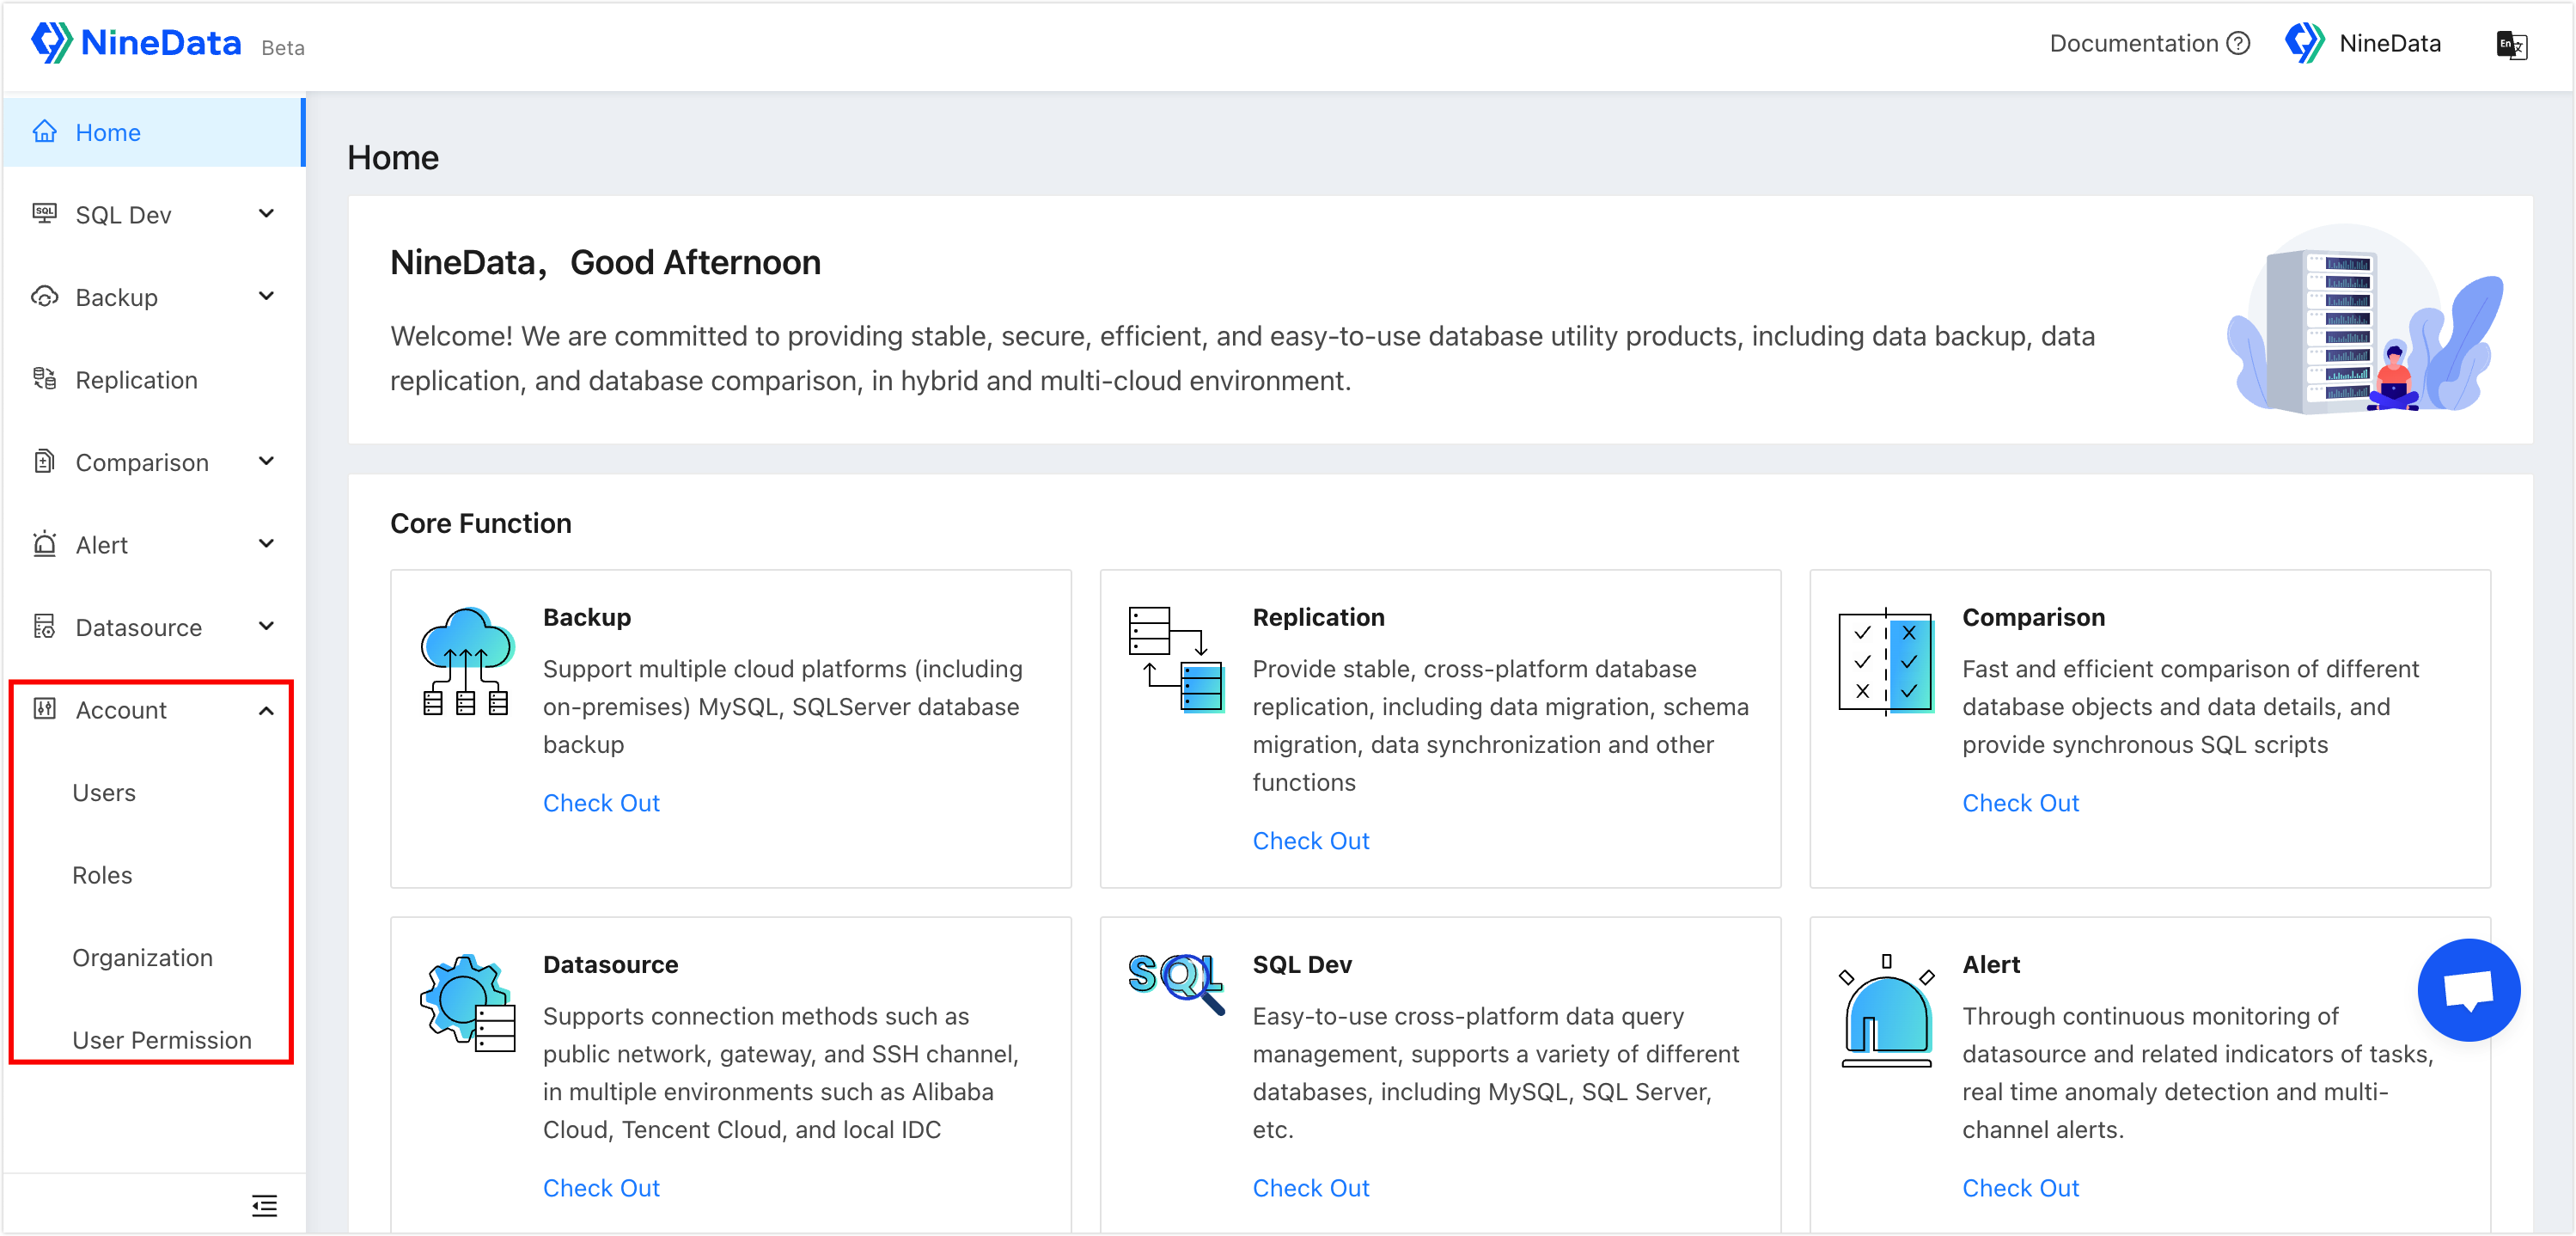
Organization-level entries such as User require the corresponding management permissions. System administrators have all management permissions by default. Members of a role with Role Authorization enabled can see Role, but can manage only the roles in their authorized scope. For details, see Manage roles.
View or edit organization information
Before you begin
- Create an organization and switch to it. For details, see Create an organization and Switch to an organization.
- To edit organization information, your role must be Administrator.
Procedure
Sign in to the NineData Console.
Go to Account > Organization to view the information of the current organization.
On the Organization Information page, choose the operation you need.
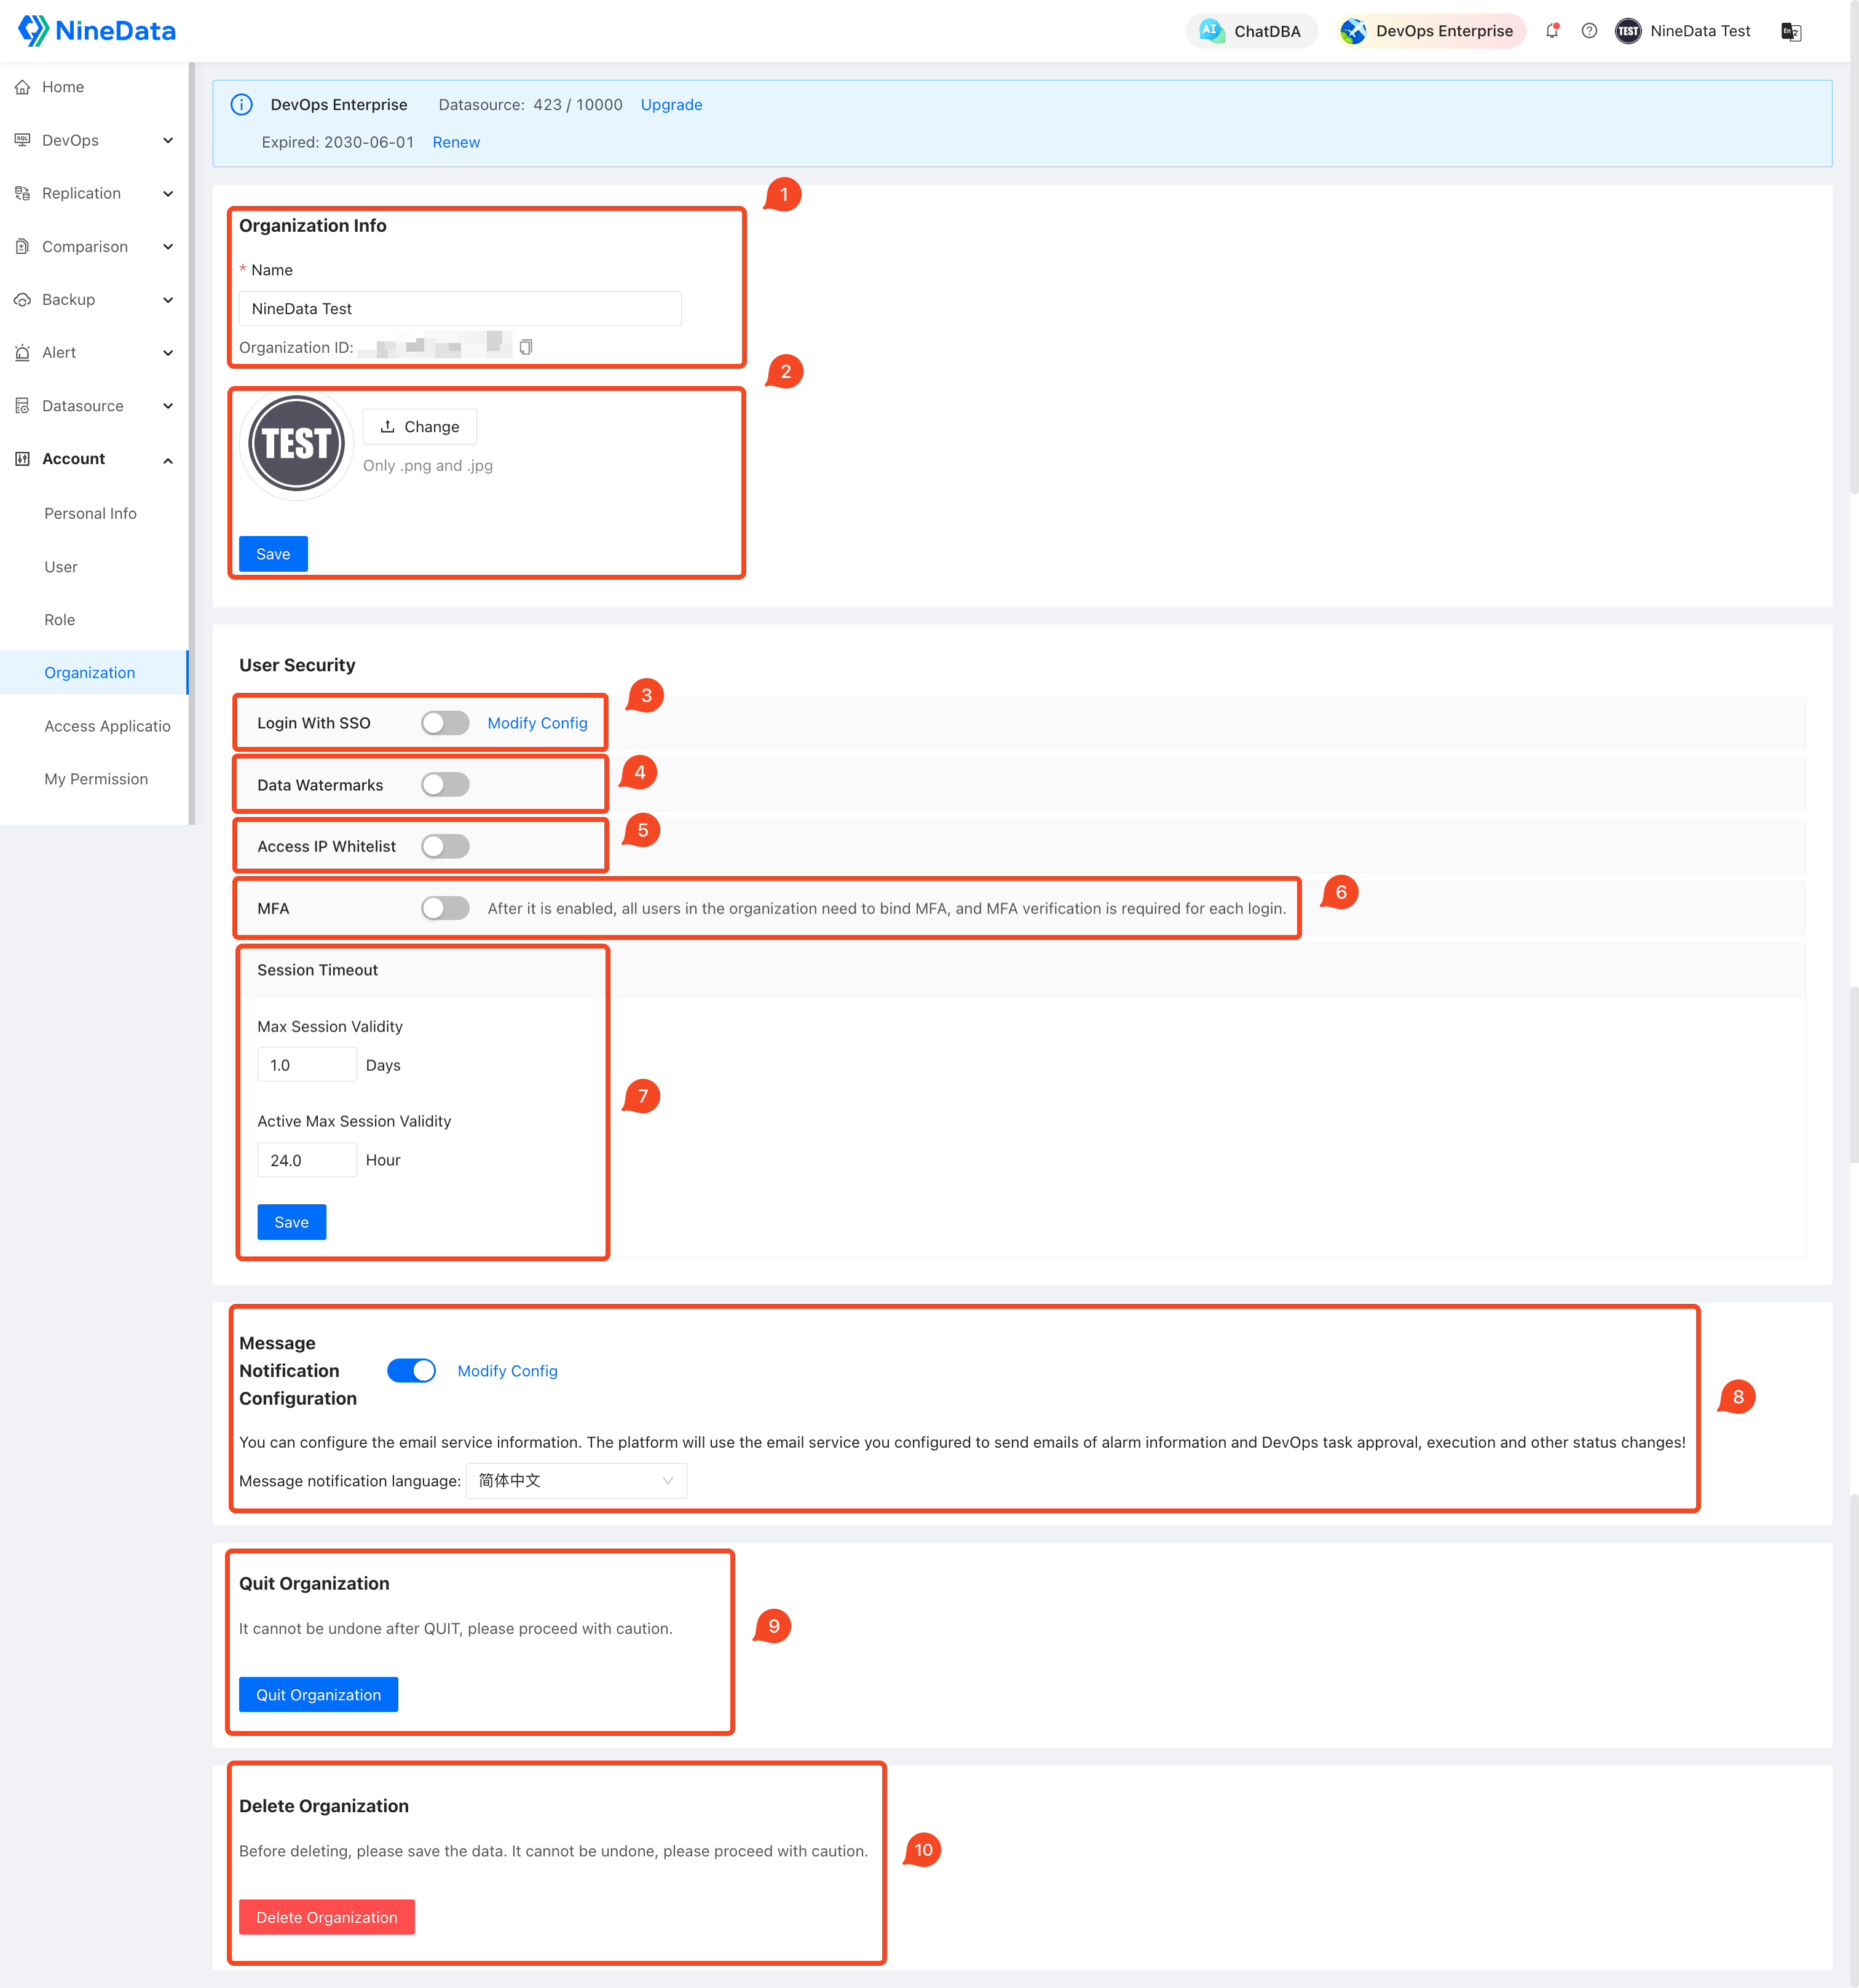
| No. | Operation | Description |
|---|---|---|
| 1 | Modify organization name (Administrator only) | Update the organization name. Up to 24 characters are supported. Click Save after the update. |
| 2 | Replace logo (Administrator only) | Click Change, upload the organization logo, and then click Save. |
| 3 | Configure SSO login (Administrator only) | Enable or disable SSO login for the organization.For details, see Enable SSO login. |
| 4 | Manage data watermarks (Administrator only) | Enable or disable data watermarks for the organization. This feature is available only for DevOps Enterprise.For details, see Manage data watermarks. |
| 5 | Manage IP allowlist (Administrator only) | Enable or disable IP allowlist control for the organization. This feature is available only for DevOps Enterprise.For details, see Manage IP allowlists. |
| 6 | MFA (Administrator only) | Enable or disable multi-factor authentication (MFA) for the organization.For details, see Multi-factor authentication. |
| 7 | Configure session timeout (Administrator only) | Configure when console sessions expire.
|
| 8 | Configure message notifications (Administrator only) | Manage organization-level message notification settings, including Message notification language and email service settings. Choose Simplified Chinese or English in Message notification language to control the language of emails and other message notifications. After the email service is configured, NineData can use your SMTP server to send alert notifications and DevOps task status-change emails, such as approval and execution notifications. For details, see Configure email service. |
| 9 | Leave the organization | Leave the current organization. If your account is the only system administrator in the organization, assign system administrator privileges to another member before you leave. |
| 10 | Delete organization (Administrator only) | Delete the current organization. Warning: After deletion, all data sources, members, and other organization data are lost. This operation is irreversible. Proceed with caution. |