Data import
NineData Data Import lets you import files that contain SQL scripts or data records into a target database. The maximum file size is 5 GB.
Overview
NineData SQL tasks are suitable for small SQL batches. For larger imports, Data Import provides a dedicated workflow for uploading files, checking permissions, routing approval, and executing the import into the target database.
What this feature supports
NineData Data Import supports the following:
Supported data sources: MySQL (including MySQL-compatible data sources), ShardingProxy, SQL Server, PostgreSQL, Oracle, OceanBase Oracle, Db2, Dameng, KingbaseES for PostgreSQL, TiDB, OceanBase MySQL, GreatSQL, Vastbase, GoldenDB, KingbaseES for Oracle, MariaDB, MongoDB, Lindorm, TDSQL MySQL Edition, Elasticsearch, openGauss, GaussDB, ClickHouse, Doris, DWS, Greenplum, AnalyticDB PostgreSQL, AWS Redshift, StarRocks, SelectDB, GBase8s, GBase8a, and Klustron.
Supported import types and corresponding file formats:
Import Type File Formats SQL ZIP, SQL, TXT CSV ZIP, CSV EXCEL ZIP, XLS, XLSX JSON JSON Maximum file size: 5 GB
Supported character sets: UTF-8, GBK
Governed import workflow: In organization modeOrganization mode supports assigning different roles and resource management permissions to each user in the organization. It works well for collaborative development with multiple users in the same organization, improves data security, and improves overall productivity., data import is controlled by permissions and approval processes.
- Approvers: By default, data import tasks must be approved by the System Administrator before execution. Administrators may adjust the approval process for their organization.
- Executors: After approval, the executor can be System Executor, Applicant Executor, or Approver Executor.
- Development standards: If an imported SQL file contains multiple statement types, only
INSERTstatements are executed by default for database security. Administrators may adjust the development standards for their organization. - Execution time: After approval, the executor can run the task immediately or schedule it for a specific time.
Common scenarios
NineData Data Import is useful in these scenarios:
- External data source import: Import data from external systems into a target database for processing and management. For example, an e-commerce platform can import product data from a supplier system.
- Data initialization: Import initial data when you create a database or reset a database structure.
- Large-scale data updates: Run large imports when business data must be added, corrected, merged, or reformatted in bulk.
- Import a large volume of order data for storage and analysis.
- Delete, merge, format, or convert duplicate or invalid data.
- Update product prices, inventory, or other key business data in bulk.
- Update timestamps or data formats during troubleshooting.
Before you begin
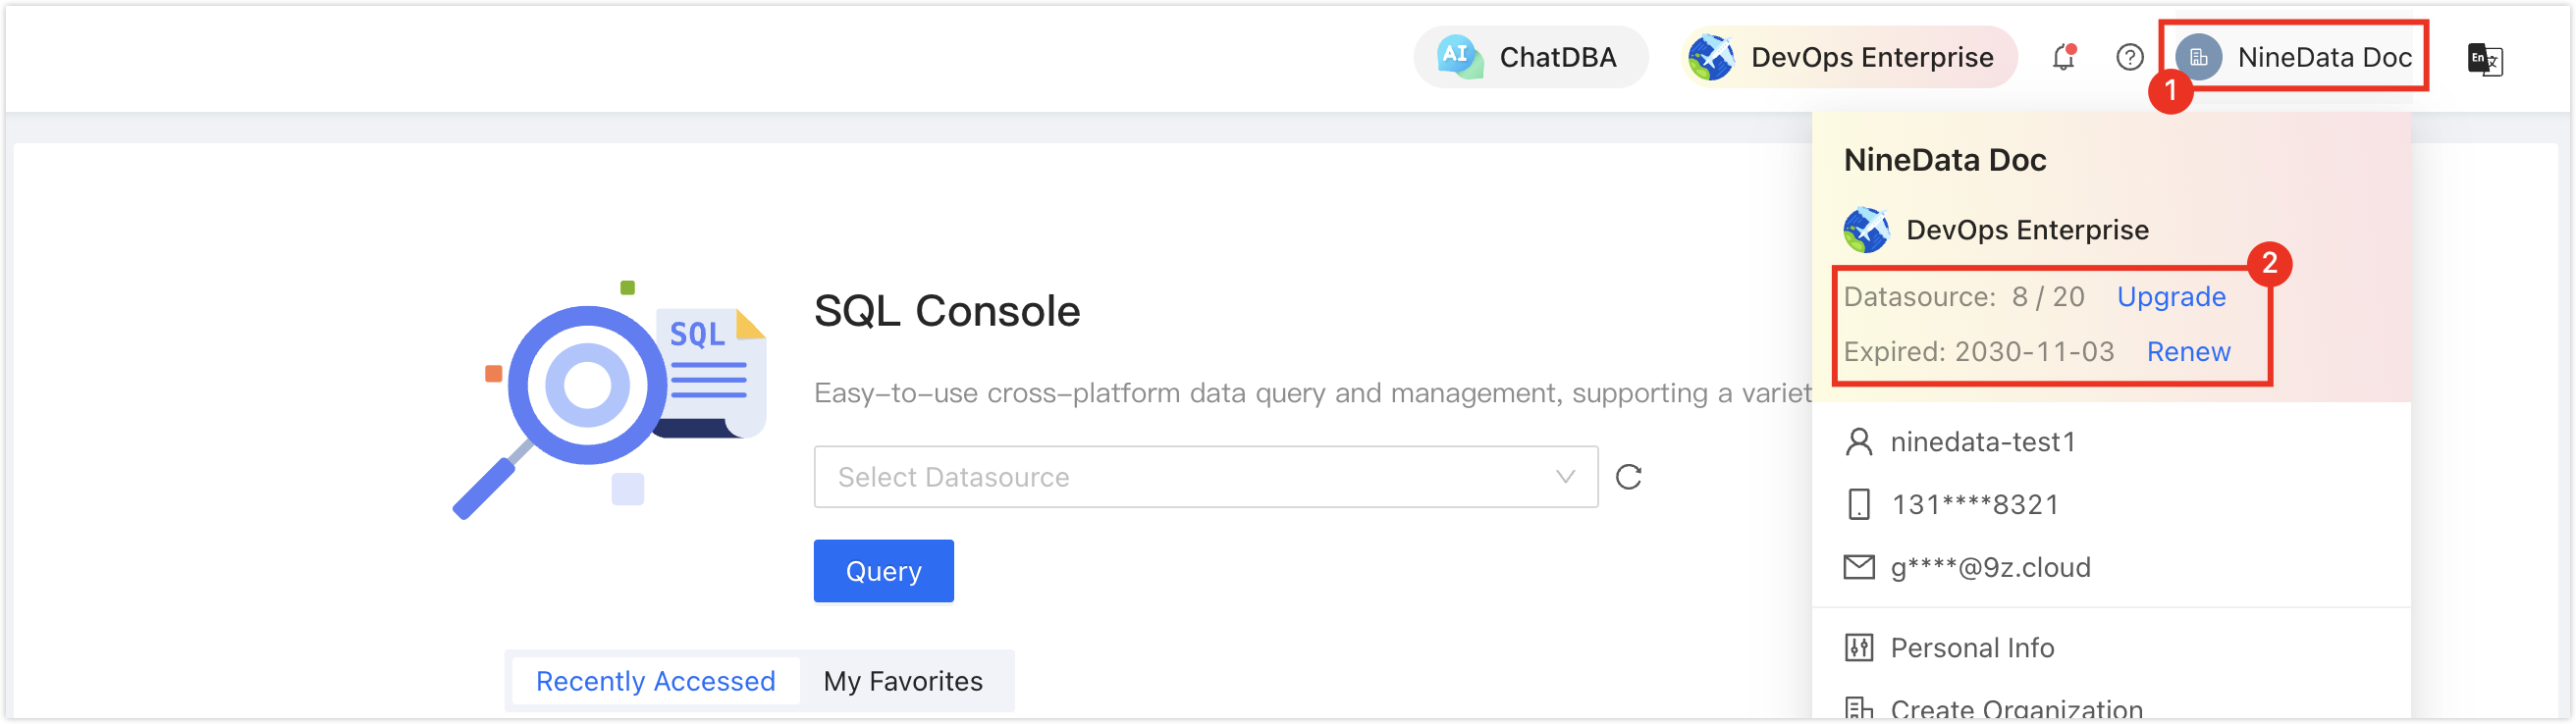
In the commercial versions (DevOps Pro, DevOps Enterprise), make sure your monthly or yearly subscription has not expired. An expired subscription may prevent you from using the Database DevOps service. Check the remaining quota and expiration date in the NineData Console header.
Limitations
- Non-SQL data files must be imported into a specific table, and every column in the file must exist in the target table.
- When you import an SQL file that does not contain table structure, make sure the table referenced by each statement already exists in the target database.
- Data Import does not run specification validation during pre-check. Use extra care when importing data into production.
Create a data import task
Before you begin
- You have permissions on the target database and tables. If not, apply for permissions first. See Permission application and approval.
- The module permission Data Import is granted, which is the default. If this entry is not visible, contact your system administrator.
- The permission Data Import - Submit is granted. To request this permission, see Permission application and approval.
Procedure
Sign in to the NineData Console.
Go to DevOps > Data Import.
On the Data Import page, click Create Import in the toolbar.
On the Create Import page, configure the settings in the table.
Parameter Description Name Enter a name for the data import task. This parameter is required only in organization mode. Use a meaningful name so the task is easy to find later. Up to 64 characters are supported. Datasource/Database Select the target data source and database for the data import task. When Import Type is not SQL, select the target table as well. For SQL Server, Oracle, OceanBase Oracle, and Db2, select the corresponding schema before you choose the target table.
Note: If you do not have permission for this data source or database, a message appears on the page. Click Apply Permission in the message to apply for permission. See Permission application and approval.Import Type Select the import type: - SQL: A file that contains SQL statements and is imported through SQL playback.
- CSV: A text file in which each line represents a record and fields are usually separated by commas.
- EXCEL: An Excel file in which each cell contains a field value.
- JSON: Supported only for MongoDB.
Upload Click Upload to select the data file to import. Upload .zippackages that contain multiple data files for batch upload, except for JSON imports.
Note: Make sure the column names and column count in the data file match the target table. Otherwise, the import may fail.File Encoding Select the character set for the data file: - Auto-Recognize (default): NineData detects the character set of the data file.
- UTF-8: A variable-length Unicode character encoding.
- GBK: A Chinese character encoding that extends from GB2312.
Import Reason Enter the import reason. This parameter is required only in organization mode when an approval process is used. Batch Mode When enabled, NineData performs permission checks on the data source but skips specification pre-checks on the task. Batch mode merges multiple SQL statements into one batch statement, which reduces network overhead and improves import performance. In the current version, this mode is always enabled. Executor Select the user who executes the task after approval. This parameter is required only in organization mode.
Note: The options in the Executor list depend on two conditions:- If the current data source has configured development standards, the options are based on the Import Executor Config rule in the current policy. This rule is located on the SQL Task & Console tab. For configuration details, see Edit policy.
- If the current data source has not configured development standards, the options are users with Data Import - Exec permission for the current data source. For authorization details, see Configure user permissions.
Advanced Click Advanced to expand the configuration options. MySQL, TiDB, GreatSQL
- Column Setting (optional when Import Type is CSV or EXCEL):
- First Row as Field Name (selected by default): Choose whether the first row of the data file contains field names. Select or clear this option based on the import file.
- Field Delimiter (In CSV format only, optional and selected by default): Choose the delimiter for each field in the data file. Select it based on the import file.
- Columns: Use this option to select which column(s) from the data file to import into the target table. Multiple selections are supported. When you select multiple columns, NineData imports them in the order of the selected column names. Use this when column names or column counts differ between the data file and the target table.
- Import Mode (optional when Import Type is CSV or EXCEL):
- Insert (default): Insert data into the table. If a similar row already exists in the table, the insertion fails and an error message is displayed.
- Insert Ignore: Insert data into the table. If a similar row already exists in the table, the insertion operation skips that row without making any changes.
- Replace Into: Insert data into the table. If a similar row already exists in the table, the existing row is overwritten.
- Exec Config:
- Ignore Foreign Key: Select this option to skip checking restrictions imposed by foreign key constraints.
PostgreSQL
- Column Setting (optional when Import Type is CSV or EXCEL):
- First Row as Field Name (selected by default): Choose whether the first row of the data file contains field names. Select or clear this option based on the import file.
- Field Delimiter (In CSV format only, optional and selected by default): Choose the delimiter for each field in the data file. Select it based on the import file.
- Columns: Use this option to select which column(s) from the data file to import into the target table. Multiple selections are supported. When you select multiple columns, NineData imports them in the order of the selected column names. Use this when column names or column counts differ between the data file and the target table.
- Import Mode (optional when Import Type is CSV or EXCEL):
- Insert (default): Insert data into the table. If a similar row already exists in the table, the insertion fails and an error message is displayed.
- Insert Ignore: Insert data into the table. If a similar row already exists in the table, the insertion operation skips that row without making any changes.
SQL Server
- Column Setting (optional when Import Type is CSV or EXCEL):
- First Row as Field Name (selected by default): Choose whether the first row of the data file contains field names. Select or clear this option based on the import file.
- Field Delimiter (In CSV format only, optional and selected by default): Choose the delimiter for each field in the data file. Select it based on the import file.
- Columns: Use this option to select which column(s) from the data file to import into the target table. Multiple selections are supported. When you select multiple columns, NineData imports them in the order of the selected column names. Use this when column names or column counts differ between the data file and the target table.
- Import Mode (displayed when Import Type is CSV or EXCEL):
- Insert (fixed): Insert data into the table. If a similar row already exists in the table, the insertion fails and an error message is displayed.
- Exec Config:
- Ignore Foreign Key: Select this option to skip checking restrictions imposed by foreign key constraints.
Oracle|Oceanbase Oracle
Column Setting (optional when Import Type is CSV or EXCEL):- First Row as Field Name (selected by default): Choose whether the first row of the data file contains field names. Select or clear this option based on the import file.
- Field Delimiter (optional and selected by default, for CSV only): Choose the delimiter for each field in the data file. Select it based on the import file.
- Columns: Use this option to select which column(s) in the data file to import into the target table. Multiple selections are supported. When you select multiple columns, NineData imports them in the order of the selected column names. Use this when the column names in the data file and the target table do not match or when the column counts differ.
Db2|DaMeng
Column Setting (optional when Import Type is CSV or EXCEL):- First Row as Field Name (selected by default): Choose whether the first row of the data file contains field names. Select or clear this option based on the import file.
- Field Delimiter (optional and selected by default, for CSV only): Choose the delimiter for each field in the data file. Select it based on the import file.
- Columns: Use this option to select which column(s) in the data file to import into the target table. Multiple selections are supported. When you select multiple columns, NineData imports them in the order of the selected column names. Use this when the column names in the data file and the target table do not match or when the column counts differ.
Lindorm
Exec Config:- Ignore Foreign Key: Select this option to skip checking restrictions imposed by foreign key constraints.
MongoDB
Import Mode:- INSERT: Inserts all documents from the file into the target collection. If a document with the same
_idalready exists, the import reports an error and exits. - UPSERT: Inserts all documents from the file into the target collection. If a document with the same
_idalready exists, the existing document's values are updated or overwritten. - MERGE: Inserts all documents from the file into the target collection. If a document with the same
_idalready exists, the documents are merged upon insertion, meaning the old data from the target and the new data are both retained.
Click Save. NineData opens the Details page.
- In personal modeBy default, after you register a NineData account, you are in personal mode, which lets you use the four modules provided by NineData without additional setup. Personal mode works well for individual developers who manage their own backups, restores, synchronization, comparison tasks, and SQL Console work., the import task starts after it is saved. Wait until the task status changes to Success.
- In organization modeOrganization mode supports assigning different roles and resource management permissions to each user in the organization. It works well for collaborative development with multiple users in the same organization, improves data security, and improves overall productivity., continue with the approval steps.
In the Policy Pre-check node, wait until the task status changes to Pending. Then click Submit Approval in the toolbar to enter the Submit Approval node. In the Policy Pre-check node, these actions are available:
Click the
 icon in the toolbar to refresh the task status.
Click Check Again in the toolbar to perform the check again.
Click Withdraw in the toolbar to directly withdraw the task or edit the task and submit it again.
Click Duplicate in the toolbar to copy a new task with the same configuration.
tip- Policy Pre-check checks the import task, including SQL syntax when Import Type is SQL, estimated row count, and database permissions. If issues are found, NineData displays details to help you update the task.
- When Batch Mode is used, this node is skipped. The task enters the Submit Approval node and changes to Pending.
- If no approval process is configured for this data source, the task skips Policy Pre-check and Submit Approval, enters the Execute Task node, and changes to Approved. Then go to Step 9.
Click Submit Approval in the toolbar, select the approvers in the dialog, and then click OK.
tip- The number of approvers depends on the approval process configuration.
If the Not Specifying Approvers feature is enabled in the current approval process, this section displays After submission, all approvers can review. Please check the results in the approval process.. Submit the work order without manually specifying an approver. All users authorized to approve the current work order receive approval notifications and can approve it.
The task status changes to Pending Approval. Before approval, use these actions:
- Click the icon in the toolbar to refresh the task status.
- Click Withdraw in the toolbar to directly withdraw the task or edit and submit the task again.
- Click Transfer in the toolbar to change the approver of the task.
- Click Duplicate in the toolbar to copy a new task with the same configuration.
- Click the
When the task status changes to Approved, the Executor clicks Execute in the toolbar, selects Execution Method, and clicks OK.
- Execute Now: Execute the data import task immediately.
- Scheduled Execution: Select a time to execute the data import task.
Wait for the task status to change to Success.
Result
The import task finishes successfully, and the uploaded data is written to the selected target database or table. In organization mode, the task keeps its approval and execution history for audit purposes.
Approve a data import task
Before you begin
- You have created or joined an organization. See Manage organizations.
- The NineData console is in organization mode. To switch from personal mode to organization mode, see Switch to organization.
- The data import task status is Pending Approval.
- You are the Administrator or the Approver of the task.
Procedure
Sign in to the NineData Console.
Go to DevOps > Data Import.
On the Data Import page, find the target task and click the task ID or Details in the Actions column.
tipAlternatively, hover over the
 icon at the top of the page and click the target task in the Todo tab.
On the Details page, review the approval request and select the action that matches your decision: Transfer, Approved, or Rejected.
Operation Description Transfer Transfer the approval request to another approver. Approved Approve the request. After clicking Approved, enter Reason if needed and click OK. Rejected Reject the request. After clicking Rejected, enter Reason for rejection and click OK.