Integrate Feishu with NineData SSO
This guide is for enterprises that use Feishu to manage employee accounts. It shows how to connect Feishu with NineData SSO for centralized authentication and authorization.
Overview
Use this integration when Feishu is the identity system for your organization and users access NineData through centralized authentication.
With SSO, Feishu users can sign in through the organization URL and access NineData without maintaining a separate NineData password. This reduces duplicate account management and keeps authentication under the identity provider.
Before you begin
- You have already created or joined an organization, and the organization has subscribed to DevOps Enterprise. Please ensure that your annual or monthly subscription is still active. For more information, please refer to Manage Organizations.
- Your current account has been switched to the target organization. For more information, please refer to Switching to an Organization.
Your role in NineData must be Administrator. For more information, see Roles.
The version of Feishu used by your organization is Business Flagship Edition or higher, and you are an administrator with Identity Integration management permissions. For more version information, see Feishu Version Feature Comparison.
Procedure
Step 1: Enable the NineData SSO Organization Login Feature
Sign in to the NineData Console.
Open Account > **Organization** in the left navigation pane.Click the switch next to Login With SSO to enable SSO login, enter your organization name under Organization domain, and then copy the Reply URL (Assertion URL) under SAML Service Provider Metadata.
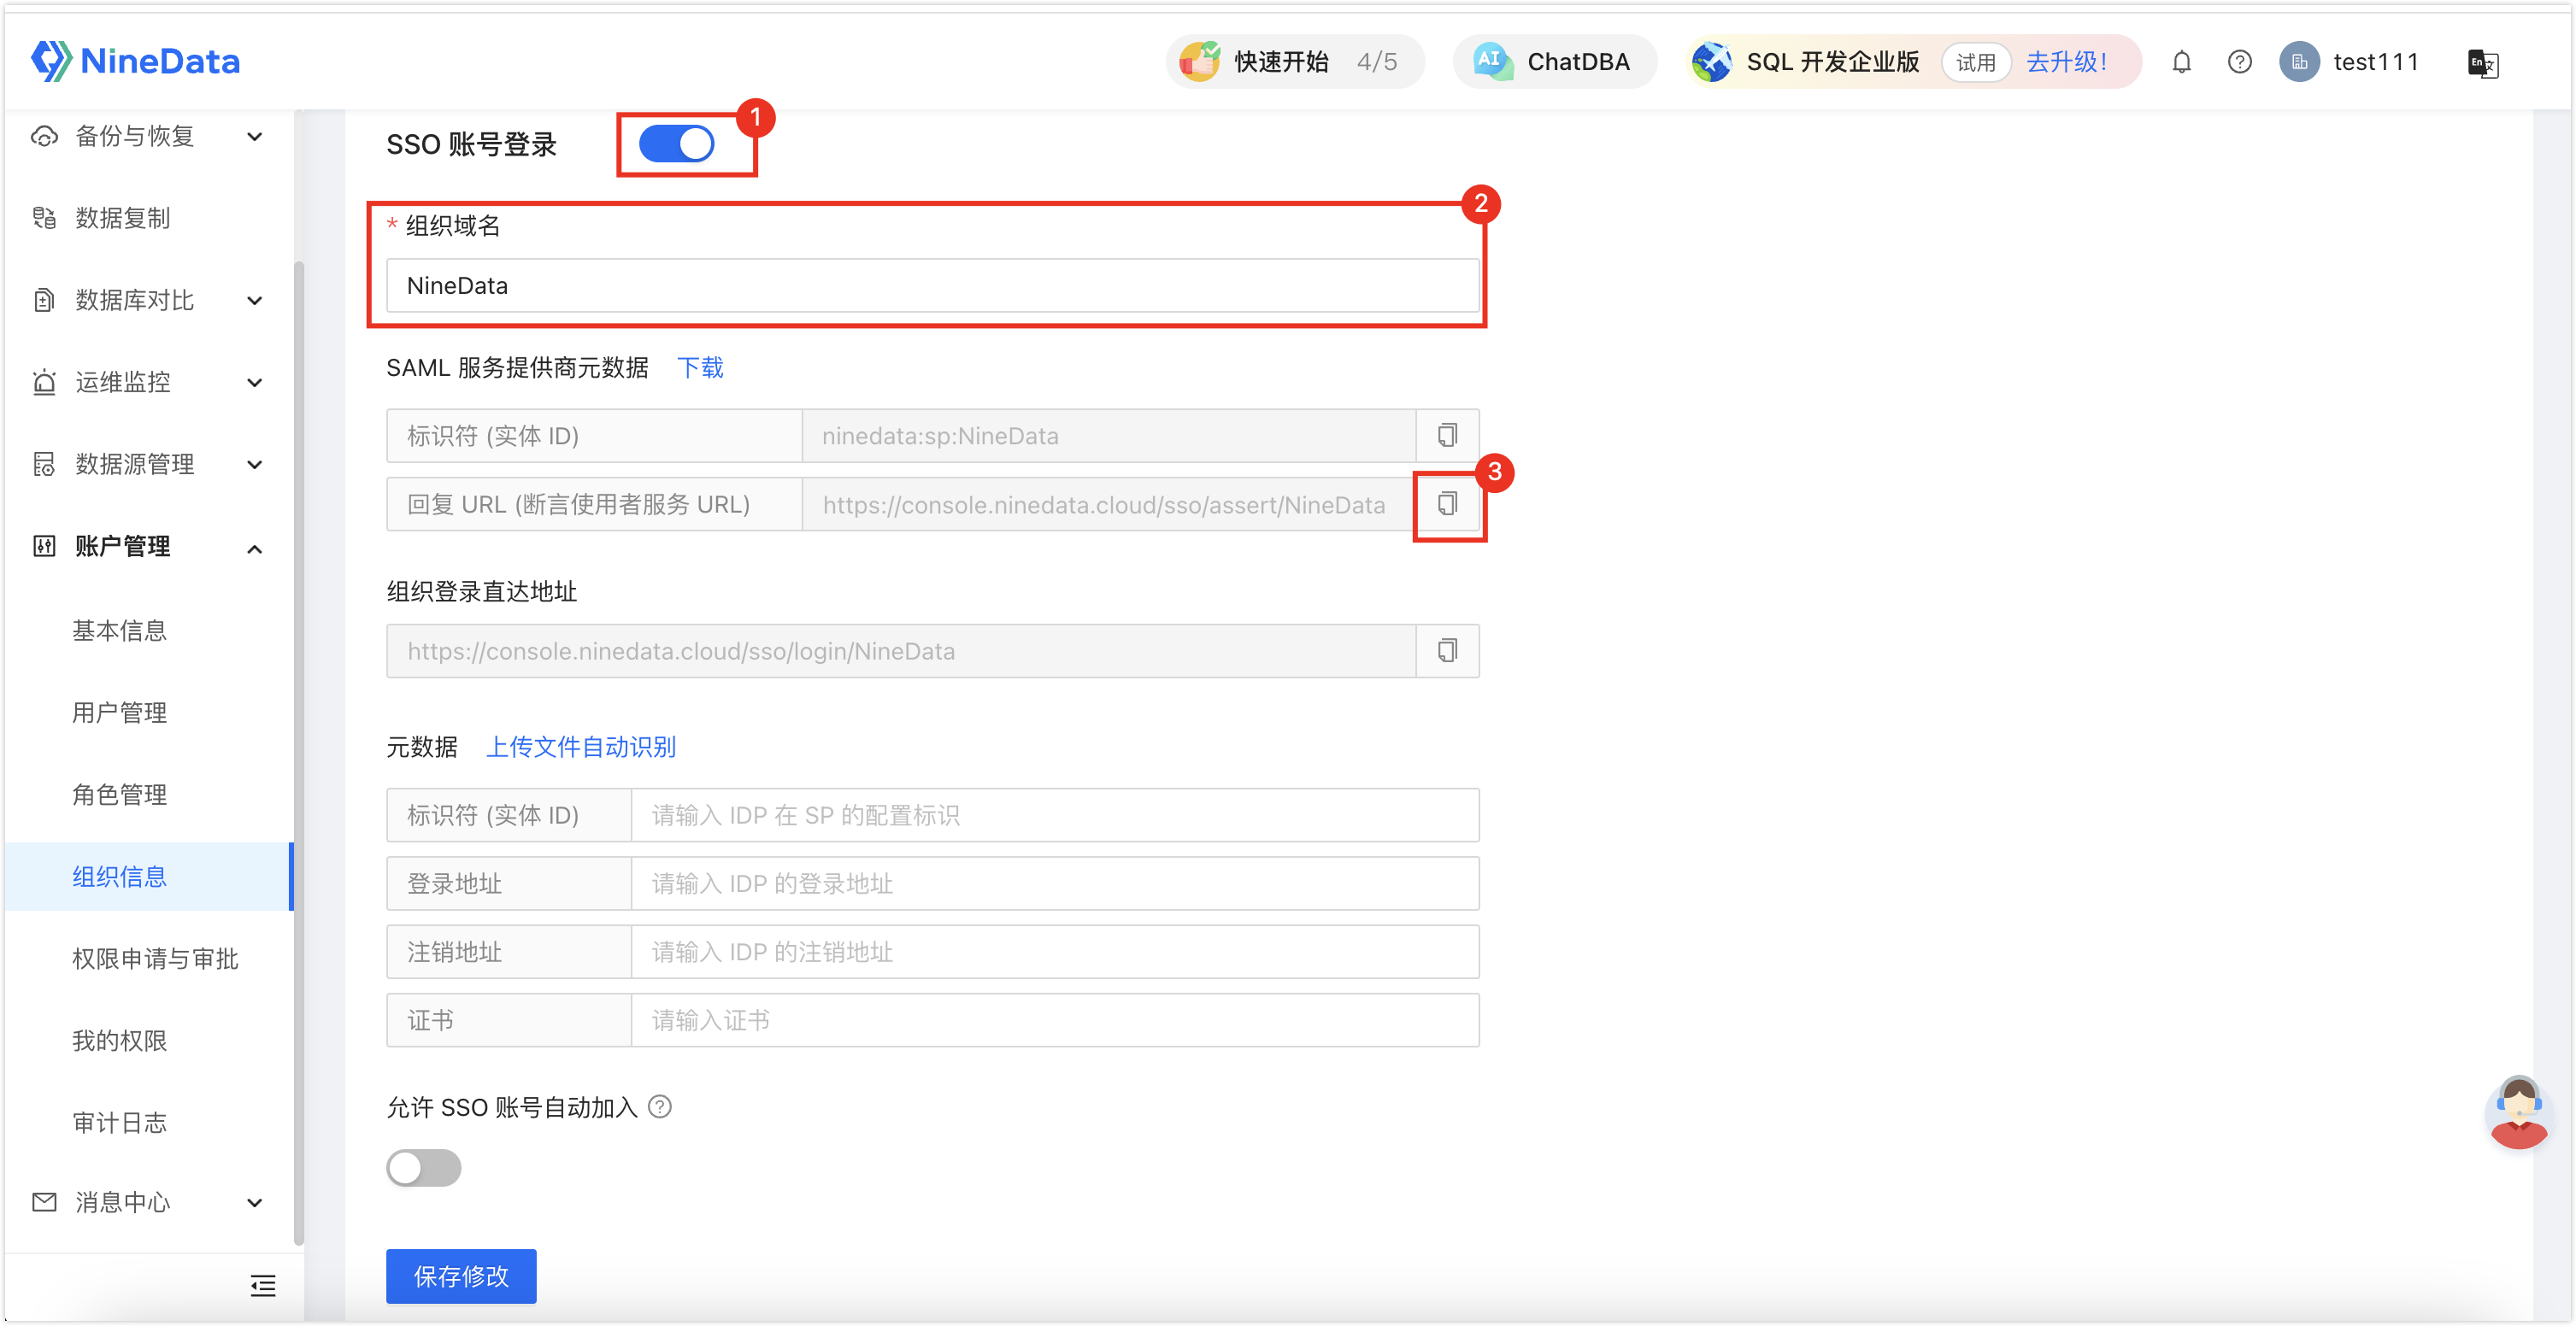
Keep this page open and proceed to the next step.
Step 2: Create an SSO Custom Application in Feishu
The steps below are based on Feishu's official guide: Configure SSO (SAML 2.0 Protocol) for Custom Enterprise Applications.
Open the Identity Integration Module of the Feishu Integration Platform, then choose Single Sign-On > Application Management > + New Application to create an SSO custom application.
On the Basic Configuration page, customize the application name, description, and icon. After you click New Application, continue to the Application Configuration page.
Enable the SAML 2.0 protocol and configure the parameters below.
Parameter Description Login Callback URL Paste the Reply URL (Assertion URL) copied from Step 1 into the Login Callback URL field. Name ID Configuration Select Enterprise email name (without @ and suffix). Click Download Metadata Document beside the page content and keep the file for later use.
Click Save and Enable.
Step 3: Integrate the SSO Custom Application in NineData
Return to the Login With SSO page from Step 1, click Upload File to Auto-recognition next to Metadata, and upload the metadata document downloaded in Step 2.
(Optional) Turn on the switch under Allow SSO Account Auto-join when NineData should add users during their first SSO sign-in. When this option is enabled, skip manual SSO user creation.
(Optional) After you enable Allow SSO Account Auto-join, set the default role for newly added SSO users. Select one or more roles.
Click Save Changes. The Feishu SSO integration is now ready. Members of the Feishu organization can use the URL under Org Login URL to sign in to NineData with their Feishu account.
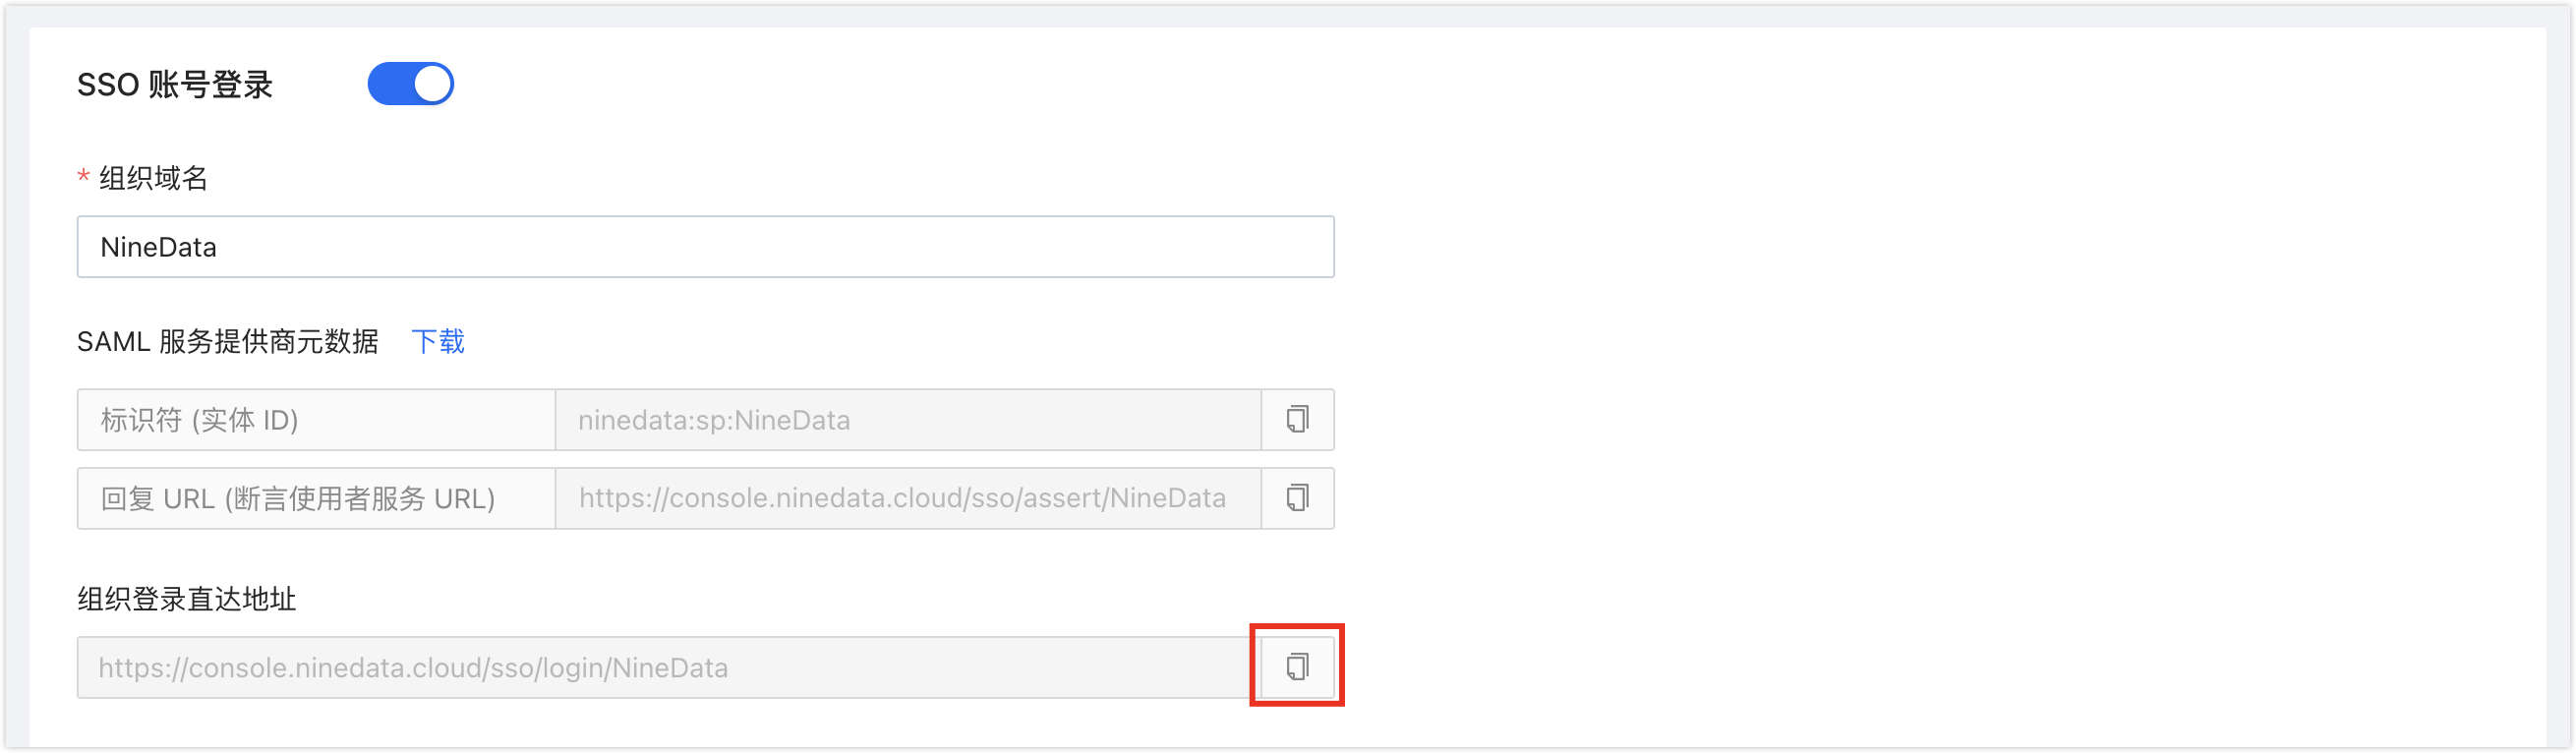
Result
After you save the configuration, Feishu users can access NineData through the organization URL. If auto-join is enabled, NineData creates the user during the first SSO sign-in.