Design MySQL Table Structures
NineData provides a visual designer for MySQL table structures in the SQL Console. Use it to configure columns, indexes, constraints, partitions, and table options while NineData generates the SQL script.
Before you begin
The target data source is MySQL.
In Organizational mode, you have access to the SQL Console module.
In Organizational mode, you have read and write permissions on the target data source.
tipIf you do not have these permissions, contact your organization's system administrator to configure permissions or bind roles.
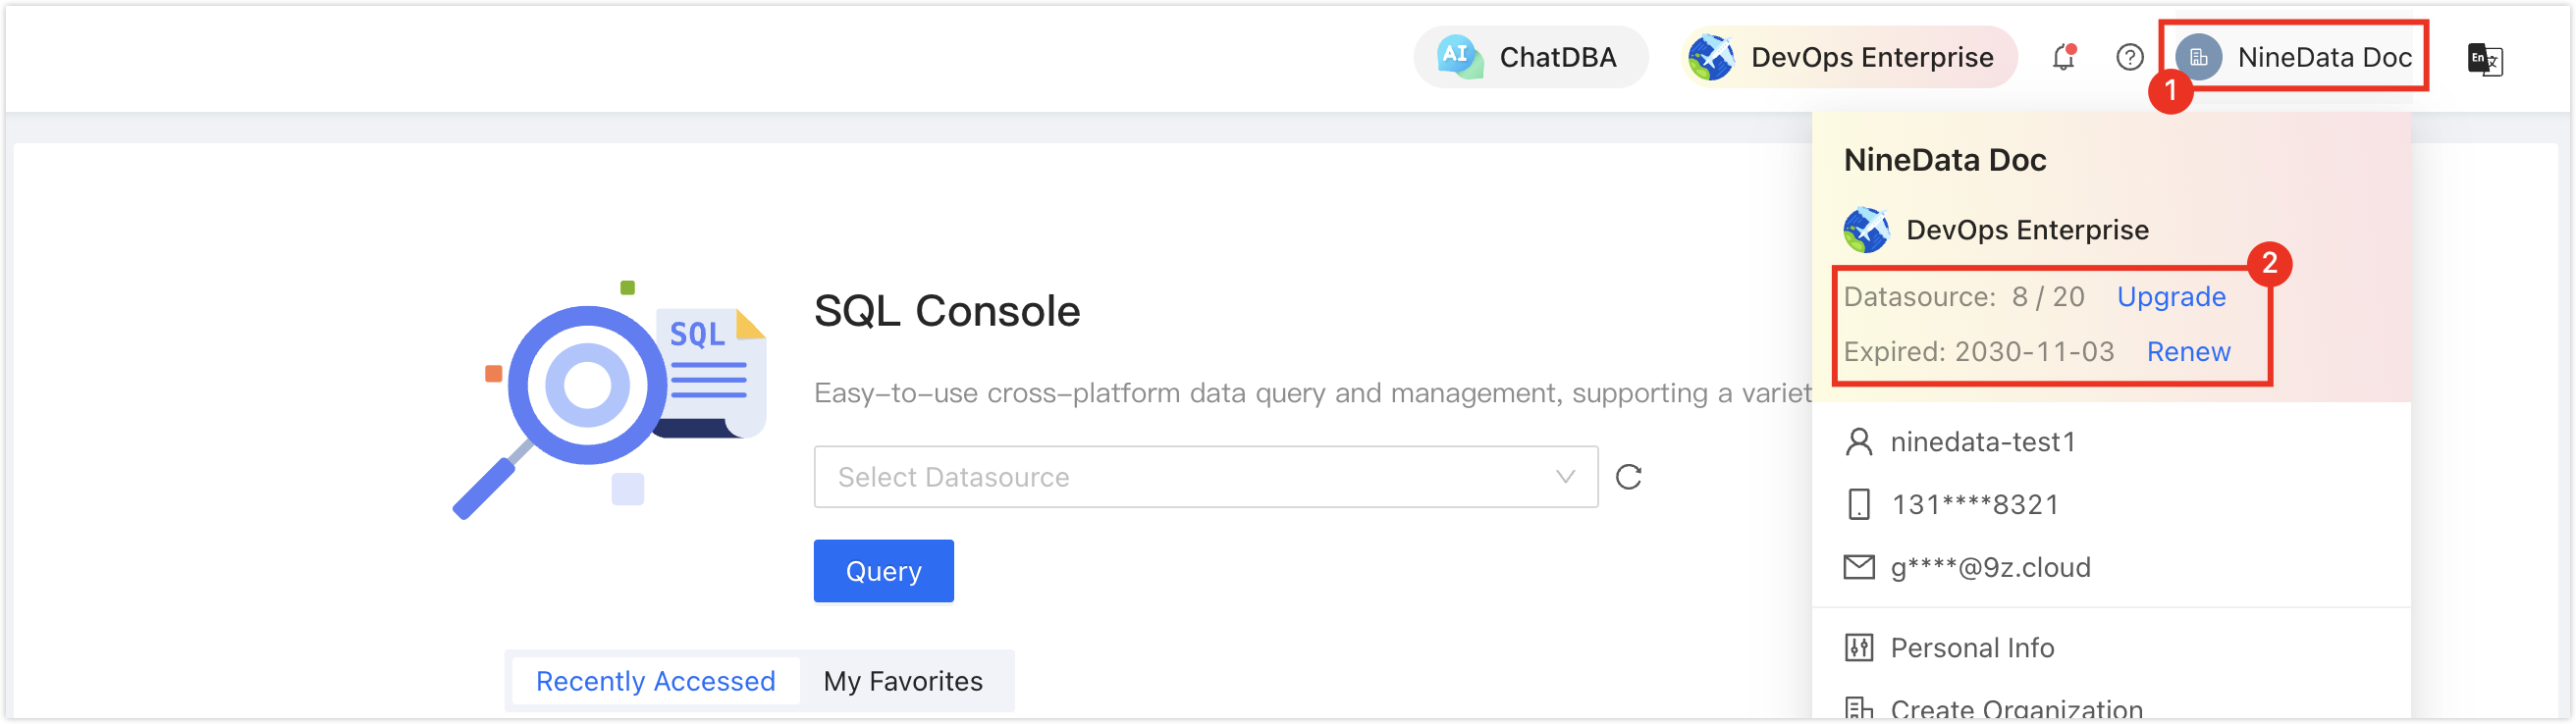
In the commercial versions (DevOps Pro, DevOps Enterprise), make sure your monthly or yearly subscription has not expired. An expired subscription may prevent you from using the Database DevOps service. Check the remaining quota and expiration date in the NineData Console header.
Procedure
Design the table structure when creating or editing a table in SQL Console. This procedure uses table creation as an example.
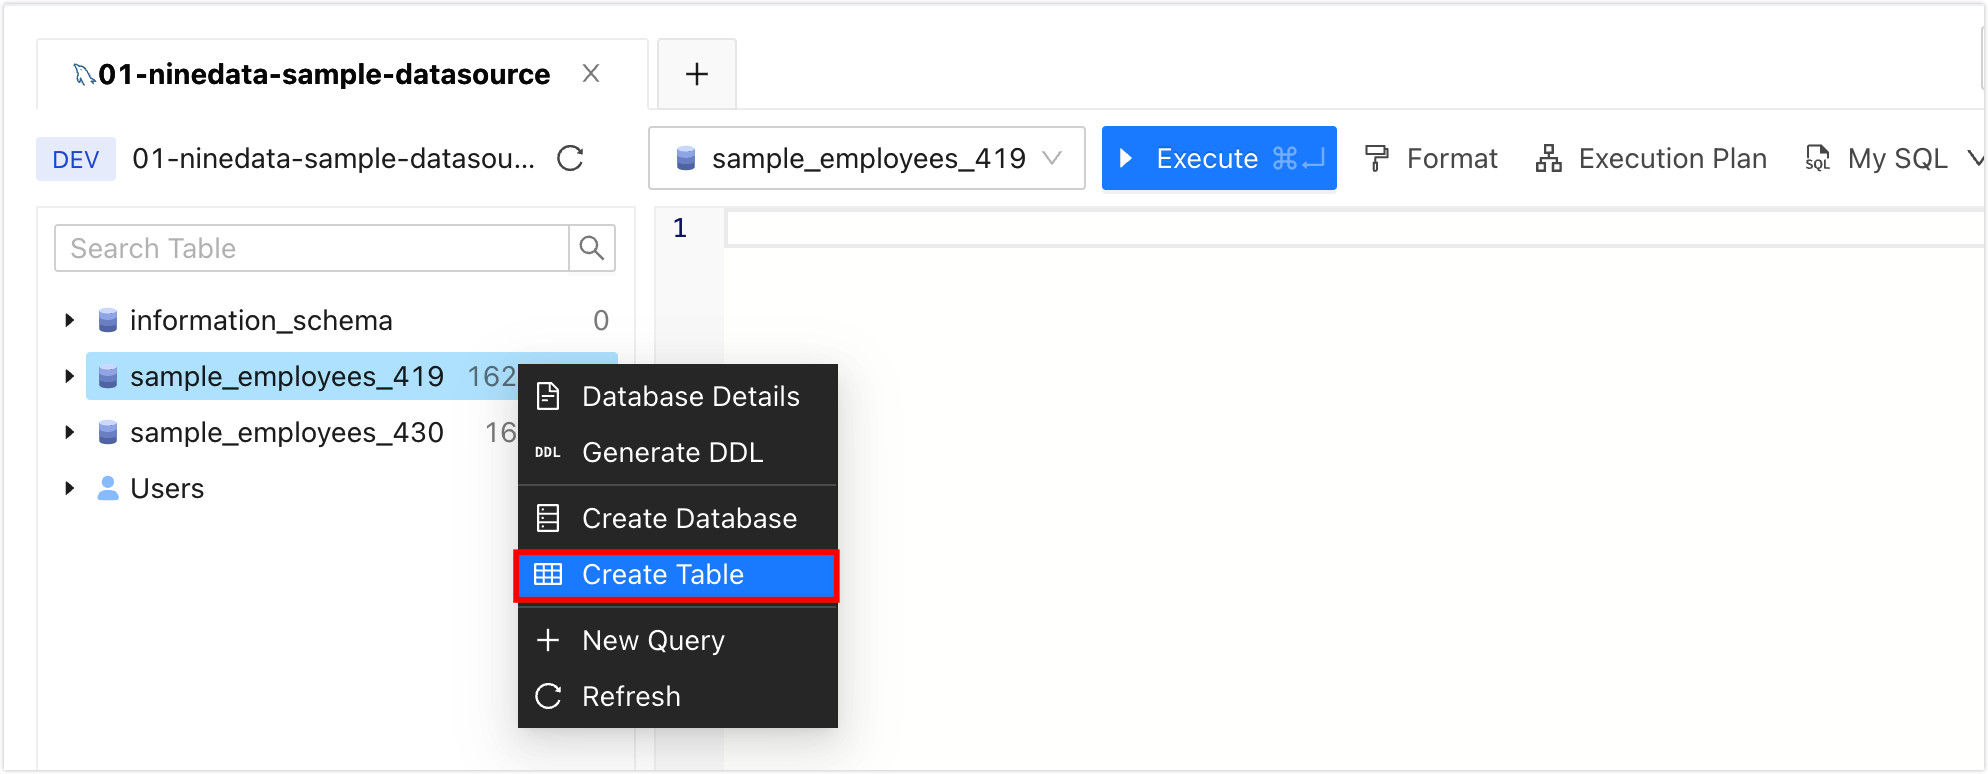
In the database list in the SQL Console, right-click the target database and click Create Table.
 tip
tipNineData creates the table in the target database.
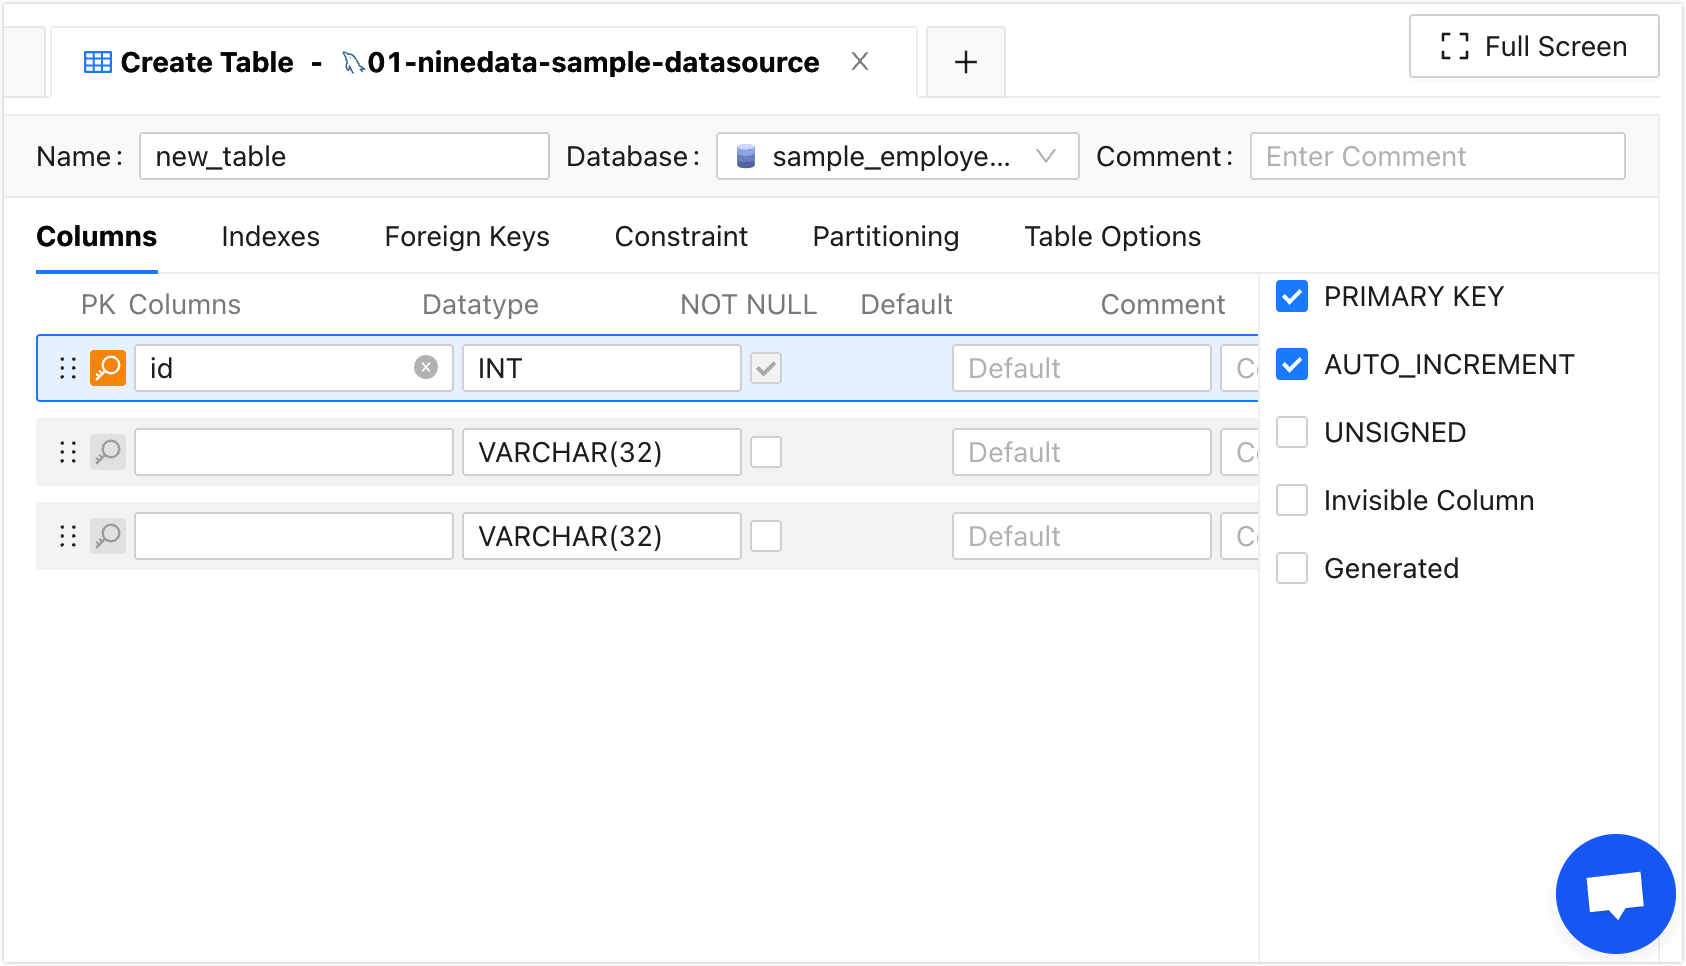
On the Create Table tab, design the table structure visually. NineData generates SQL Script at the bottom of the page based on your configuration. For details about each part of the designer, select the corresponding tab below.
- Common
- Column
- Indexes
- Foreign Keys
- Constraint
- Partitioning
- Table Options
- Name: Enter a custom table name.
- Database: Select the database where the table is created. The default value is the database you right-clicked in step 2.
- Comment: Table comment, which is written as the COMMENT attribute.
Set columns.
- Columns: In the leftmost text box, enter the name of the column, up to 64 characters in length. The first row in the current interface defaults to the primary key column, and the column name defaults to id.
- Data Type: In the second text box from the left, select the data type of the column.
- NOT NULL: Sets whether the column allows null values. For the primary key column in the first row, this option is selected by default, which means null values are not allowed.
- Default: Set the default value of the current column, that is, the DEFAULT property. If no other value is inserted into the column, the default value is used.
- Comment: Set the comment of the current column, that is, the COMMENT property. Set a description for the column with a comment. The maximum length is 1024 characters.
- PRIMARY KEY: Set whether the current column is the primary key column, by selecting the check box to the left of PRIMARY KEY, or clicking the magnifying glass icon to the left of the column name to open, multiple columns can serve as primary key columns to form a composite primary key.
- AUTO_INCREMENT: Only supported for integer type columns, set the current column as an auto-incrementing column.
- UNSIGNED: Only supported for integer type columns, set the current column to an unsigned integer type.
- ON UPDATE CURRENT_TIMESTAMP: Only supported by the time type, when the data in a row is updated, the time in the column is updated in real time.
- SRID: Only supported for geometry types, set the spatial reference identifier SRID.
- Character: Only supported for character type columns, set the character set of the current column.
- Collation: Only supported by character type columns. Set the comparison rules of the current column based on the character set.
- Invisible Column: If no existing column is suitable as the primary key, create a hidden column as the primary key.
- Generated: The value is calculated from other columns. After selecting this option, enter the **Expression** and choose whether to store the column value.
- Virtual(default): The column value is calculated in real time when reading, and does not occupy storage space.
- Stored: Save the calculation result of the column, occupying storage space.
Set the index.
- Name: Enter a name for the index. If there is a primary key in the current table, the first row defaults to the primary key index information.
- Index Type: Select the type of index to be added.
- Index Column: Select the column name to which the index needs to be added.
- Comment: Add comment information to the current index.
- Invisible Index: Only supported by MySQL 8.0 and above, set the current index as a hidden index.
- Other Options: Add other indexing options for the index.
Set foreign key constraints.
- Name: Enter the name of the foreign key.
- Column: Select the foreign key column that needs to be associated with the foreign table.
- Referenced: Choose which library table column to associate the current foreign key column to.
- ON UPDATE: Set the limit for UPDATE operation.
- ON DELETE: Set the limit for DELETE operations.
Set check constraints (supported by MySQL 8.0.16 and above).
- Name: Enter a name for the check constraint.
- Expression: Enter the expression for the constraint. For example: age >= 20.
- ENFORCED: Whether to enforce the constraint.
For large tables, partition by column to improve query performance.
- Statement: Enter a partition statement. Use the **Example** content on the right as a reference.
Set table-level options.
- Table Engine: Select the storage engine for the table.
- Character: Set the character set of the current table.
- Collation: Set the comparison rules of the current table based on the character set.
- Temporary Table: Create a temporary table. The table exists only for the current connection and is deleted after the connection closes.
- Other Options: Add other table options for the table.
Click Save, and in the Submit window that appears, click OK.
tipRun the generated SQL script in another database client when required.
Result
NineData creates the MySQL table in the selected database and keeps the generated SQL script available for review or reuse in another database client.