Data Replication between Redis Instances
NineData Data Replication supports data replication between Redis data sources.
Overview
Redis is widely used for high-performance data access. Teams often replicate and synchronize data between Redis instances for backup, traffic distribution, or recovery workflows. Common use cases include:
- Data backup: Replicate data from the master node to a backup node to support restore operations if the source is lost or damaged.
- Load balancing: Use multiple Redis instances to improve performance and reliability while replication keeps data consistent between instances.
- Failover recovery: When the Redis master node fails, promote a slave node to the master node and use replicated data to reduce business impact.
Before you begin
- Supported Redis versions are 7.4, 7.0, 6.0, 5.0, 4.0, 3.2, and 3.0. The source Redis version must be earlier than or equal to the target Redis version.
- Supported Redis architectures are:
- Source data source: standalone, master-slave, read-write separation
- Target data source: standalone, master-slave, cluster
Procedure
Sign in to the NineData Console.
Click Replication > Data Replication in the left navigation.
On the Replication page, click Create Replication.
On the Source & Target tab, set the following fields, then click Next.
Parameter Description Name Enter a task name that is easy to recognize later. Up to 64 characters are supported. Source Select the Redis data source that contains the data to replicate. Target Select the Redis data source that receives the replicated data. Specification Select the task size. Available options are Micro, Small, Medium, Large, and xLarge. Larger sizes provide more CPU and memory, which is better for large full replication volumes or higher throughput. Choose a size based on source data volume, key count, and expected synchronization speed. Type - Full: Replicate all objects and data from the source data source. This is full data replication.
- Incremental: After full synchronization completes, perform incremental synchronization based on source logs.
Target Database Preparation Choose how to handle The target database already has a data processing strategy conflicts: - Pre-Check Error and Stop Task: Stop the task if precheck finds a database with the same name.
- Ignore Existing Data and Append: Show a message and continue the task if precheck finds a database with the same name. During data replication, append new data without overwriting existing data.
- Clear Data and Rewrite: Show a message and continue the task if precheck finds a database with the same name. During data replication, clear the data in the target database with the same name and then write the data again.
On the Objects tab, set the following field, then click Next.
Parameter Description Replication Objects Select the objects to replicate. Choose Full Instance to replicate everything in the source database, or choose Customized Object, select objects in the left list, and click > to move them to the right list. On the Mapping tab, set the target database name after the source database is synchronized, then click Save and Pre-Check.
tipIn most cases, keep the default settings on the Mapping tab.
On the Pre-check tab, wait for NineData to complete the pre-check. After the pre-check passes, click Launch.
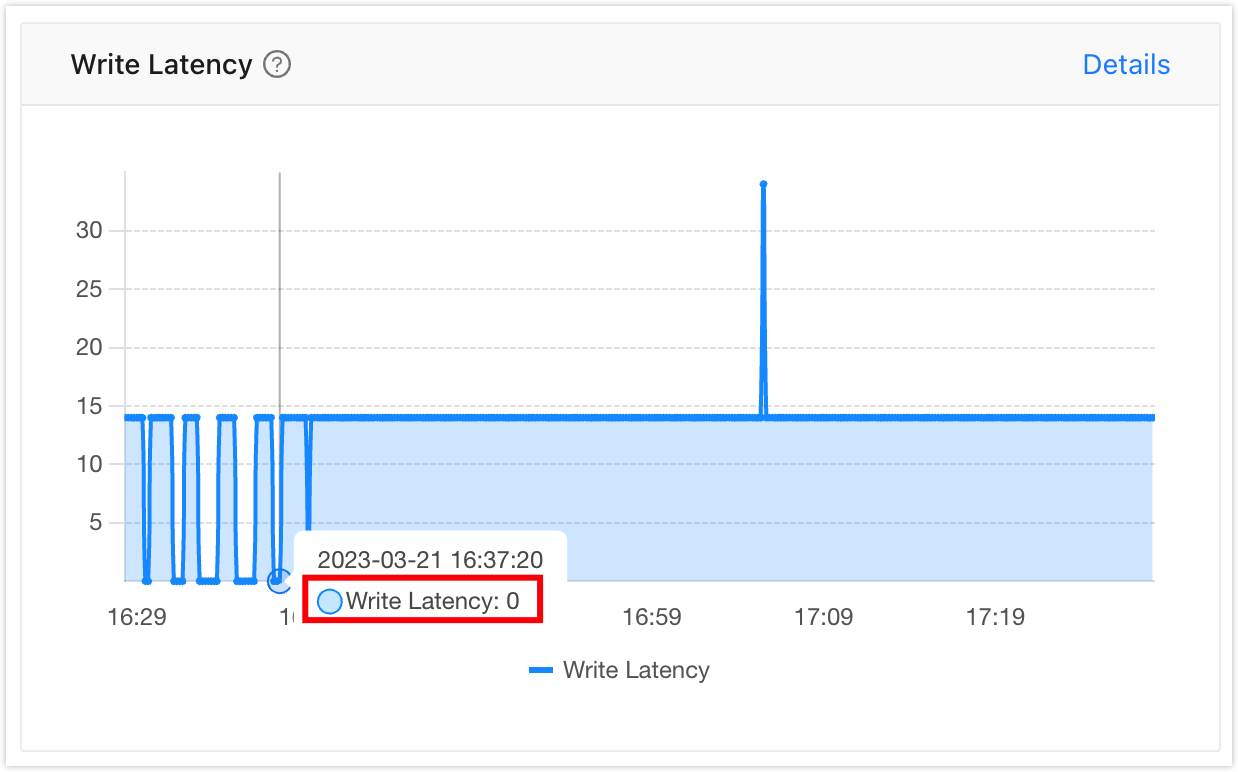
tipSelect Enable data consistency comparison to compare target data with source data after the synchronization task completes. NineData starts the comparison based on the source data source when incremental data first matches the source data source and Write Latency is 0. View Write Latency on the Incremental tab of the task details page.
If the pre-check fails, click Details in the Actions column for the failed item, review the cause, fix the issue, and then click Check Again to run the pre-check again.
For check items whose Result is Warning, fix the issue or ignore the warning when appropriate.
On the Launch page, after Launch Successfully appears, the synchronization task starts. Use these actions to review the task:
- Click View Details to view each execution stage.
- Click Back to list to return to the Replication list.
View Replication Results
Sign in to the NineData Console.
In the navigation menu, click Replication > Data Replication.
On the Replication page, click the ID of the target synchronization task to open the Details page. The task details page shows the following areas.

Number Function Explanation 1 Configure Alerts Configure alerts to get failure notifications through the method you choose. For more information, see Introduction to operational monitoring. 2 More - Pause: Pause a task whose status is Running.
- Terminate: Terminate a task that is unfinished or still being monitored, such as a task in incremental synchronization. A terminated task cannot be restarted. Proceed with caution. If the synchronization object contains a trigger, a trigger copy option appears.
- Delete: Delete the task. Deleted tasks cannot be restored. Proceed with caution.
3 Full replication Shows full replication progress and details. - Click Monitor to view monitoring metrics during full replication. On the monitoring page, click Flow Control Settings to limit the write rate to the target data source. The unit is MB/s.
- Click Log to view full replication logs.
- Click the
 icon to refresh the latest information.
4 Incremental replication Shows incremental replication monitoring metrics. - Click Flow Control Settings to limit the write rate to the target data source. The unit is rows per second.
- Click Log to view incremental replication logs.
- Click the icon to view the latest information.
5 Data comparison Shows data comparison results between the source and target data sources. If data comparison is not enabled, click Enable Comparison on the page. - Click Re-compare to start a new comparison between the current source and target data.
- Click Log to view consistency comparison logs.
- Click Monitoring to view the RPS (records per second) trend chart. Click Details to view earlier records.
- Click
 in the Actions column for an inconsistent comparison row to view comparison details between the source and target. On this page, use these actions:
- Click the
 icon for a specific inconsistent result to view more details.
 - Click the
 icon for a specific inconsistent result to generate change commands based on the key. Copy this command to the target data source and run it to fix the inconsistency.
 - Click Download JSON to export the correct source data in JSON format for data correction.
- Click the
 icon in the list to customize the displayed columns.
- Click the
- Click in the Actions column for an inconsistent comparison row to generate change SQL. Copy this SQL to the target data source and run it to fix the inconsistency.
6 Expand Shows details of the current replication task, including Type, Replication Objects, Started, and more.
Appendix: Commands Supported by Incremental Replication
During incremental replication, only Redis data change commands supported by NineData Data Replication are synchronized to the target in real time after they are executed on the source. This section lists the Redis data types and data change commands supported by NineData Data Replication.
| Supported Data Types | Supported Commands |
|---|---|
| Strings | APPEND, DECR, DECRBY, GETDEL (Redis 6.2.0 or later), GETEX (Redis 6.2.0 or later), GETSET, INCR, INCRBY, INCRBYFLOAT, MSET, MSETNX, PSETEX, SET, SETEX, SETNX, SETRANGE |
| Lists | BLMOVE, BLMPOP, BLPOP, BRPOP, BRPOPLPUSH, LINSERT, LMOVE, LMPOP, LPOP, LPUSH, LPUSHX, LREM, LSET, RPOP, RPOPLPUSH, RPUSH, RPUSHX |
| Sets | SADD, SDIFFSTORE, SINTERSTORE, SMOVE, SPOP, SREM, SUNIONSTORE |
| Hashes | HDEL, HINCRBY, HINCRBYFLOAT, HMSET, HSET, HSETNX |
| Sorted Sets | BZMPOP, BZPOPMAX, BZPOPMIN, ZADD, ZDIFFSTORE, ZINCRBY, ZINTERSTORE, ZMPOP, ZPOPMAX, ZPOPMIN, ZRANGESTORE, ZREM, ZREMRANGEBYLEX, ZREMRANGEBYSCORE, ZUNIONSTORE |
| Streams | XADD, XTRIM, XGROUP, XAUTOCLAIM, XDELXREADGROUP |
| Geospatial | GEOADD, GEOSEARCHSTORE |
| HyperLogLog | PFADD |
| Bitmaps | SETBIT, BITFIELD, BITOP |
Appendix 2: Checklist of Precheck Items
| Check Item | Check Content |
|---|---|
| Target Database Data Existence Check | Check if data exists for the objects to be replicated in the target database |
| Source Instance Log Buffer Size Check | Check the size configuration of the source instance parameter repl-backlog-size |
| Check Source Instance Client Output Buffer Size | Check the size configuration of the source instance parameter client-output-buffer-limit replica |
| Source Data Source Connection Check | Check the status of the source data source gateway, instance accessibility, and accuracy of username and password |
| Target Data Source Connection Check | Check the status of the target data source gateway, instance accessibility, and accuracy of username and password |
| Source Database Permission Check | Check if the account permissions in the source database meet the requirements |