Configure Email Service
NineData supports custom email service configuration. If the default sender address is blocked, or if you want to use your organization’s own mail server to send notifications, you can configure an SMTP email service on the Organization page. Once configured, the platform will use your email service to send alert notifications, as well as status change emails for DevOps tasks such as approvals and execution.
Prerequisites
- You have switched to organization mode. For more information, see Switch to organization.
- Your role is Administrator.
Procedure
Log in to the NineData Console.
In the left navigation bar, click Account > Organization.
tipIf you cannot find Account, make sure your console is in organization mode. To switch from personal mode to organization mode, see Switch to organization.
On the Organization page, locate the Message Notification Configuration section. If the toggle in the upper-right corner is off, turn it on first. You can also choose
Simplified ChineseorEnglishin Message notification language to control the display language of email and other message notifications. Then click Modify Config to open the Mail configuration Service dialog.In the Mail configuration Service dialog, configure the parameters according to the table below.
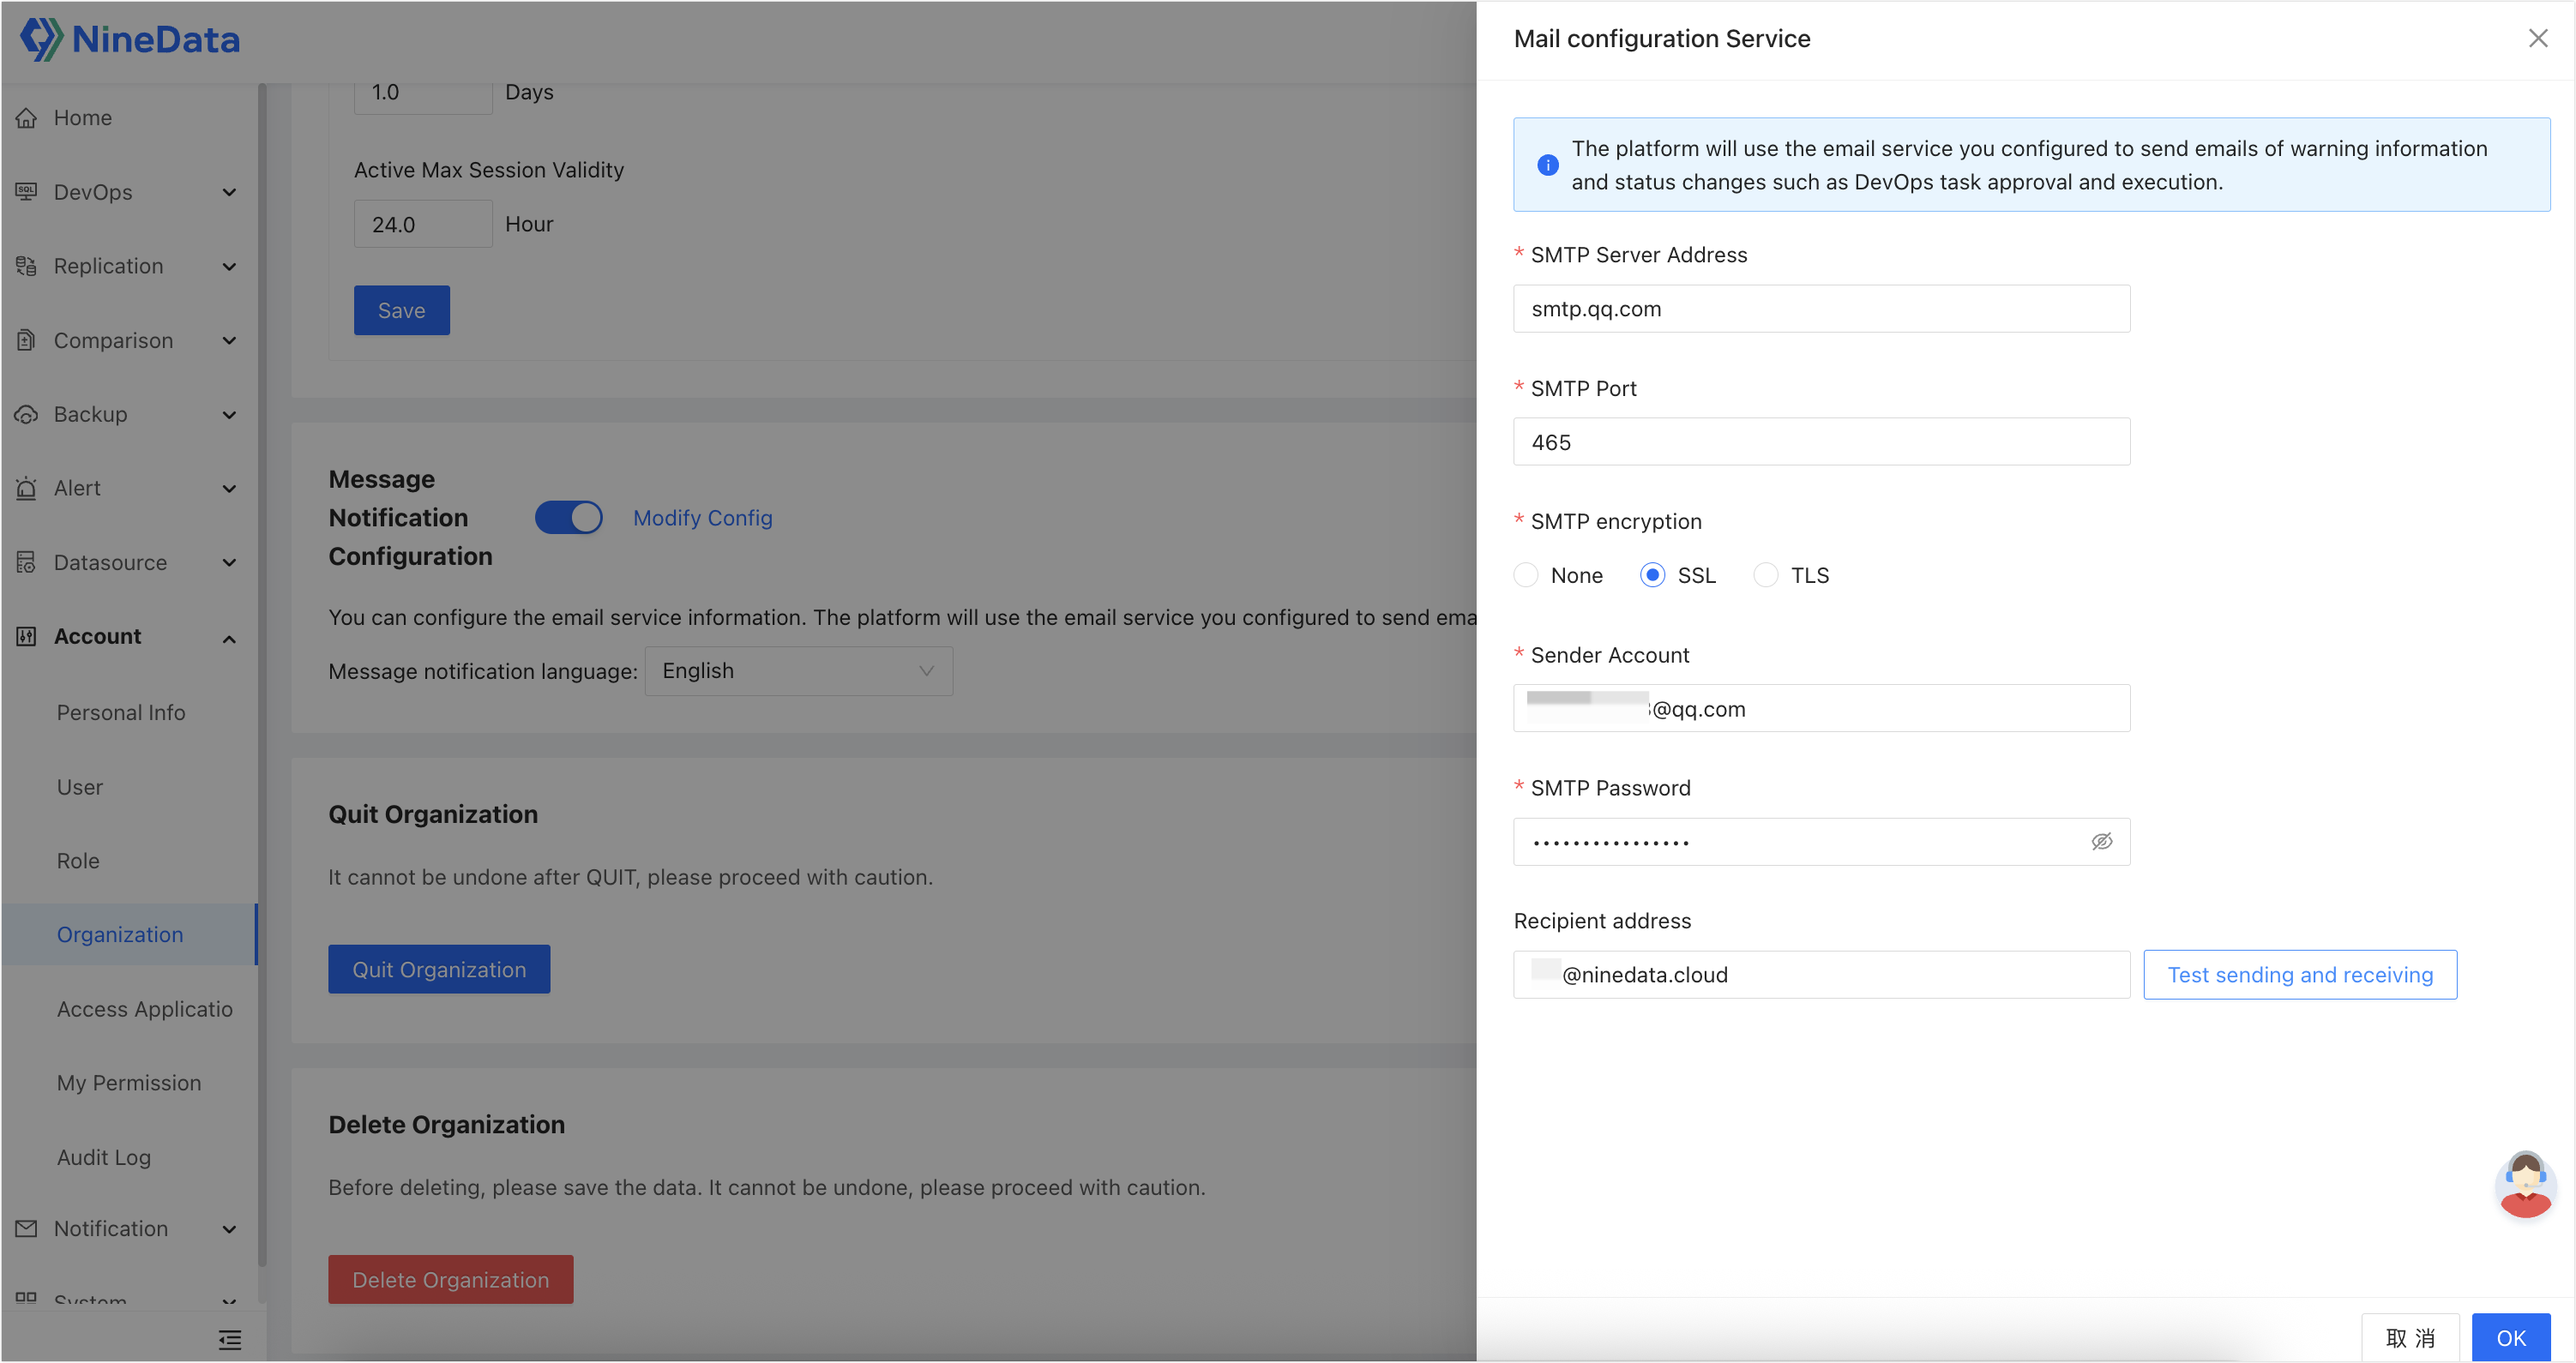
Parameter Description SMTP Server Address The address of the mail server used to send emails. You can find this in your email service provider’s documentation. For example, the SMTP Server Address for QQ Mail is smtp.qq.com.SMTP Port The port on which the mail server listens. You can find this in your email service provider’s documentation. For example, a commonly used SMTP Port for QQ Mail is 465.SMTP encryption Select the encryption method for the SMTP connection. Supported options include None,SSL, andTLS. Choose according to your provider’s requirements and ensure it matches the configured port.Sender Account Enter the email account used to send system emails. For example: example@qq.com.SMTP Password Enter the SMTP password or authorization code for the sender email account. Some providers use an authorization code instead of the login password. Refer to your provider’s documentation. Recipient address Enter a recipient email address for testing. After filling it in, you can click Test sending and receiving to verify whether the SMTP configuration works properly. To verify the configuration, enter a test email address in Recipient address, then click Test sending and receiving.
Click OK to complete the email service configuration.
tipAfter configuration, the platform will use your email service to send alert notifications and DevOps-related emails. If you need to change the mail server, reopen the Mail configuration Service dialog, update the settings, and click OK.