Configure Personal Messages via Lark
This topic describes how to configure Lark personal message delivery in NineData so that users can receive message notifications at key workflow stages.
This guide was fully re-validated on March 13, 2026 through an end-to-end workflow: creating a new Lark app, enabling the required capability, publishing the app, and successfully sending a test message from NineData. The validation confirms that international Lark and mainland China Feishu are configured separately.
Re-validation Summary
- The developer-console entry for international Lark is Lark Developer, and the login page is hosted on
accounts.larksuite.com. - Signing in to Lark Developer requires the Lark account email and an email verification code.
- In NineData, Feishu and Feishu Lark appear as two separate cards under Personal Channel Management. For international Lark organizations, always use Feishu Lark instead of Feishu.
- In the tenant used for this re-check, the Feishu card showed Unconfigured, while Feishu Lark showed Configured:
cli_a9eee28b6268dcda, which confirms that they are not the same channel. - In this re-validation, a brand-new custom app was created in Lark Developer, the Bot capability was added, the version was published, and NineData test sending was executed against that new app.
- In the current NineData UI, the notification-field dropdown contains Login Name, Phone Number, and Email. The final successful validation used Email.
Overview
NineData supports configuring personal notification channels for individual users. With Personal Channel Management, you can:
- Bind a dedicated channel for specific members, such as Lark.
- Receive more timely and intuitive notifications without affecting the default subscription settings.
- Enable or disable personal-channel notifications for specific subscription types and workflow nodes.
After the personal channel is configured, NineData sends notifications to the target member through both the default subscription method and the personal channel when the specified workflow state changes.
Prerequisites
- You have created or joined an organization, and this organization has subscribed to either DevOps Pro or DevOps Enterprise. Please ensure that your annual or monthly subscription is still active. For more information, please refer to Manage Organizations.
- Your current account has switched to the target organization. For more information, please refer to Switching to an Organization.
- You are logged in to Lark with organization admin or app admin permissions.
- A target app is already prepared and has the Bot capability enabled.
- You are logged in to the NineData console as a system administrator.
Notes
- For international Lark, use Lark Developer. Do not replace it with the Feishu Open Platform.
- If your company uses Feishu China instead of international Lark, refer to Configure Personal Messages via Feishu.
- NineData matches recipients by the selected notification field. Make sure the login name, phone number, or email address is consistent between NineData and Lark; otherwise, the test message may not be delivered.
- In the re-validated NineData page, Feishu, Feishu Lark, DingTalk, and WeCom are displayed as separate personal-channel cards. Feishu Lark is the correct card for international Lark.
- In this actual test, the Phone Number route returned Failed to obtain user ID, while the Email route succeeded. If phone-based testing fails in your environment, first check whether the Lark member can be resolved by phone, or switch to Email.
- Before the test succeeded, the app also needed the application identity scopes
contact:user.id:readonlyandcontact:user.employee_id:readonly. If the Lark API returns Access denied for those scopes, enable them in Permission Management before retrying.
Step 1: Prepare Lark App Credentials
Go to Lark Developer and sign in with the target Lark account. If prompted, complete email verification with the 6-digit code sent to the mailbox.
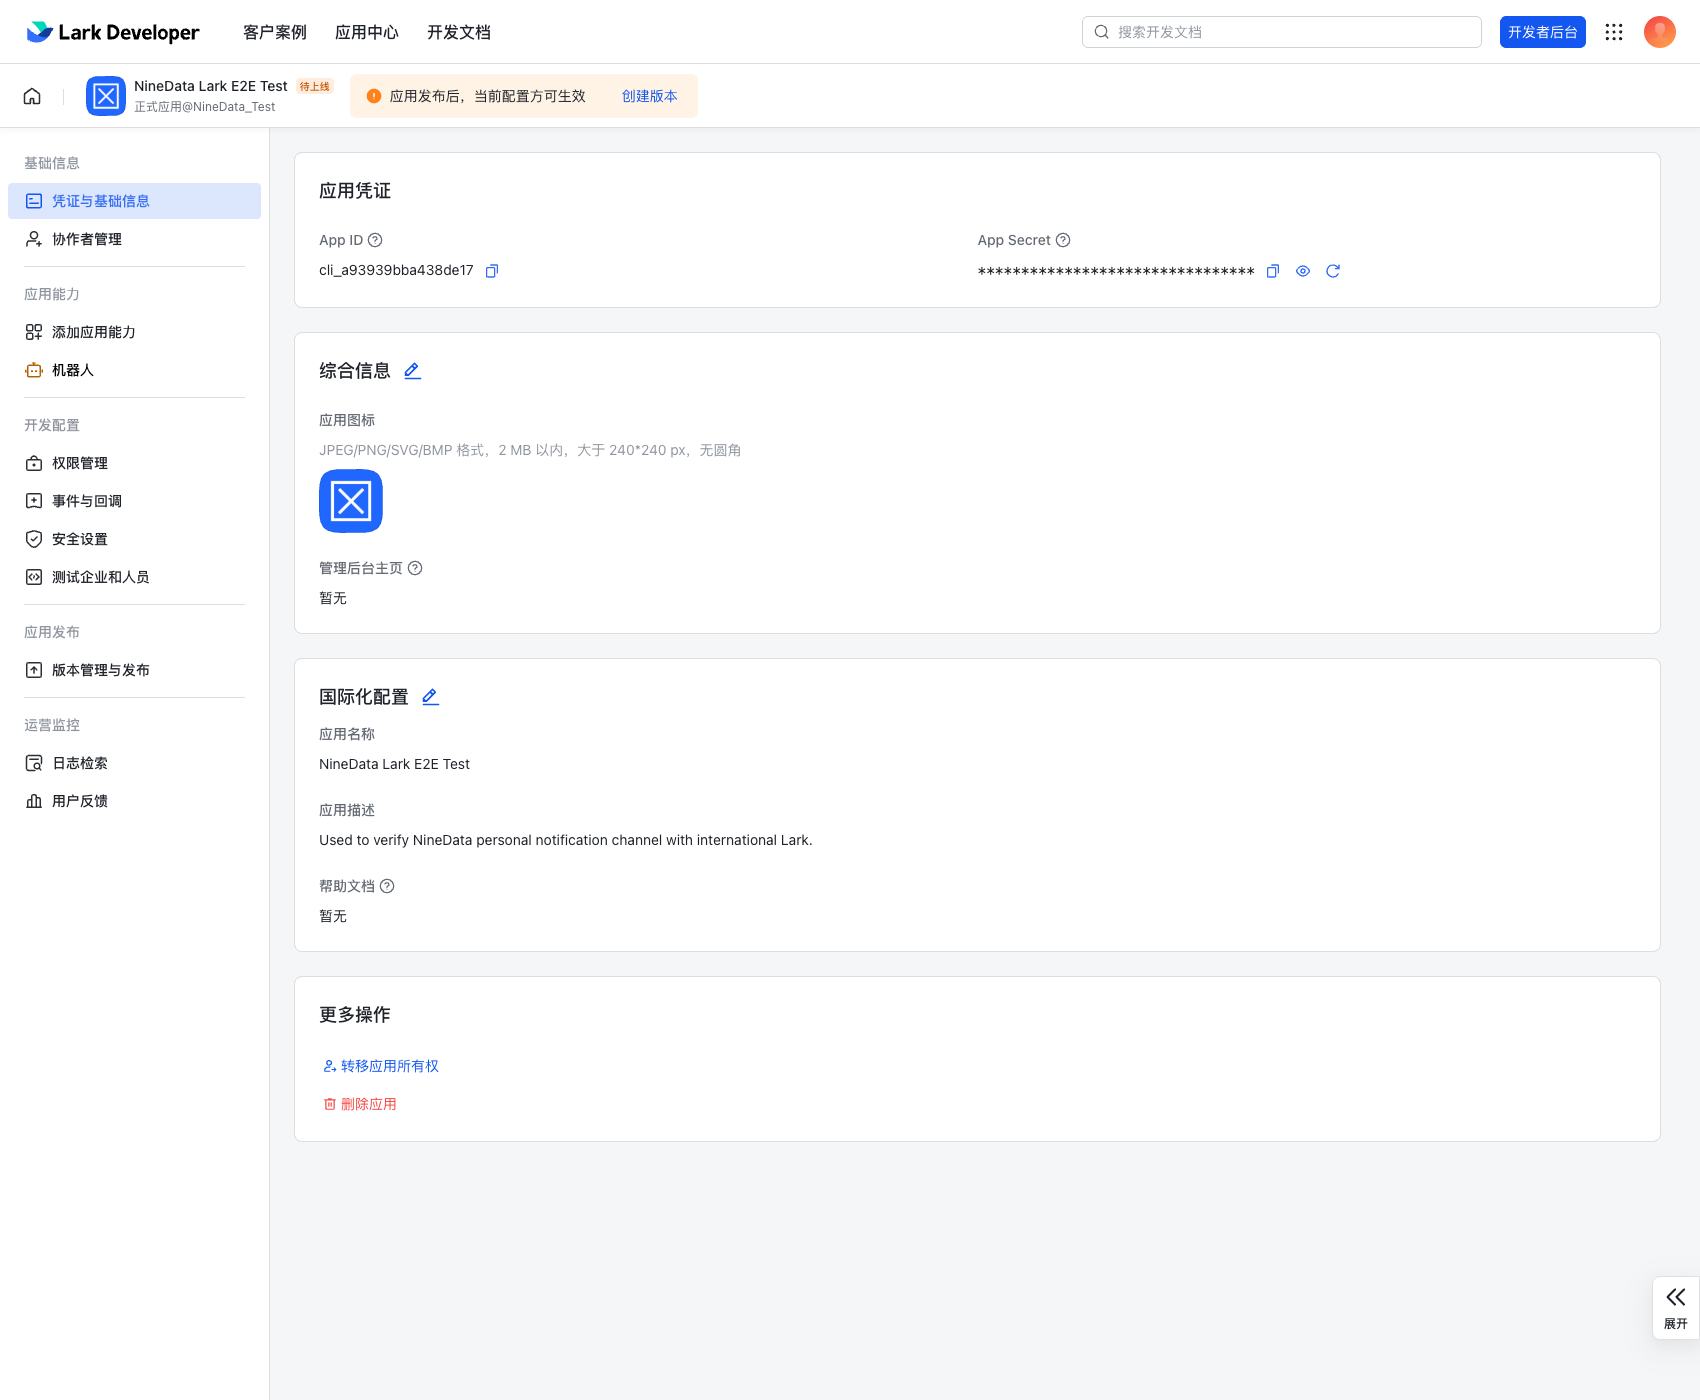
After signing in, enter the Lark Developer console. If the account does not have an app yet, click Create Custom App to create one. Otherwise, open the target app directly. In this validation, a new custom app was created and its App ID and App Secret were recorded from the Credentials & Basic Info page.
In the target app, open its credential or basic-information page and record App ID and App Secret.
In Add Capabilities, add the Bot capability.
In Permission Management, confirm that the app has the permissions required for NineData test sending. If the test reports missing scopes, first verify these application-identity scopes:
contact:user.id:readonlycontact:user.employee_id:readonlyim:message:send_as_bot
In Version Management & Release, create and publish a version. Otherwise, the NineData test message may still fail even if the channel fields are correct.
If you still need the full app-creation, capability, permission, and publishing flow, refer to Configure Personal Messages via Feishu. For Lark, the main differences are the console entry and login flow; NineData still requires App ID and App Secret.
Step 2: Bind the Lark App in NineData
Log in to the NineData Console.
In the left navigation pane, click Notification > Subscription.
At the top of the page, click Personal Channel Management. This page displays separate cards for Feishu, Feishu Lark, DingTalk, and WeCom.
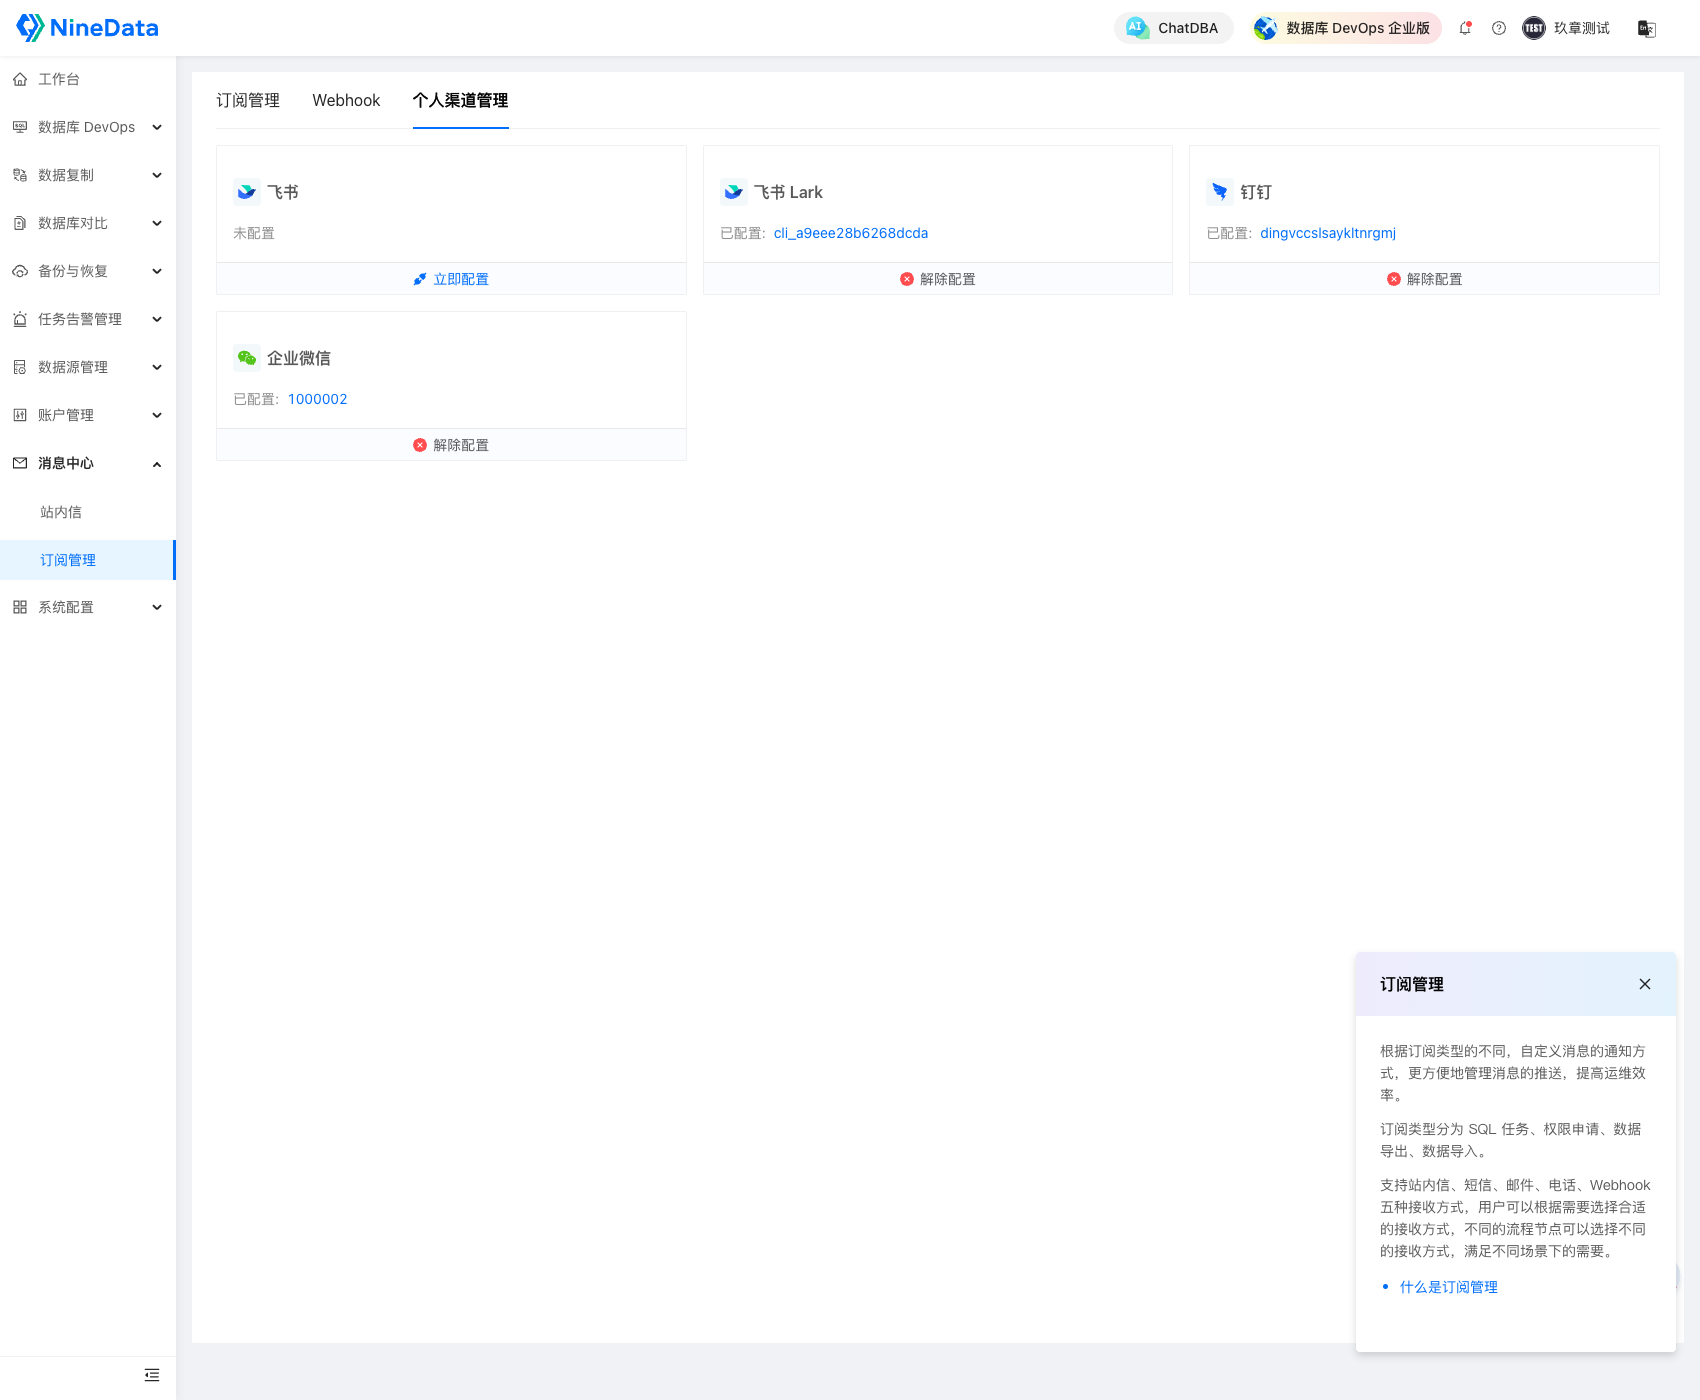
On the Feishu Lark card:
- If the card shows Unconfigured, click Configure.
- If the card already shows Configured: AppID, the tenant is already bound to a Lark app.
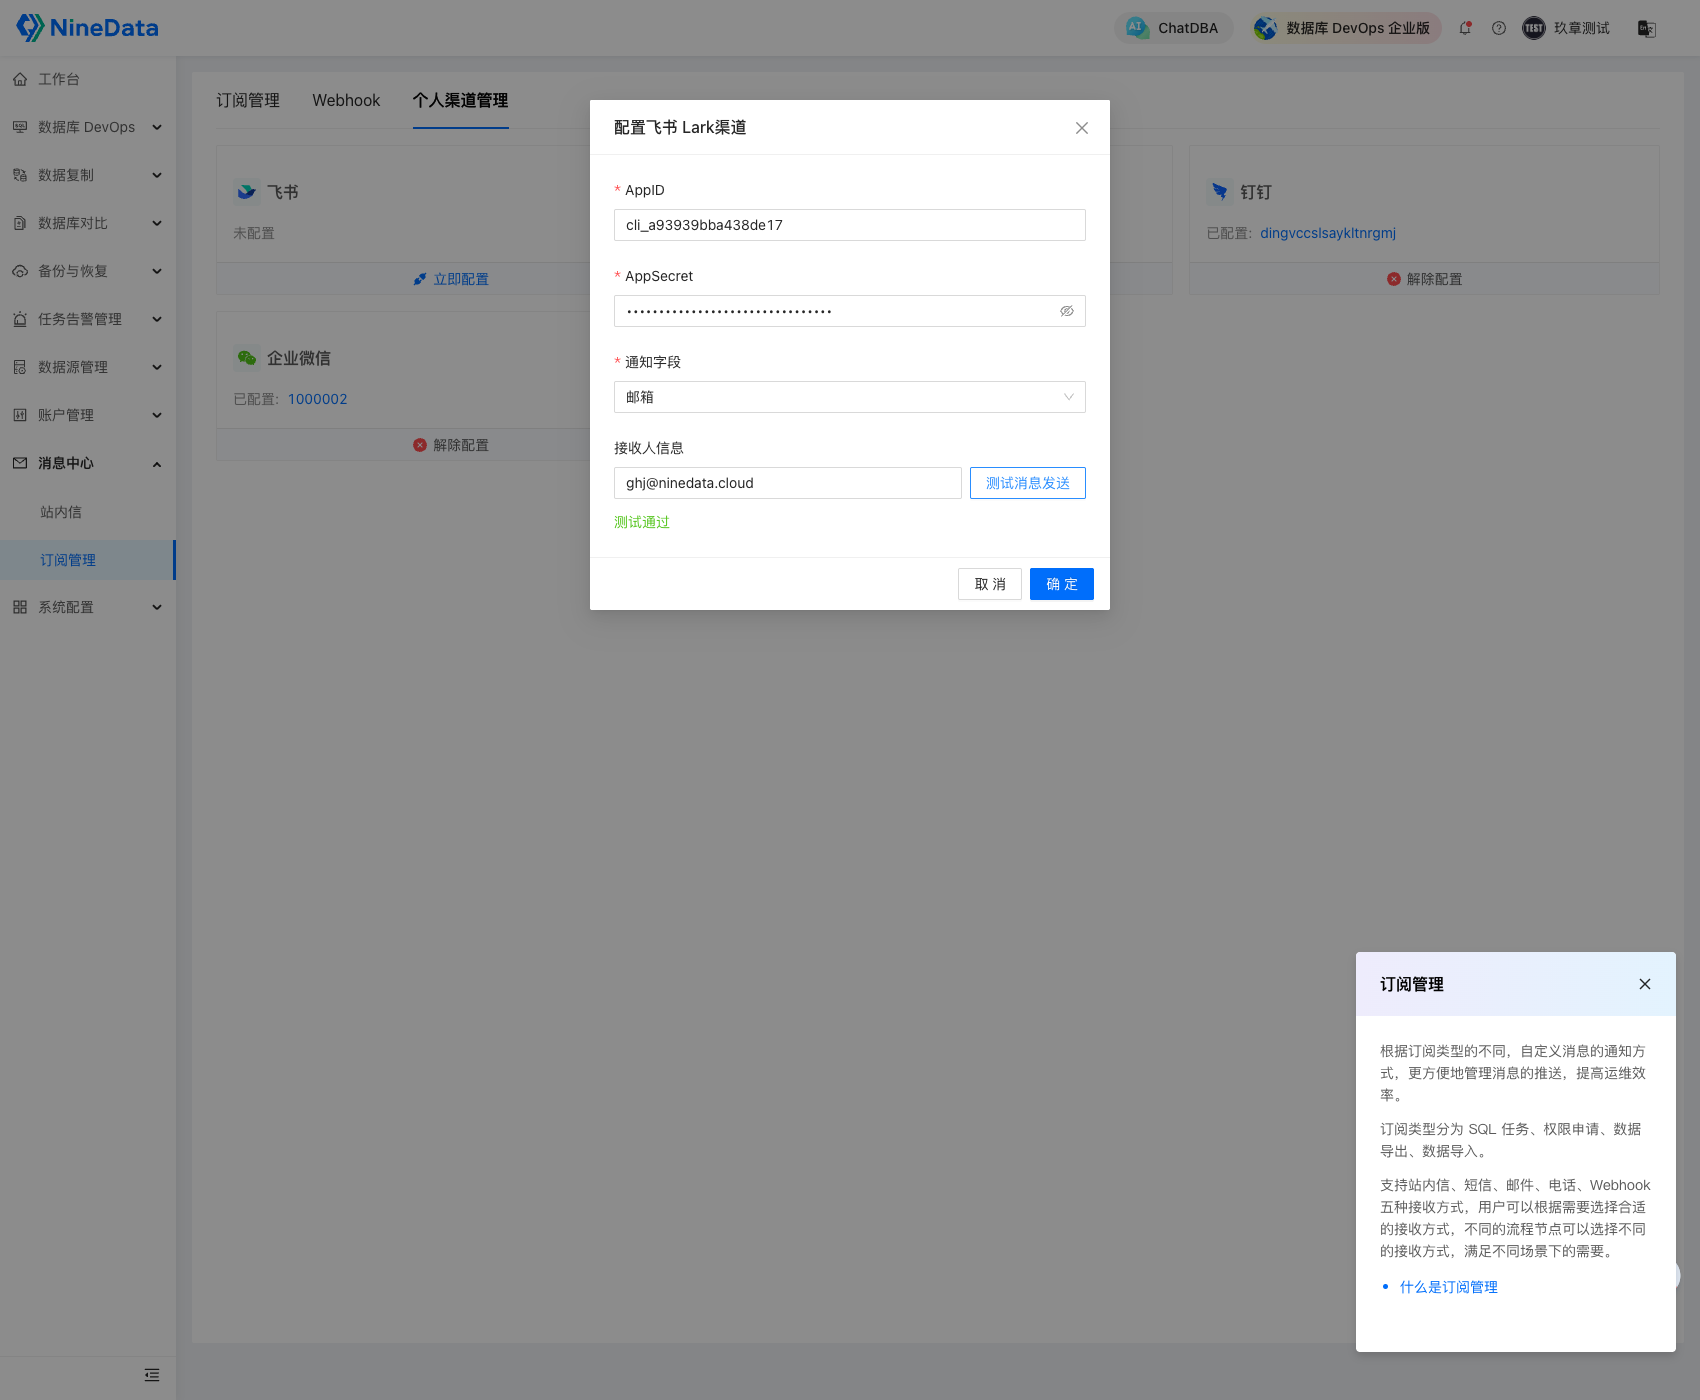
In the Configure Feishu Lark Channel dialog, complete the fields and click OK.
Parameter Description AppID Enter the Lark App ID recorded in Step 1. AppSecret Enter the Lark App Secret recorded in Step 1. Notification Field Select the NineData field used to match the Lark recipient. In this validation, the dropdown contained Login Name, Phone Number, and Email, and the final successful test used Email. Receiver Info Enter the recipient identifier that matches the selected notification field, and then click Test Message Sending to validate delivery. Click Test Message Sending, confirm that the page shows a success result, and then click OK to save the configuration.
Step 3: Enable the Personal Channel in Subscription Management
Log in to the NineData Console.
- In the left navigation pane, click Notification > Subscription.
- On the Subscription Management tab, locate the target subscription type and select the checkbox in the Personal Channel column. For more information, see Subscription Management.
After the configuration is complete, target users with the personal channel enabled can receive message notifications in Lark when the workflow reaches the subscribed notification node.