Configure Personal Messages via WeCom
This topic describes how to configure WeCom personal message delivery in NineData so that users can receive message notifications at key workflow stages.
This guide is based on the actual validation performed on March 11, 2026. Both the Send Test Message step in NineData and the API Receive Message save step in WeCom were verified successfully.
Overview
NineData supports configuring personal notification channels for individual users. With Personal Channel Management, you can:
- Bind a dedicated WeCom channel for a specific member.
- Receive more timely notifications without affecting the default subscription settings.
- Enable or disable personal-channel notifications for specific subscription types and workflow nodes.
Prerequisites
- You have created or joined an organization, and this organization has subscribed to either DevOps Pro or DevOps Enterprise. Please ensure that your annual or monthly subscription is still active. For more information, please refer to Manage Organizations.
- Your current account has switched to the target organization. For more information, please refer to Switching to an Organization.
- You are logged in to the WeCom admin console as an enterprise administrator.
- A target custom WeCom app is already prepared.
- You are logged in to the NineData console as a system administrator.
Notes
- In the actual test, Phone was the successful notification field. A test using Login Name returned
81013 user & party & tag all invalid, so Phone is strongly recommended. - Besides app credentials, WeCom also requires Token, EncodingAESKey, and the Callback url used by API Receive Message.
- If the NineData test returns
60020 not allow to access from your ip, add the source IP returned in the error message to the app's Trusted IP list. In this test, the required IP was121.199.39.25. - In the actual validation flow, the recommended order was: generate Token and EncodingAESKey in WeCom, complete the test and save in NineData first, and then return to WeCom to save the callback configuration.
Step 1: Prepare WeCom App Information
Sign in to the WeCom admin console and open the target custom app.
On the app details page, record the following:
- AgentId (used as Agent Id in NineData)
- Secret (click View, then send it to the WeCom client and copy the value there)
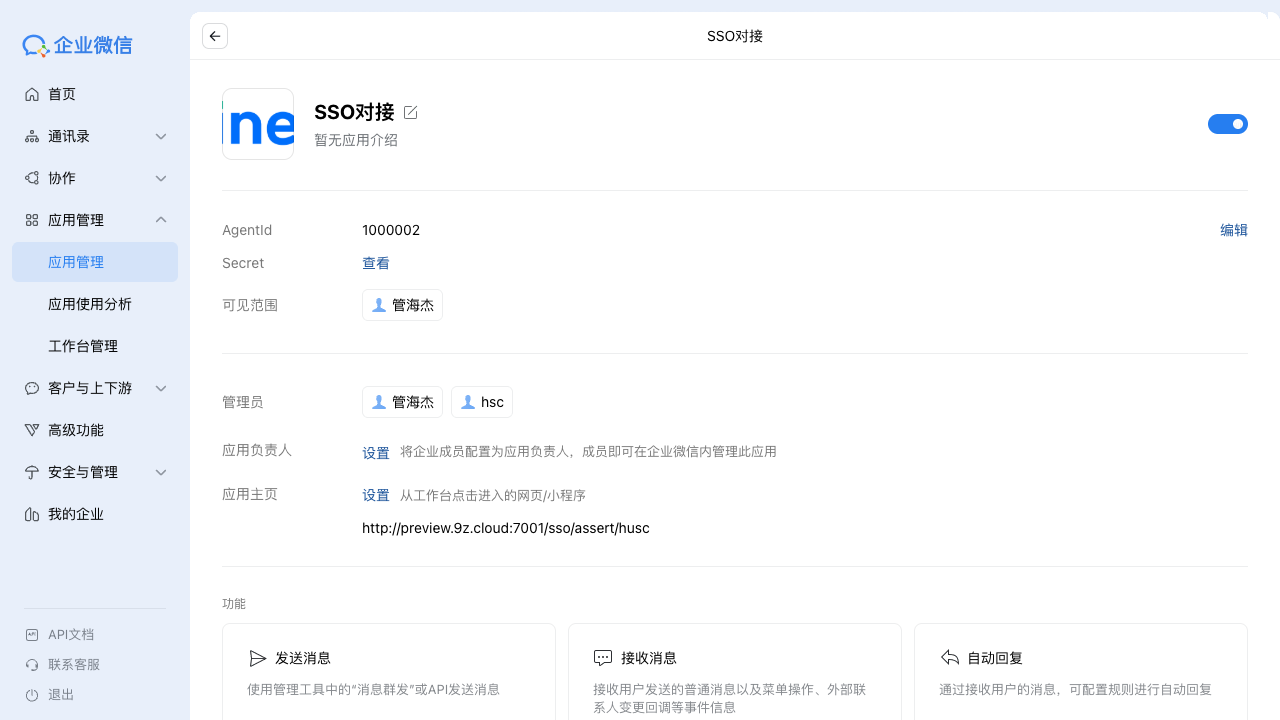
Make sure that the target receiver is included in the app visibility scope.
If required later, open Trusted IP and add the outbound IP returned by NineData test errors.
Step 2: Get the Callback URL from NineData
Log in to the NineData Console.
- In the left navigation pane, click Notification > Subscription, and then click the Channel Management tab.
- On this tab, locate the WeCom personal channel card, click Configure, and open the Configure Wechat Message Channels dialog.
- Record the Callback url shown at the bottom of the configuration dialog.
Step 3: Generate Token and EncodingAESKey in WeCom
Return to the WeCom app details page and click Set API Receive in the Receive Messages section.
On the Receive Message Server Configuration page:
- Enter the NineData Callback url from Step 2 in URL.
- Click Random Generate next to Token.
- Click Random Generate next to EncodingAESKey.
Record the generated Token and EncodingAESKey.
At this point, do not save the WeCom page yet. Return to NineData first.

Step 4: Return to NineData, Test, and Save the Binding
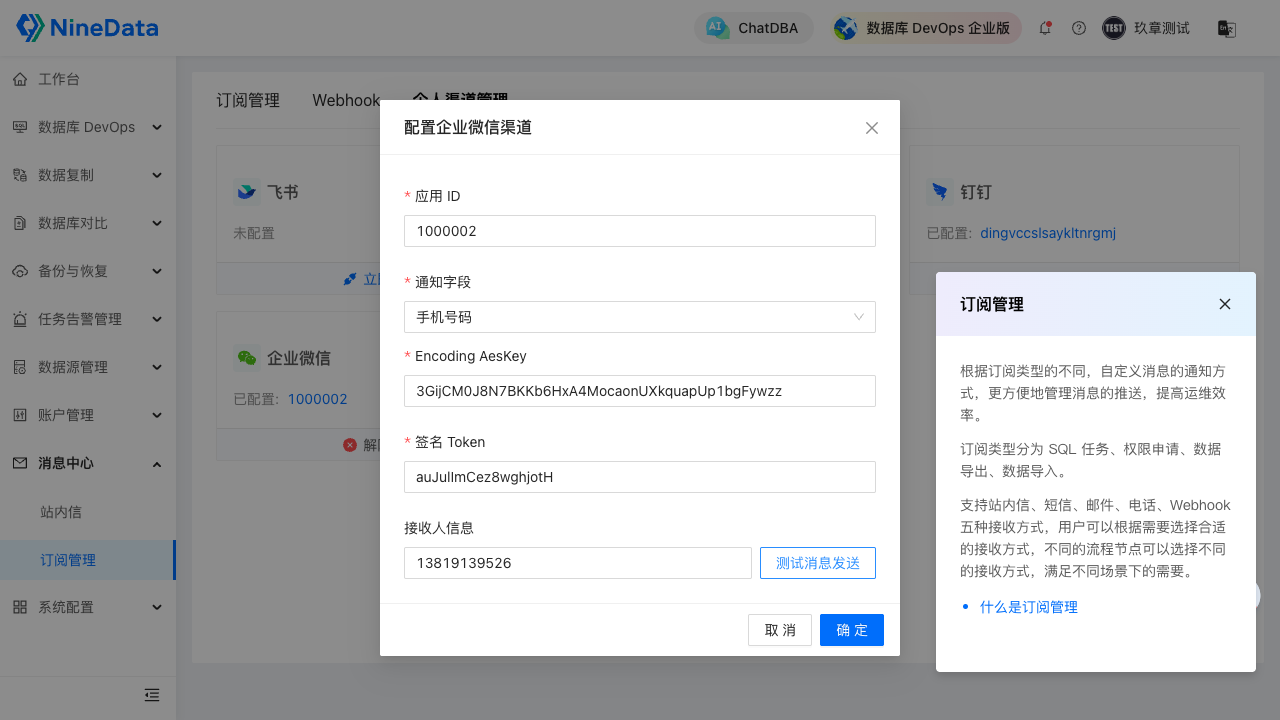
Return to the Configure Wechat Message Channels dialog in NineData and complete the fields below.
Parameter Description Company ID Enter the WeCom CorpID, which usually starts with ww.AppSecret Enter the app Secret obtained in Step 1. Agent Id Enter the AgentId recorded in Step 1. Source Column Supports Login Name, Phone, and Email. This test used Phone. Encoding AesKey Enter the EncodingAESKey generated in Step 3. Signed Token Enter the Token generated in Step 3. Receiver Info Enter the target member's receiver info. This test used the member's Phone. Click Test Message Sending, confirm that the page displays Successful, and then click OK to save the configuration.
Step 5: Return to WeCom and Save API Receive Message Settings
- Go back to the API Receive Message page in WeCom.
- Fill in the same URL, Token, and EncodingAESKey that have already been saved in NineData.
- Keep the default selected event types and click Save.
- If WeCom still reports that the callback URL cannot be reached, confirm that the same Signed Token and EncodingAESKey have already been saved in NineData, and then retry.
Step 6: Enable the Personal Channel in Subscription Management
Log in to the NineData Console.
- In the left navigation pane, click Notification > Subscription.
- On the Subscription tab, locate the target subscription type and select the checkbox in the Personal Channel column. For more information, see Subscription Management.
After the configuration is complete, target users with the personal channel enabled can receive notifications in WeCom when the workflow reaches the subscribed notification node.