Creating OceanBase MySQL Data Source
NineData supports adding various types and environments of data sources to the console for unified management. You can use database DevOps, backup and recovery, data replication, and database comparison features for data sources that have been added. This article introduces how to add an OceanBase MySQL data source to NineData.
Prerequisites
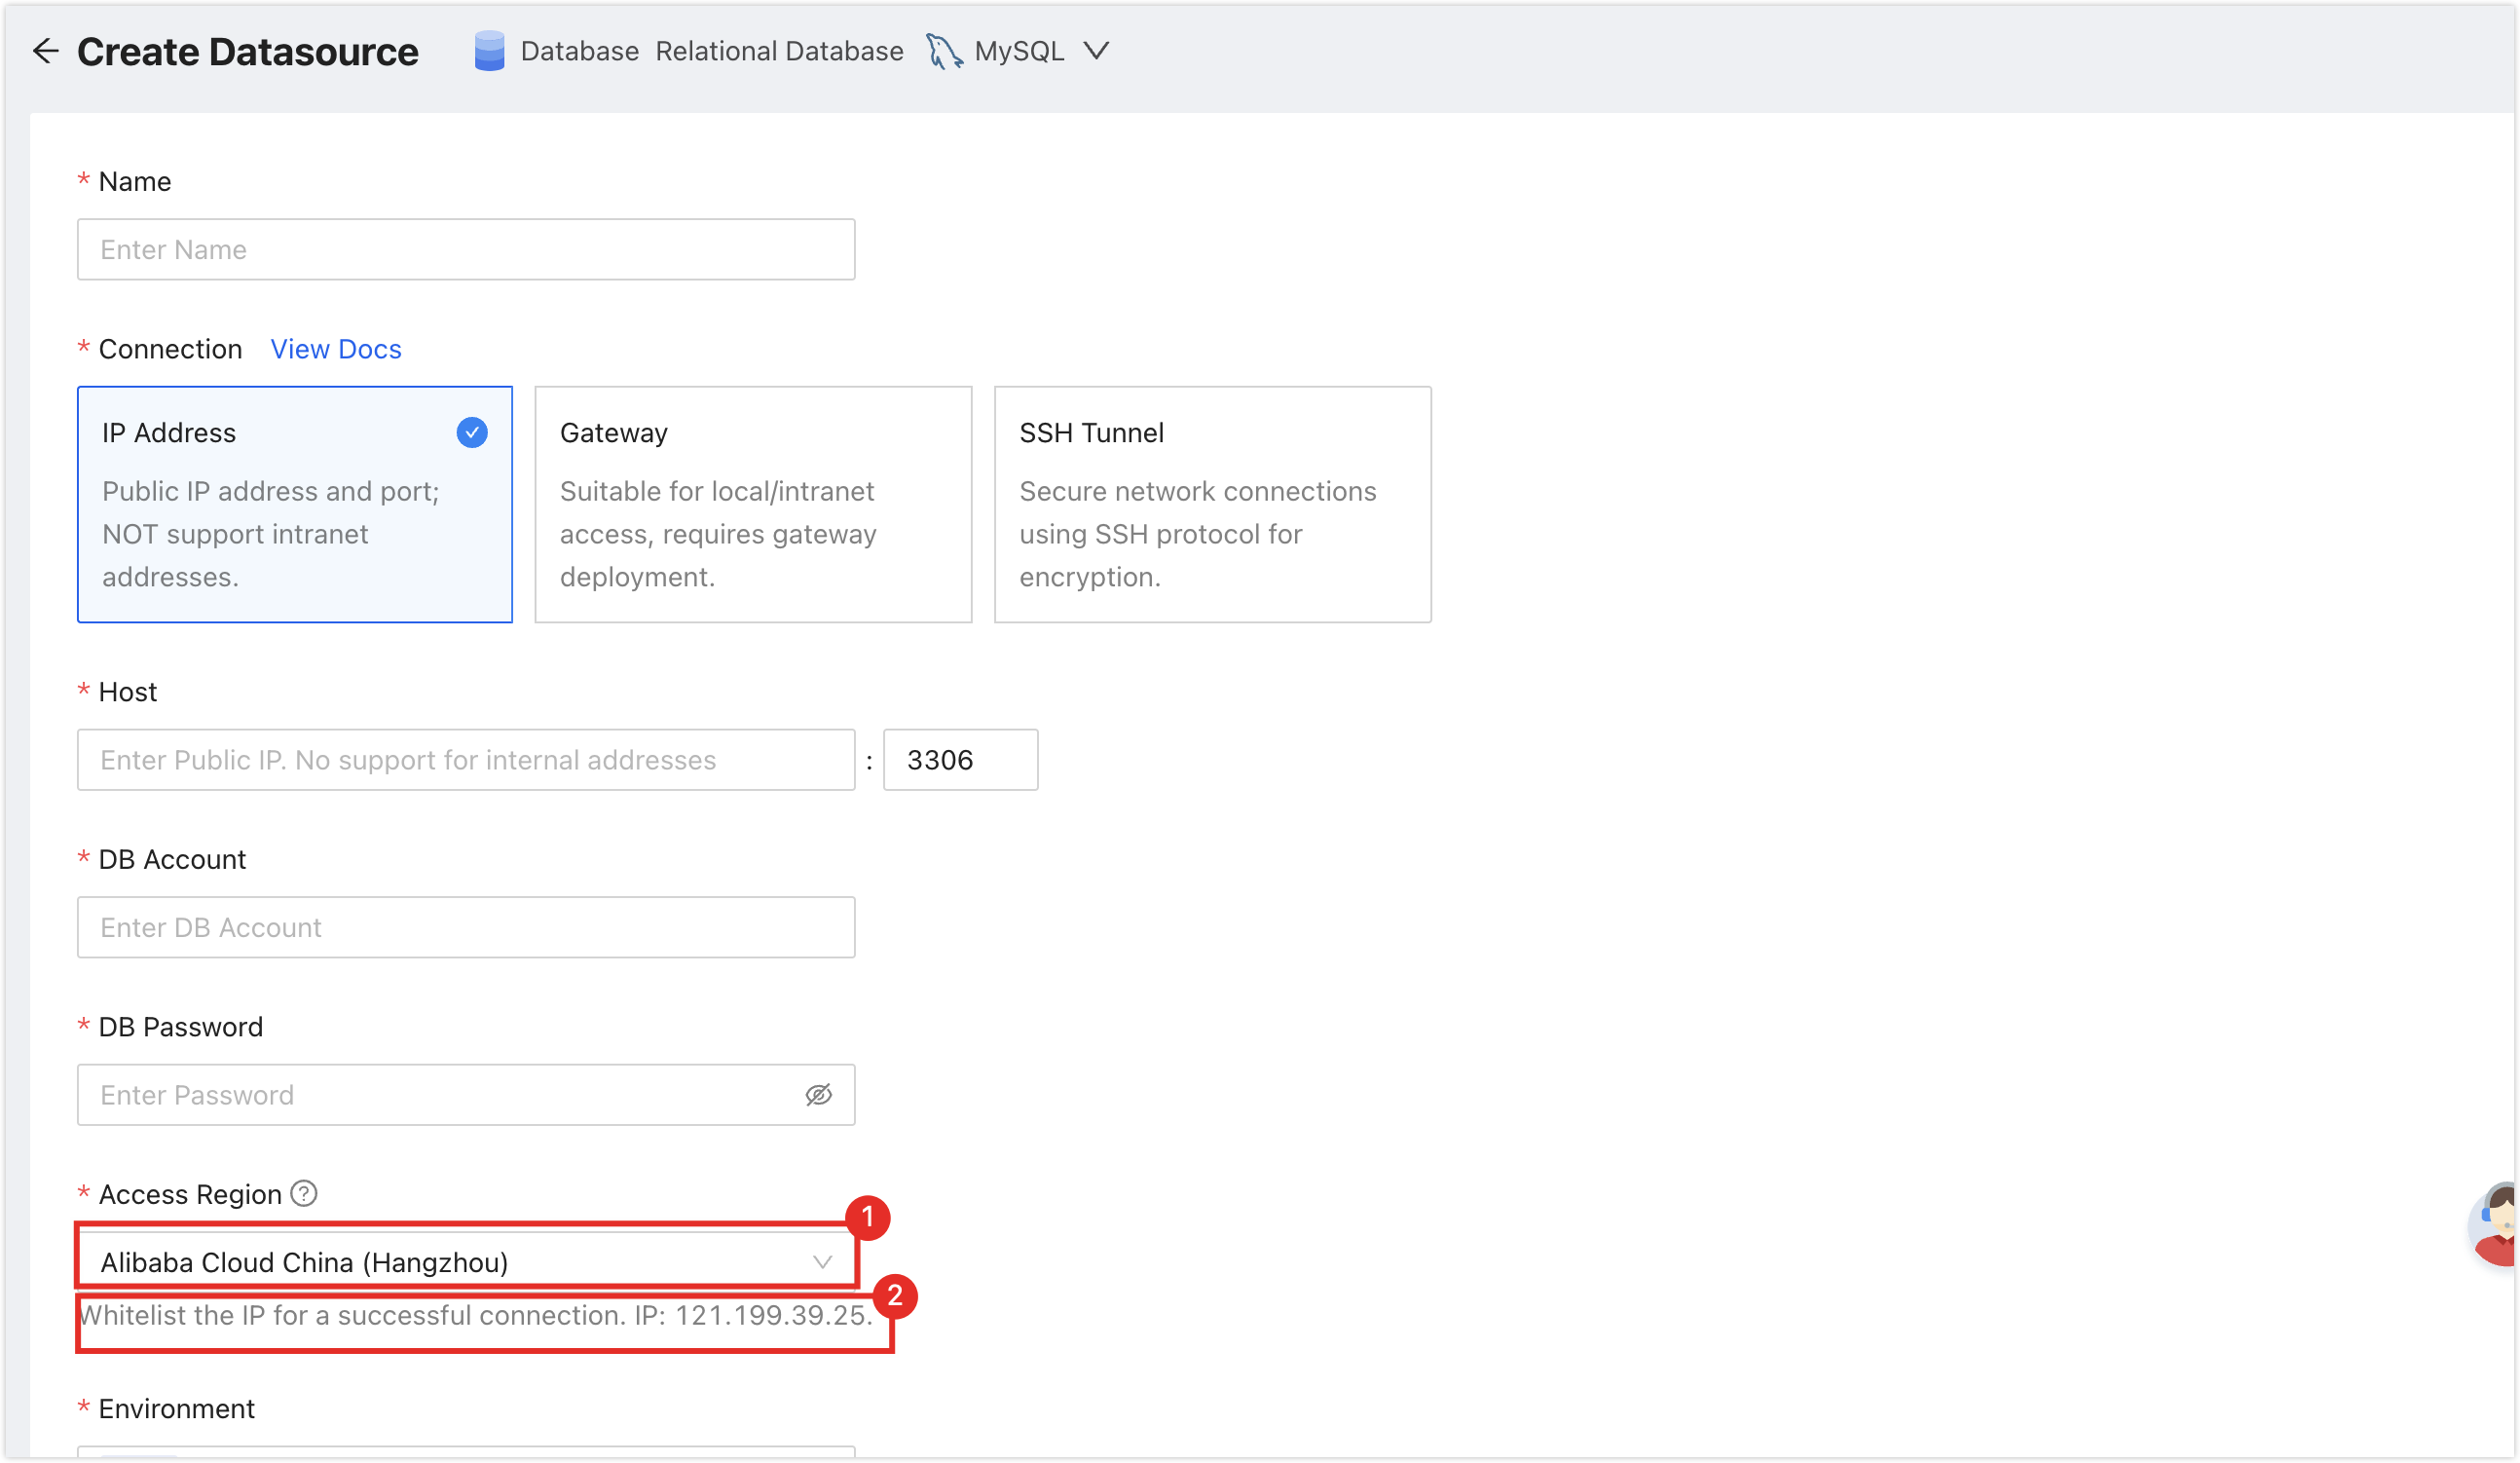
The server IP address of NineData has been added to the data source allowlist. Please refer to the image below for instructions on how to obtain the server IP address.
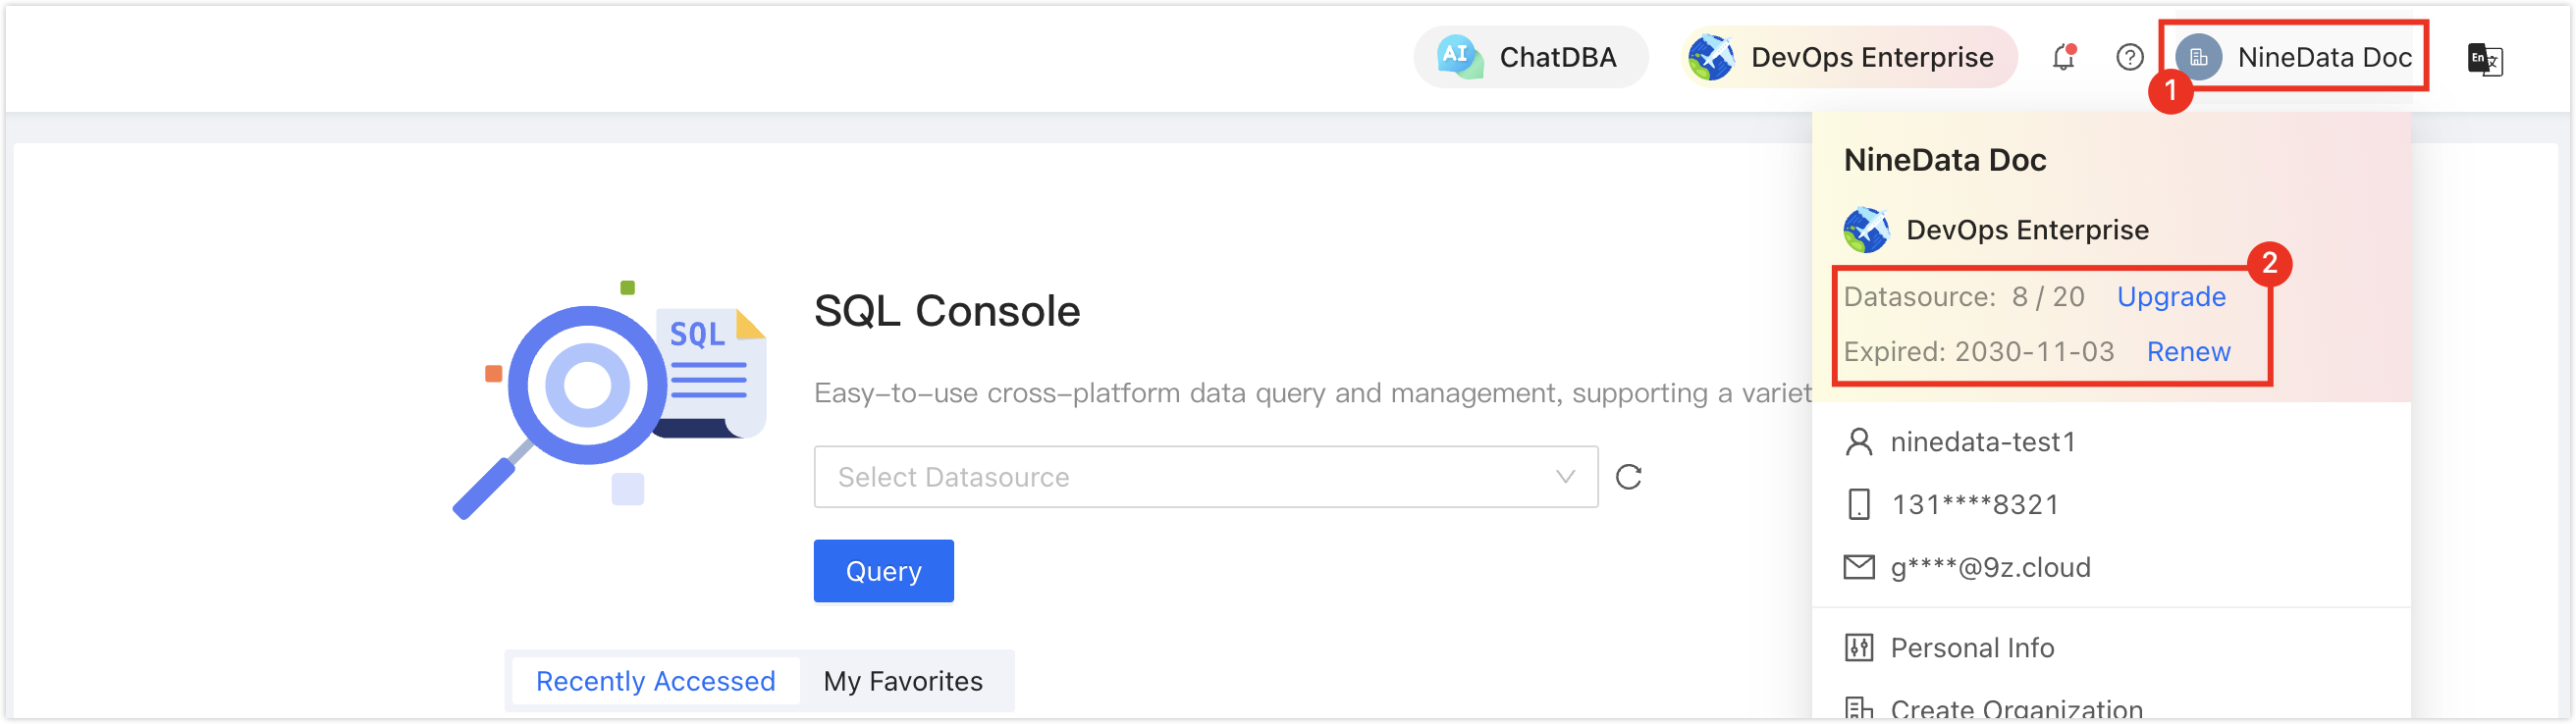
Make sure you have available data source quota; otherwise, the data source cannot be added. You can quickly check your remaining quota at the top-right corner of the NineData console.
Operation Steps
Log in to the NineData Console.
On the left navigation pane, click Datasource > Datasource.
- Click Datasource tab, and click Create Datasource on the page. In the popup window for selecting the data source type, choose Database > (the type of data source to be added), and configure the parameters based on the table below on the Create Datasource page.tip
If you make a mistake during the operation, you can click the
 icon at the top of the Create Datasource page to make a new selection.
Configure the data source parameters:
Parameter Description Name Enter the name of the data source. To facilitate subsequent search and management, please use meaningful names. Connection Select the access method of the data source. Supports access through IP Address, Gateway, SSH Tunnel three methods. - IP Address: Access the data source through the public network address.
- Gateway: A secure and fast intranet access method provided by NineData, which requires the data source host to be connected first. For connection methods, please refer to Add Gateway.
- SSH Tunnel: Access the data source through an SSH tunnel.
- IP Address: Access the data source through the public network address.
- SSH Tunnel: Access the data source through an SSH tunnel.
Configuration items when Connection is IP Address Host: The public network connection address and port of the data source. Configuration items when Connection is Gateway - Gateway: Select the NineData gateway installed on the host where the data source is located.
- Host: Can be written as localhost (data source is on the local machine) or the intranet IP of the host where the data source is located.
Configuration items when Connection is SSH Tunnel - SSH Host: Enter the public IP or domain name of the server where the target data source is located, as well as the corresponding port number (the default port number for SSH service is 22).
- SSH Authentication Method: Select the SSH authentication method.
- Password: Connect through SSH Username (i.e., the server's login name) and Password (i.e., the server's login password).
- SSH Username: Enter the login username of the server where the target data source is located.
- Password: Enter the login password of the server where the target data source is located.
- Key (recommended): Connect through SSH Username and Key File.
- SSH Username: Enter the login username of the server where the target data source is located.
- Key File: Click Upload to upload the private key file, which is a key file without a suffix. If you have not created one yet, please refer to Generate SSH Tunnel Key File.
- Password: Enter the password set when generating the key file. If you did not set a password during the key generation process, leave this field blank.
Note: After the SSH configuration is completed, you need to click the Connection Test on the right, there may be the following two results: - Password: Connect through SSH Username (i.e., the server's login name) and Password (i.e., the server's login password).
- Prompt Connection Successfully: Indicates that the SSH Tunnel has been established.
- Prompt error message: Indicates the connection failed, you need to troubleshoot the cause of the error according to the prompt and retry.
- Host: Can be written as localhost (data source is on the local machine) or the intranet IP of the host where the data source is located.
DB Account The username of the data source. DB Password The password of the data source. Access Region Select the region closest to your data source location to effectively reduce network latency. Environment Choose according to the actual business purpose of the data source, as an environmental identifier for the data source. Default provides PROD and DEV environments, and supports you to create a custom environment.
Note: Under the organization mode, the database environment can also be applied to permission policy management, for example, the default Prod Admin role only supports access to data sources in the PROD environment and cannot access data sources in other environments. For more information, please refer to Manage Roles.Encryption Whether to use SSL encryption to access the data source (default on). If the data source enforces SSL encrypted connections, this switch must be turned on, otherwise the connection will fail.
Click the switch on the right to turn on or off encrypted transmission. Click the > to the left of Encryption to expand detailed configuration.- SSL Options: Supports the following two methods.
- If Available: Automatically detect the server's SSL status, if the server has SSL enabled, it will connect through SSL first, if the server does not have SSL enabled, it will connect through non-SSL.
- Require: Always use SSL to connect to the data source, if the server does not support this method or cannot establish an SSL connection for other reasons, the connection will fail.
- SSL Cipher: Specify the SSL-Cipher encryption algorithm.
- Verify Server Certificate (SSL CA): If the OceanBase server uses a certificate issued by a self-signed CA, you need to upload the root certificate of this CA here.
- Verify Server Identity (SSL Identify): Check to verify the server's name and IP address, etc., to ensure that the connection is to the real OceanBase server and to prevent man-in-the-middle attacks.
- Authenticate Client: If the OceanBase server requires the client to provide a certificate, you need to upload the client's certificate and key here, the OceanBase server will verify the information you uploaded to ensure the security of the connection.
After all configurations are completed, click the Connection Test next to Create Datasource to test whether the data source can be accessed normally. If prompted with Connection Successfully, you can click Create Datasource to complete the addition of the data source. Otherwise, please recheck the connection settings until the connection test is successful.