Create AWS Redshift Datasource
NineData supports adding data sources of different types and environments to the console for centralized management. After a datasource is added, you can use features such as Database DevOps, Backup and Restore, Data Replication, and Data Comparison. This topic describes how to add an AWS Redshift datasource to NineData.
Prerequisites
The server IP address of NineData has been added to the data source allowlist. Please refer to the image below for instructions on how to obtain the server IP address.
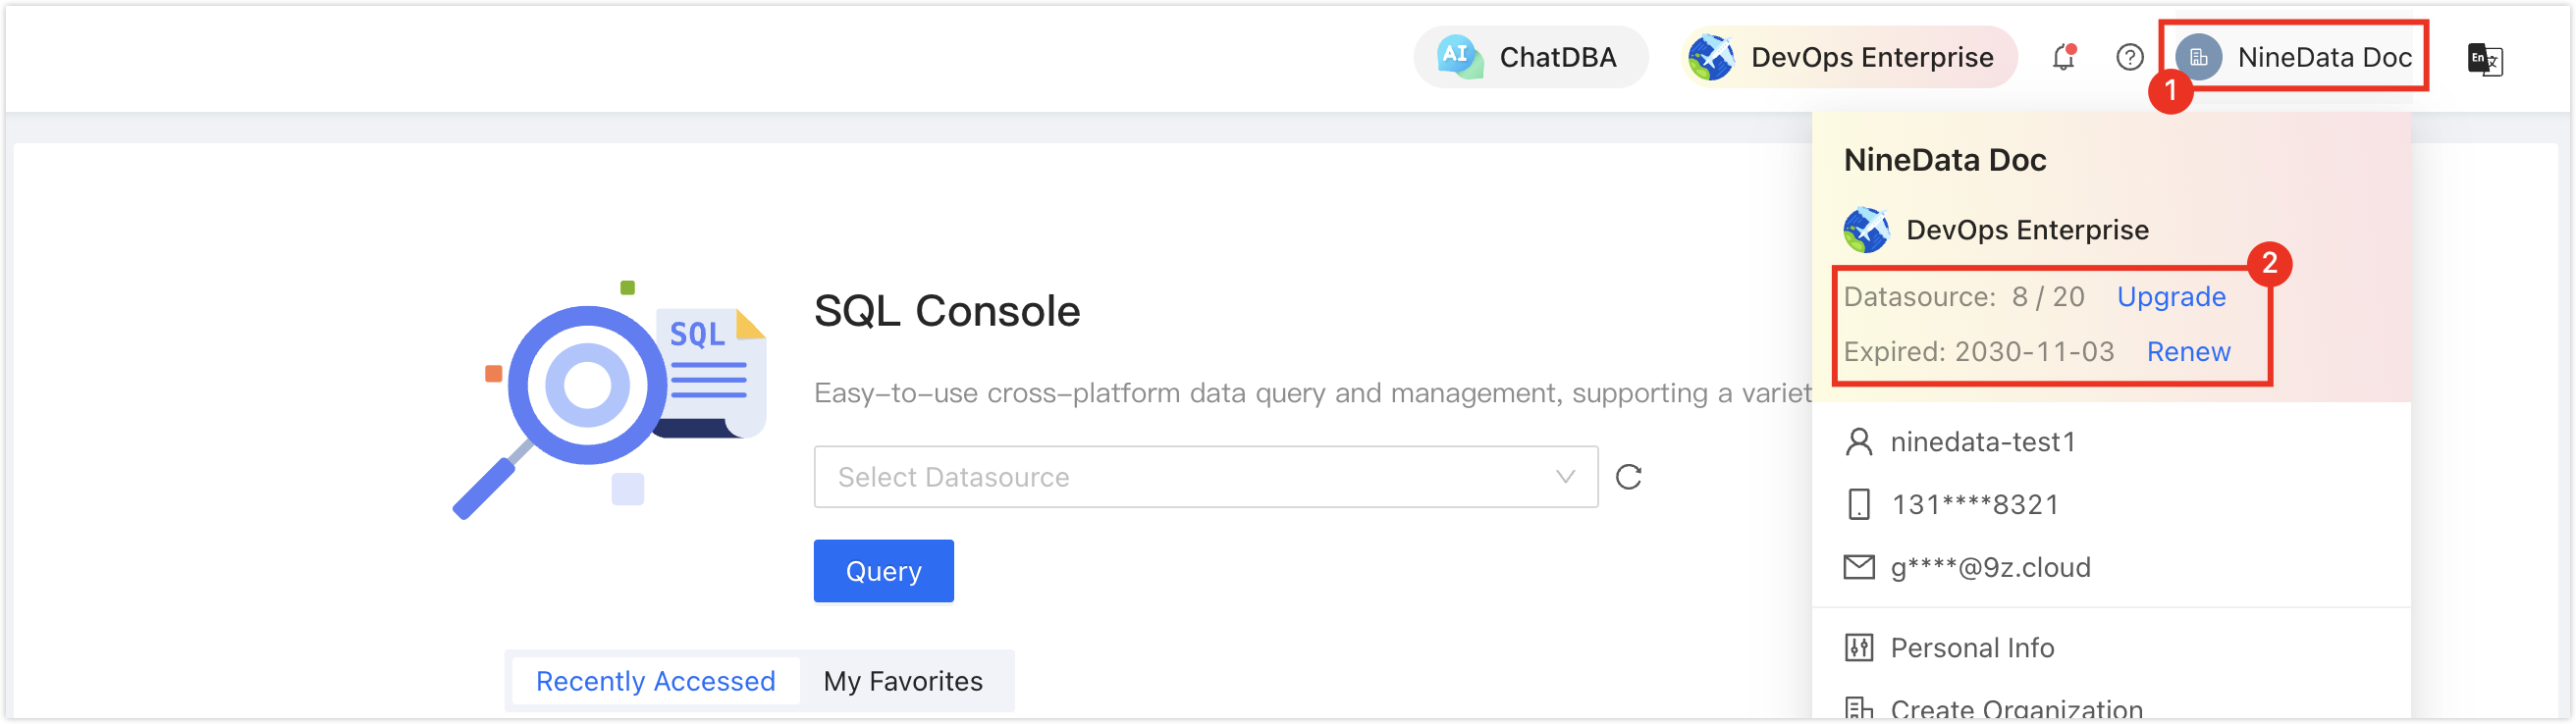
Make sure you have available data source quota; otherwise, the data source cannot be added. You can quickly check your remaining quota at the top-right corner of the NineData console.
Procedure
Log in to the NineData Console.
In the left-side navigation pane, choose Datasource > Datasource.
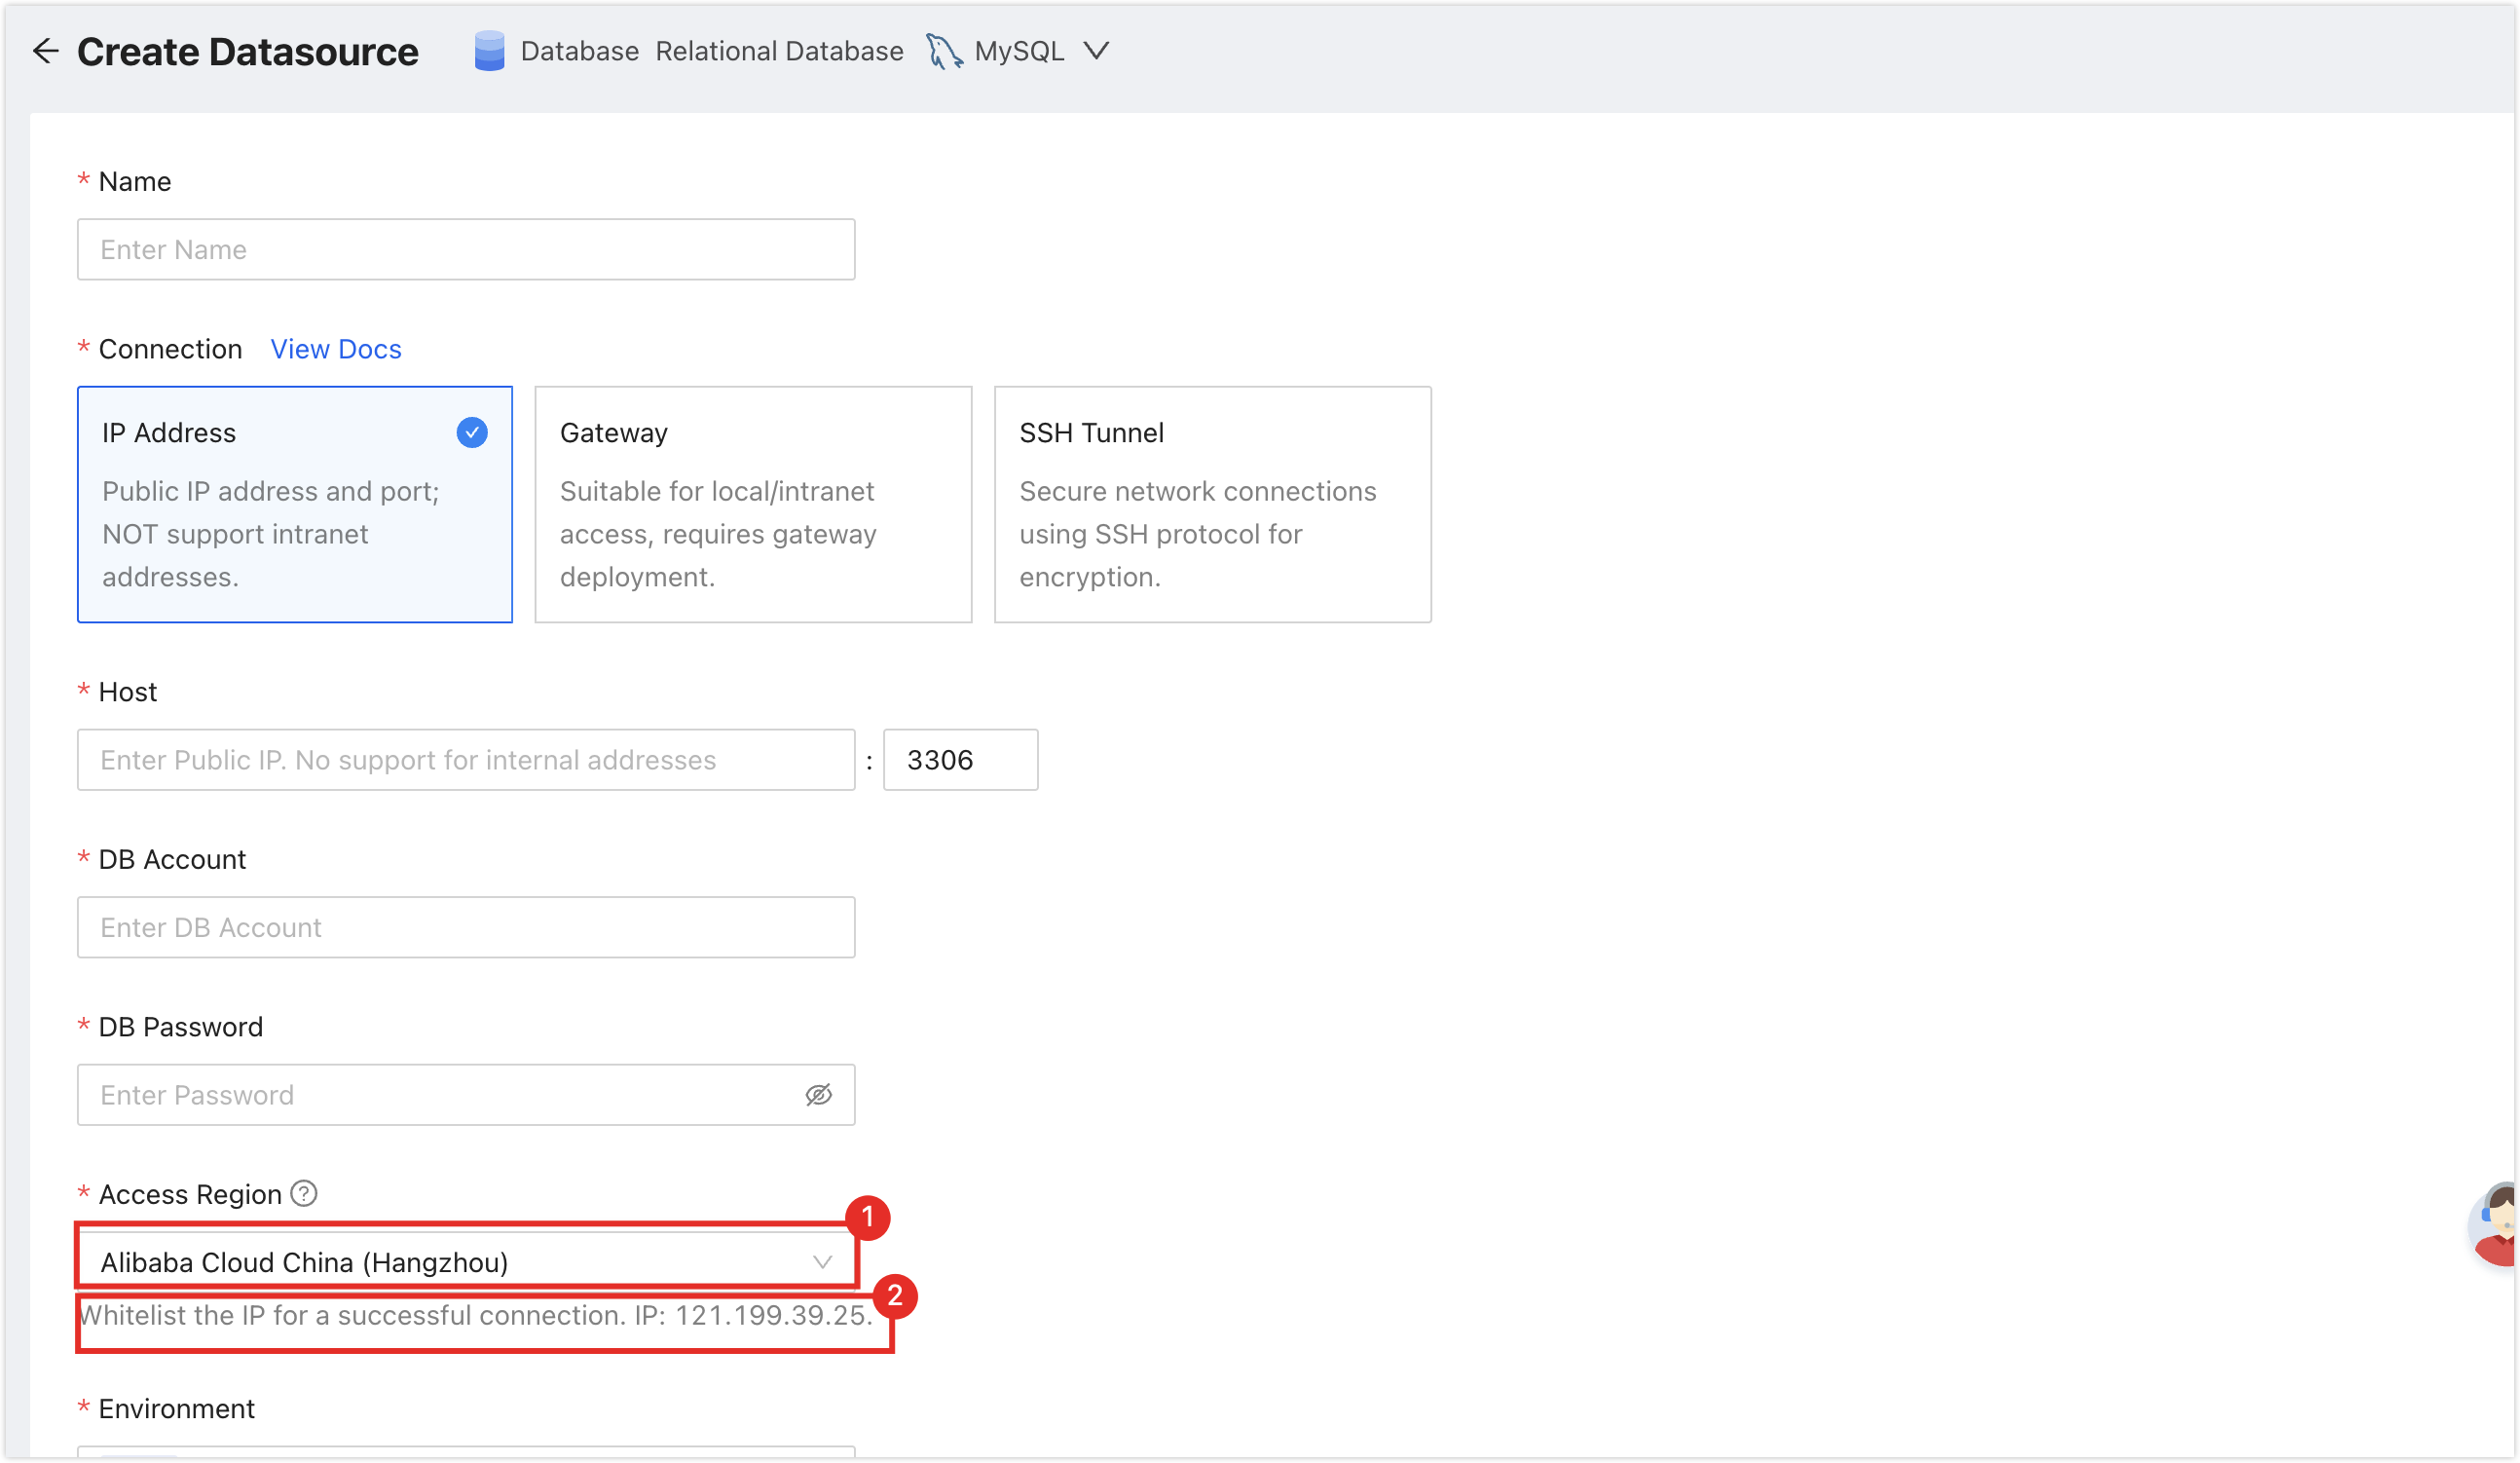
On the Datasource tab, click Create Datasource. In the datasource type dialog box, choose AWS > Cloud Datasource > Redshift, and then configure the parameters on the Create Datasource page according to the following table.
tipIf you select the wrong type, click the
 icon at the top of the Create Datasource page to reselect the datasource type.
Configure the datasource parameters:
Parameter Description Name Enter a datasource name. Connection Select the connection method. The console currently supports Private Network, IP Address, Gateway, and SSH Tunnel. If a private connection has already been created, Private Network is recommended. Private Connection When Private Network is selected, choose the created private connection here. Access Method The current fixed value is Connection Address. Connection Address Enter the Redshift endpoint and port. The default port shown in the console is 5439.Authentication Database Enter the database name used for authentication. The console currently displays devas the default hint.DB Account Enter the database login username. DB Password Enter the database login password. Access Region Select the access region nearest to the instance. Environment Select the environment tag for the datasource, such as Production or Development. After all parameters are configured, click Connection Test on the right of Create Datasource to test connectivity. When Connection Successfully is displayed, click Create Datasource to finish creating the datasource.